first

March 11, 2015
At Home with Friends

1 comment

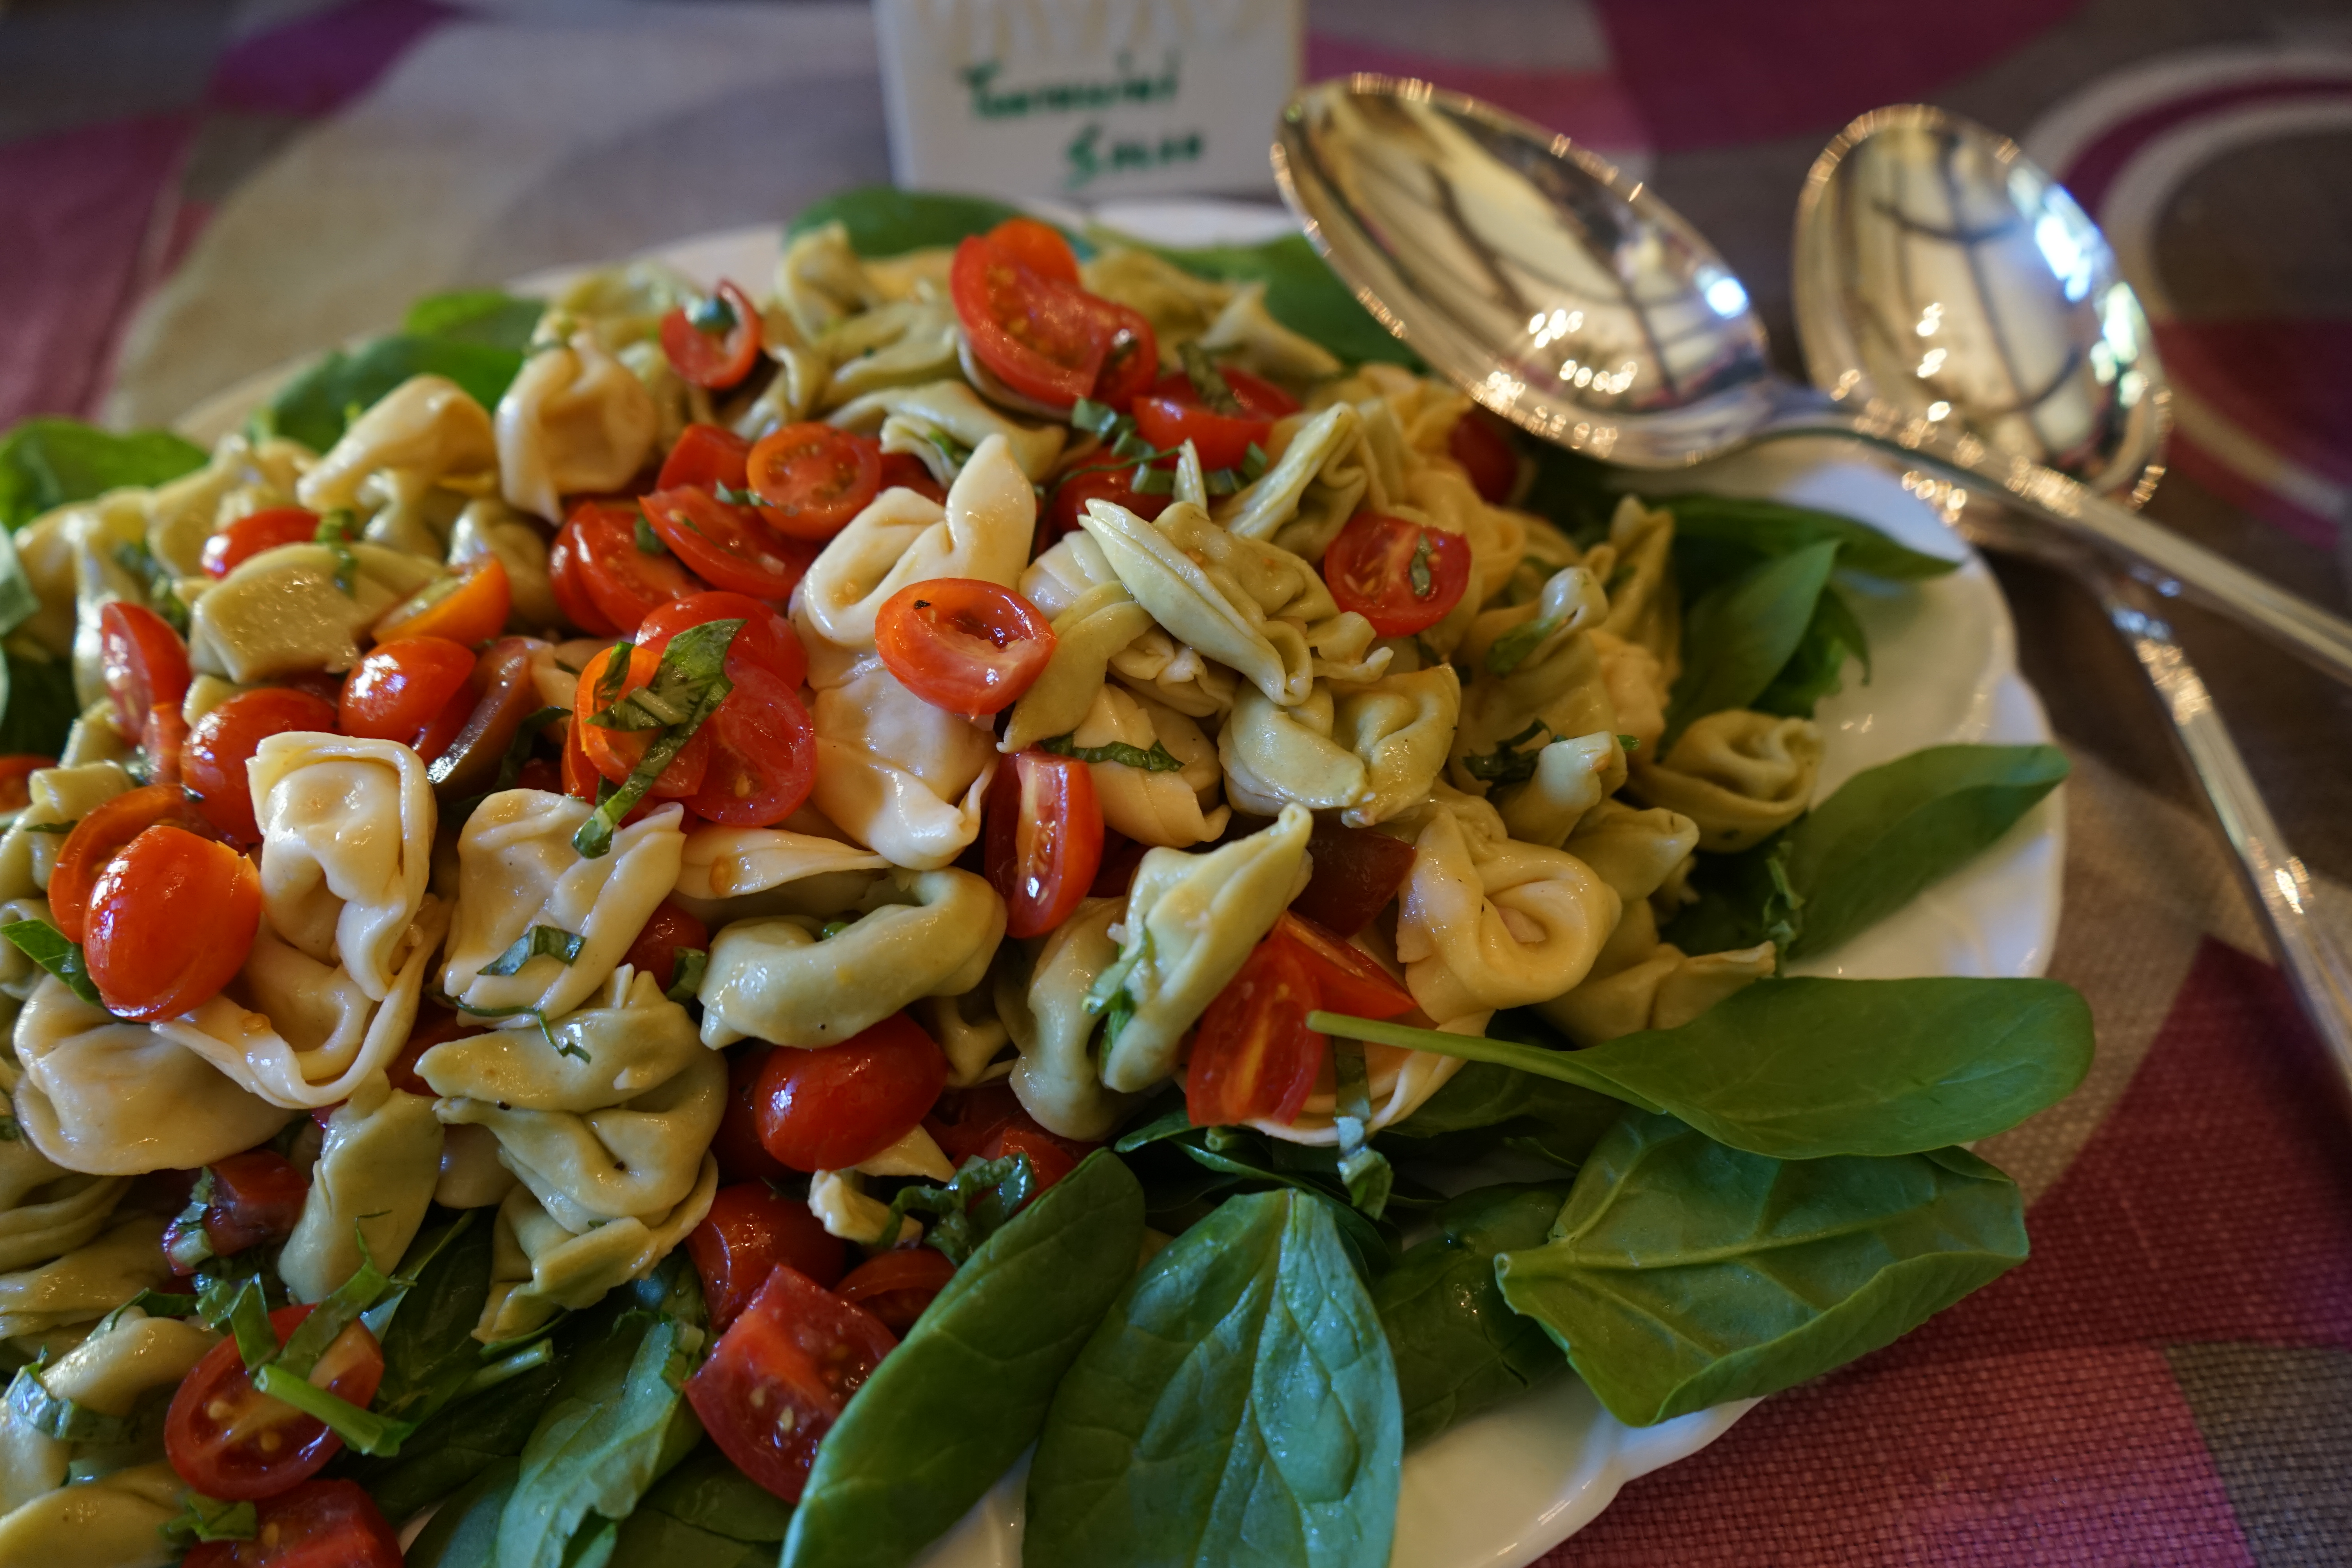
Tortellini Salad with Spinach, Cherry Tomatoes & Lemon Dressing

It’s great to have one or two cold pasta salads in your repertoire. They are simple to make and you can tweak them to your own taste.

This one includes cheese tortellini and baby spinach. For this party, I served the pasta mounded on top of the spinach, but I have also tossed it all together and served it that way.

Using the highest quality ingredients is what makes this dish stand out. Buy the freshest tortellini available and the sweetest organic pearl or cherry tomatoes, and the most tender baby spinach.

If you have a large menu and are concerned about getting everything ready on time, one of my do-ahead tricks is to cook the tortellini the day before, lightly toss it in olive oil — so the individual tortellini don’t stick together — and store it covered in the refrigerator. Also, prep the dressing two days before and store it separately.

The day of the party, all you have to do is bring everything to room temperature, toss it together, add the fresh basil and Parmesan cheese — and voila, it’s done!

Don’t be afraid to double the recipe: Leftovers are great for several days!

TORTELLINI SALAD WITH SPINACH, CHERRY TOMATOES & LEMON DRESSING

EVENT: Baby Shower

SERVES: 6-8 People


Ingredients

For dressing:

6 tablespoons olive oil

3 tablespoons lemon juice

1 teaspoon minced shallot

Salt and pepper to taste

For salad:

2 9-oz packages cheese or spinach tortellini

1 pint pearl or cherry tomatoes, cut in half

1/3 cup grated Parmesan cheese

Fresh basil to taste

2 bags (5 oz.) baby spinach

Extra olive oil for pasta if making ahead

Directions

1. Boil water for pasta.

2. While water is on stove, make salad dressing. Combine: olive oil, lemon juice, minced shallot, salt and pepper. Whisk to combine.

3. Toss dressing with tomatoes and set aside.

4. Cook tortellini according to package directions. Drain in collander.

5. If making ahead, toss tortellini with small amount of olive oil, so the individual tortellini don’t stick together. OR: If serving that day, toss immediately with tomatoes and salad dressing.

6. Toss with Parmesan cheese and torn fresh basil.

7. Mound on bed of baby spinach and enjoy!

A NOTE: If making ahead, be sure and take cooked tortellini and dressed tomatoes out of the refrigerator, and allow to come to room temperature before combining ingredients.

March 9, 2015
At Home with Friends

2 comments

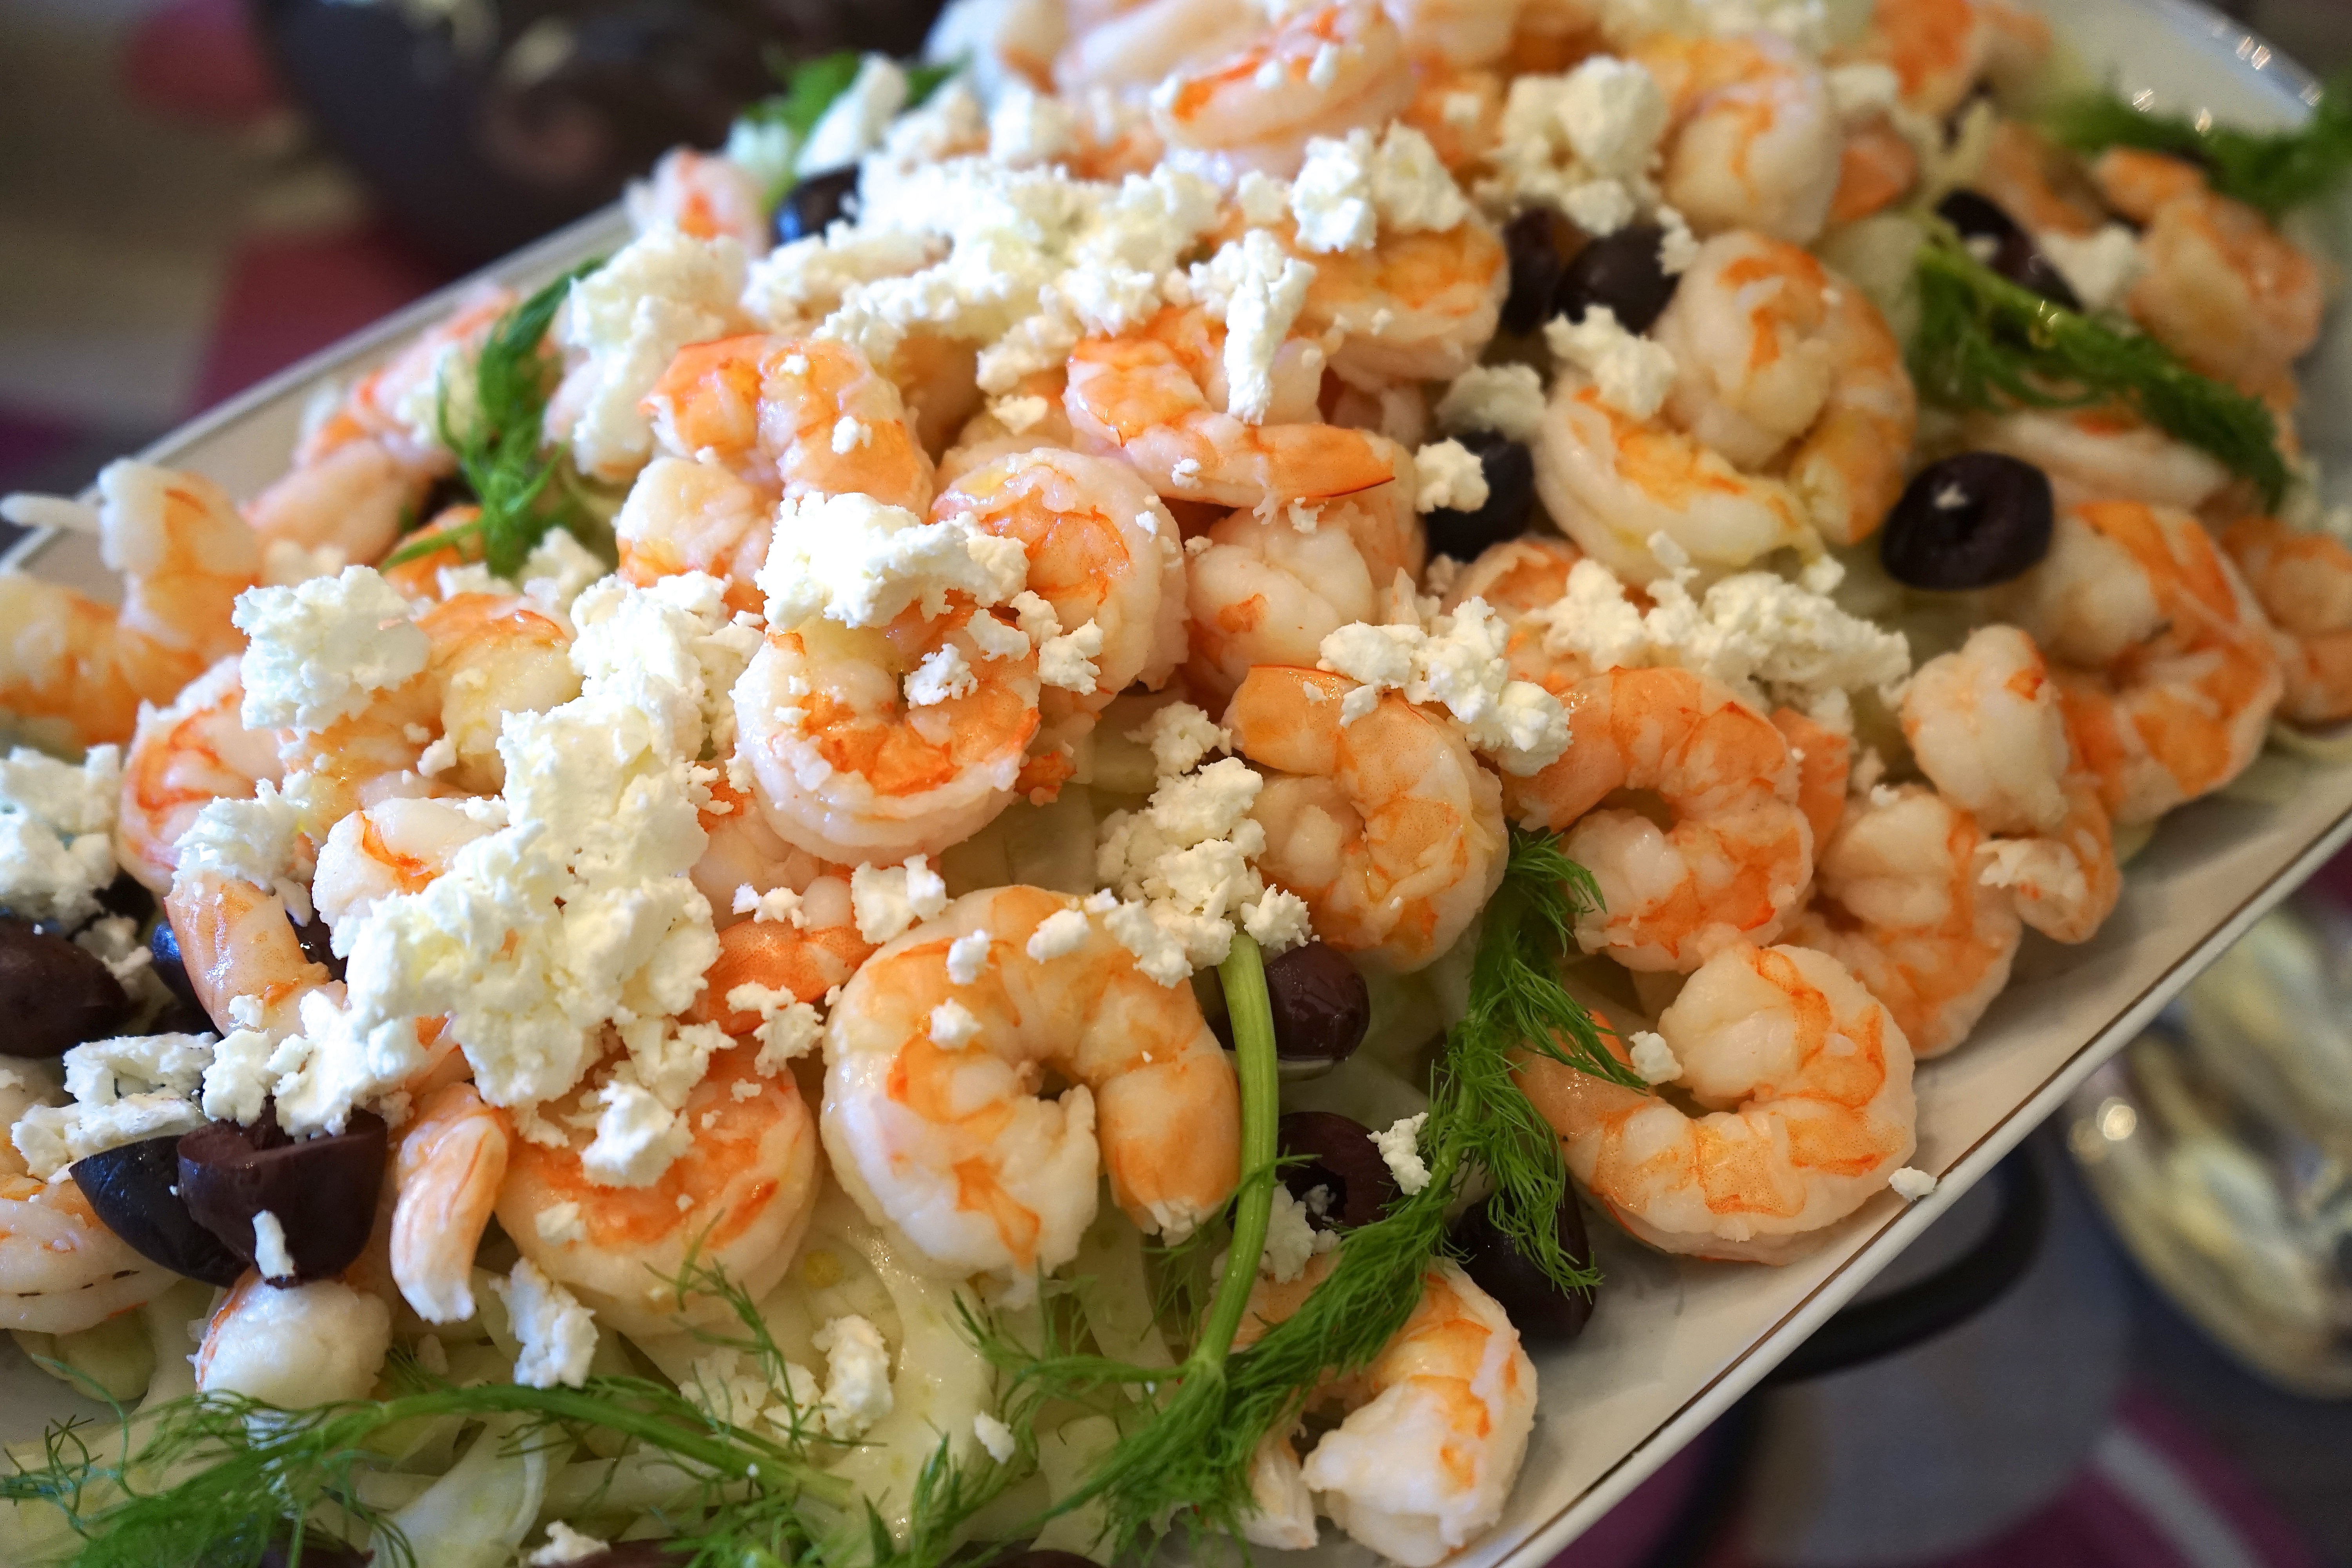
Shrimp Salad with Feta Cheese & Olives on a Bed of Fennel

There was an Italian restaurant in Beverly Hills, now closed, that served a shrimp appetizer on a bed of shaved fennel. This was such a distinct and refreshing way to the start of an Italian meal, I always admired it. The restaurant closed so I had to make it for myself.

This salad combines the crunch and the slightly licorice flavor of raw fennel, the subtle sweetness of shrimp and the creamy saltiness of fresh feta cheese.

It’s basically a composed salad. Don’t leave anything out: Each component contributes to the overall delectable taste.

Note: When cleaning the fennel, reserve the fronds and use them to garnish the platter.  

SHRIMP SALAD WITH FETA CHEESE & OLIVES ON A BED OF FENNEL

EVENT: Baby Shower

SERVES: 8-10 People

Ingredients

For dressing:

6 tablespoons olive oil

1/4 cup red wine vinegar

1 shallot, minced

1 clove garlic, crushed

1 1/2 teaspoon fresh oregano

Salt and pepper to taste

For salad:

2 bulbs fennel, trimmed, cored and thinly sliced (reserve fronds for garnish)

1 1/2 – 2 lbs cooked shrimp

1/3 cup Kalamata olives, sliced *

1/2 cup crumbled feta cheese *

Extra olive oil for drizzling on top


Directions

1. Combine all dressing ingredients and whisk until thoroughly blended.

2. Toss fennel with dressing.

3. Put fennel on a large serving platter.

4. Mound shrimp on top. Sprinkle sliced olives around shrimp.

5. Drizzle shrimp very lightly with olive oil.

6. Top with crumbled feta. Use fennel fronds for decoration.

* A NOTE: I buy the feta cheese and the Kalmata olives at Costco.

March 6, 2015
At Home with Friends

1 comment

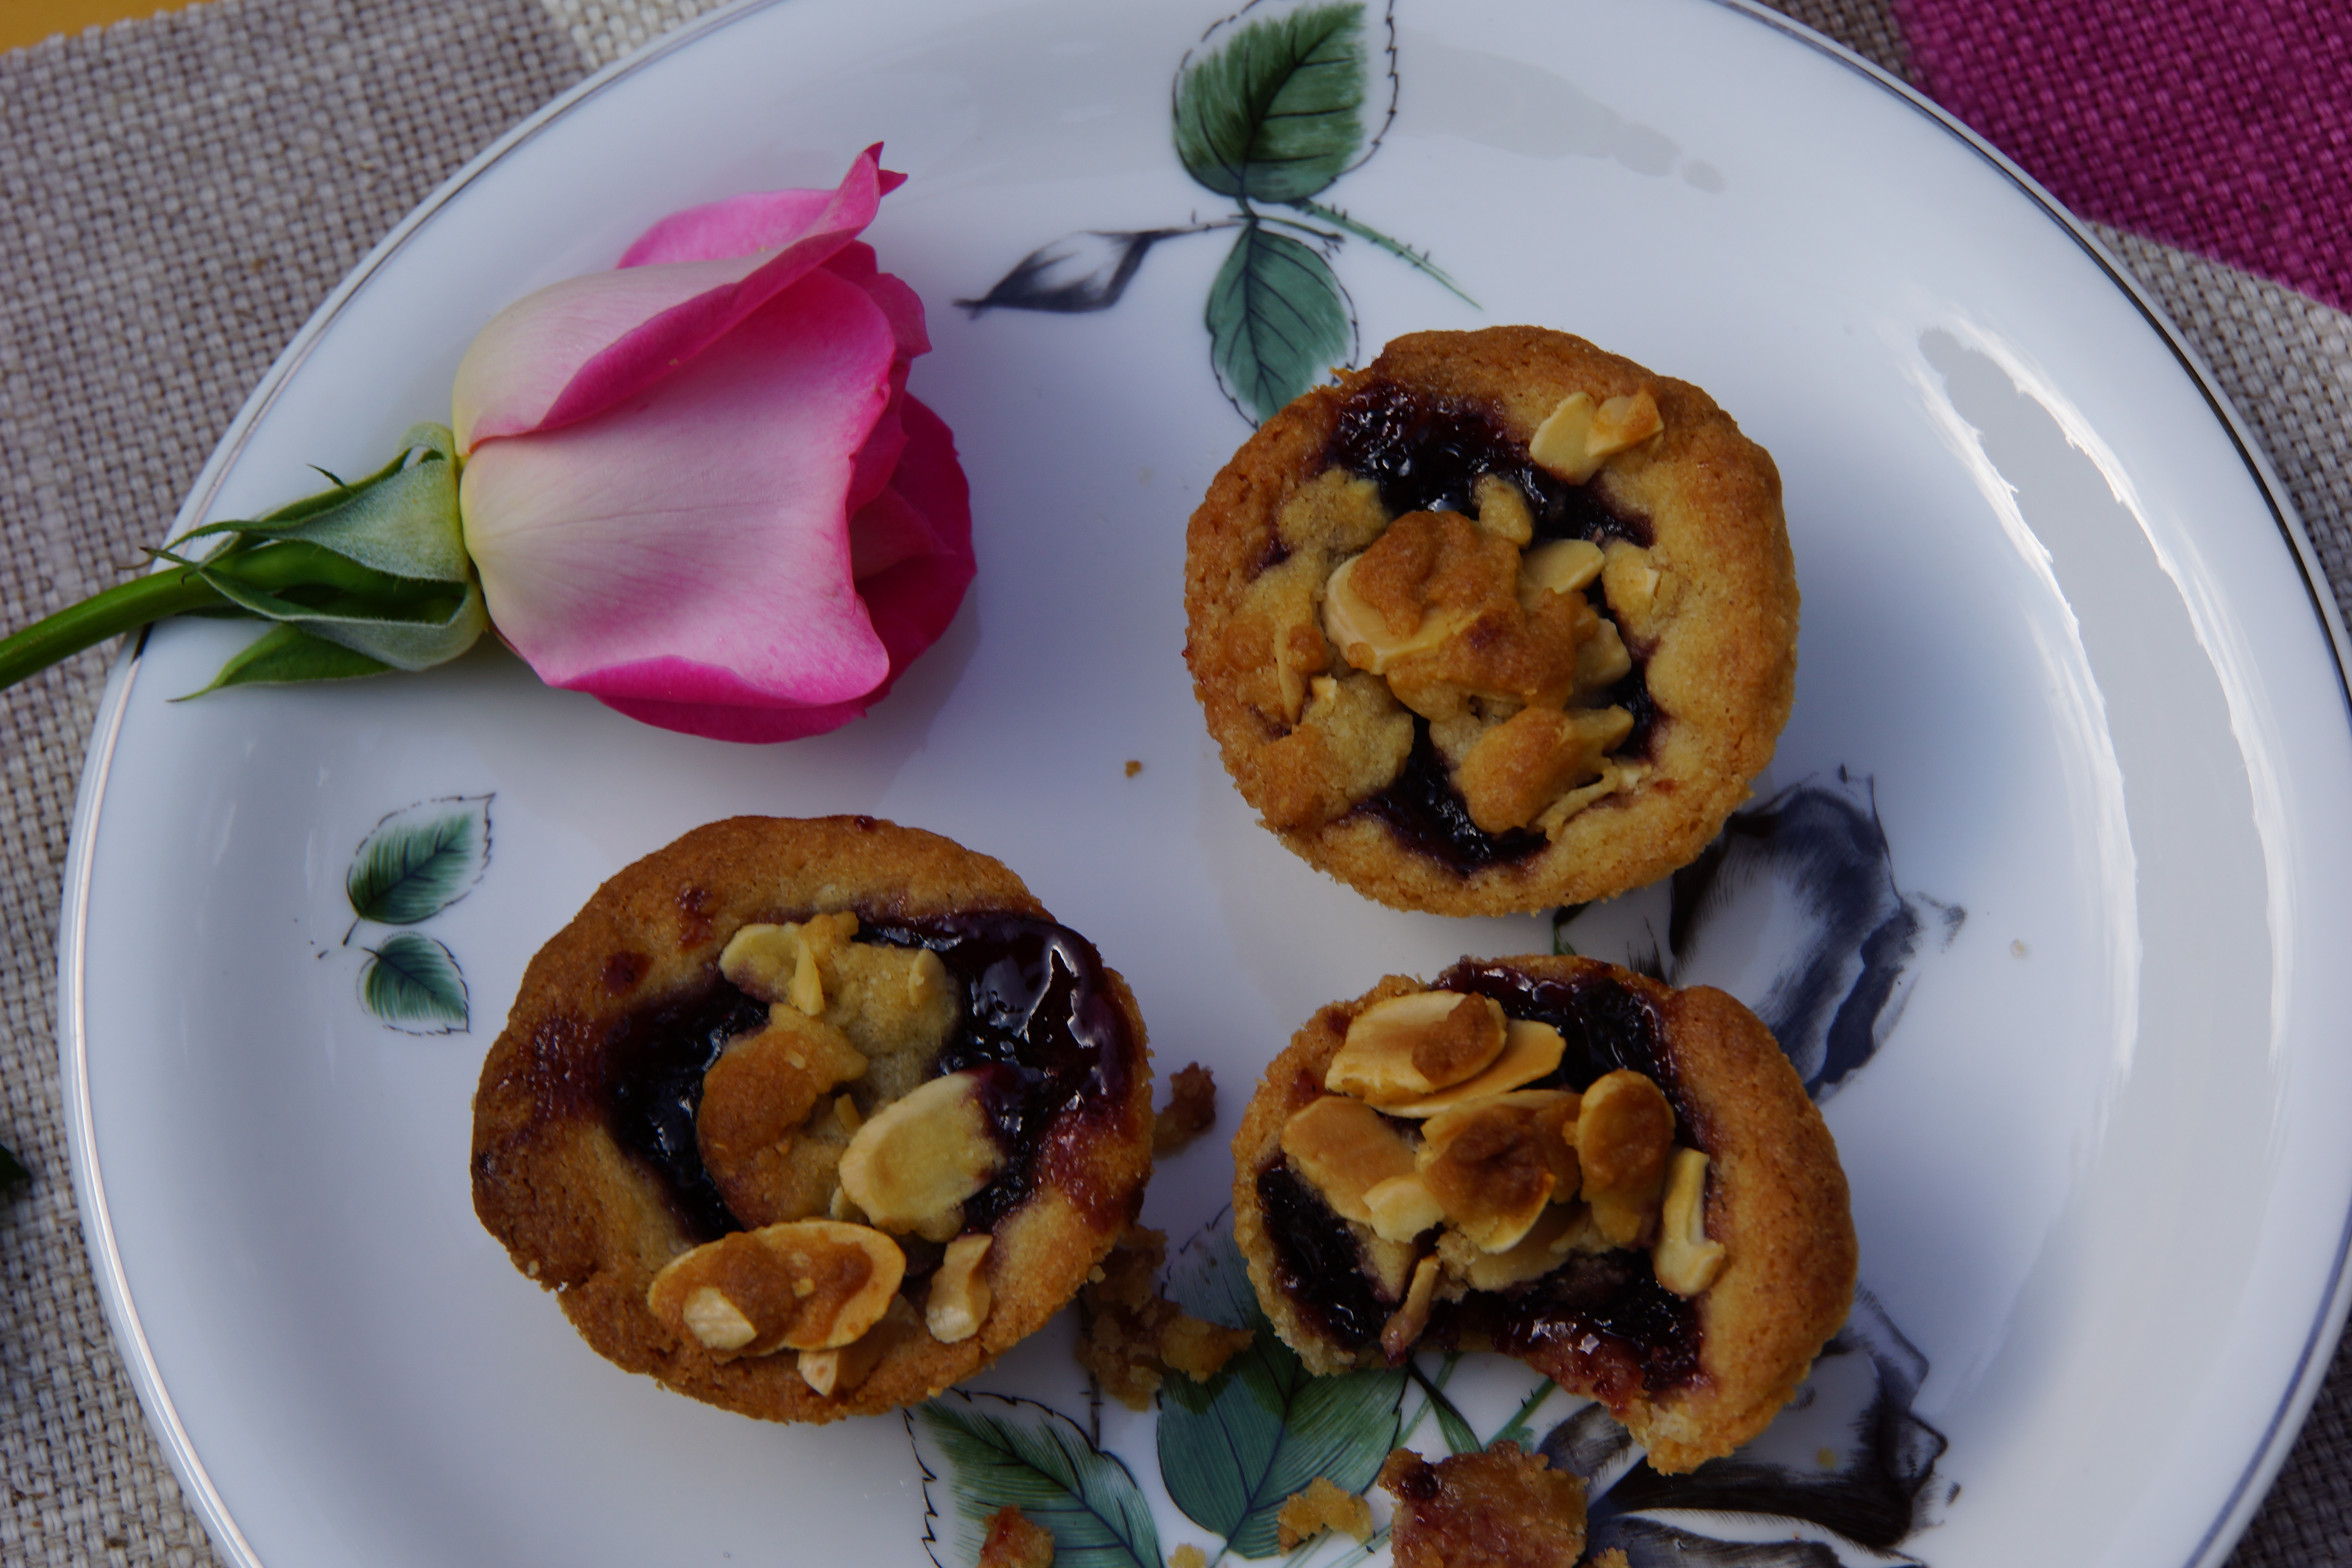
One-Bite Cherry Pies

I knew we had ordered a very rich chocolate vanilla cake for dessert and I wanted to make some one-bite treats to accompany the cake. I wanted something fruity and I came up with these one-bite cherry pies.

The great thing about this recipe is that you can substitute any type of dried berry and any flavor of berry preserves you have in the pantry.

They freeze beautifully, so make them ahead.

ONE-BITE CHERRY PIES

EVENT: Baby Shower

YIELDS: 24 Pieces

Ingredients

Butter or non-stick spray for muffin tins

1 cup sliced almonds with skins (lightly toasted)

1 ¾ cup flour

½ cup granulated sugar

½ cup packed light brown sugar

3 teaspoons finely grated lemon zest

½ teaspoon cinnamon

½ teaspoon salt

1 ½ sticks (12 tablespoons) unsalted butter, room temperature

2 large egg yolks

1 teaspoon vanilla

2 teaspoons fresh lemon juice

1/3 cup dried cherries, chopped

½ cup berry preserves

Equipment

Mini muffin tins

Small offset spatula

Directions

1. Preheat oven to 375 degrees.

2. Grease or spray mini muffin pans with non-stick spray.

3. In a food processor, pulse flour, both sugars, 1 ½ teaspoon lemon zest, cinnamon and salt until combined.

4. Add butter and pulse to form coarse meal.

5. Add egg yolks and vanilla and process until dough forms a ball.

6. Put ¾ cup dough in a bowl and stir in almonds for crumb topping. Set aside.

7. Press 1 tablespoon of dough into bottom and sides of muffin pans. Chill in refrigerator 15 minutes.

8. Combine remaining lemon zest, lemon juice, dried fruit and preserves until well blended.

9. Spoon ½ teaspoon into each muffin cup.

10. Crumble almond topping evenly on top.

11. Bake until tops are deep golden brown — do not over bake! – approximately 15-20 minutes. Cool in pan 15 minutes.

12. Gently loosen edges with offset spatula. Allow these to cool completely on wire rack and store in an airtight container.

13. These can be frozen or stored at room temperature for 1 week.

March 4, 2015
At Home with Friends

1 comment

Chocolate Dipped Coconut Macaroons

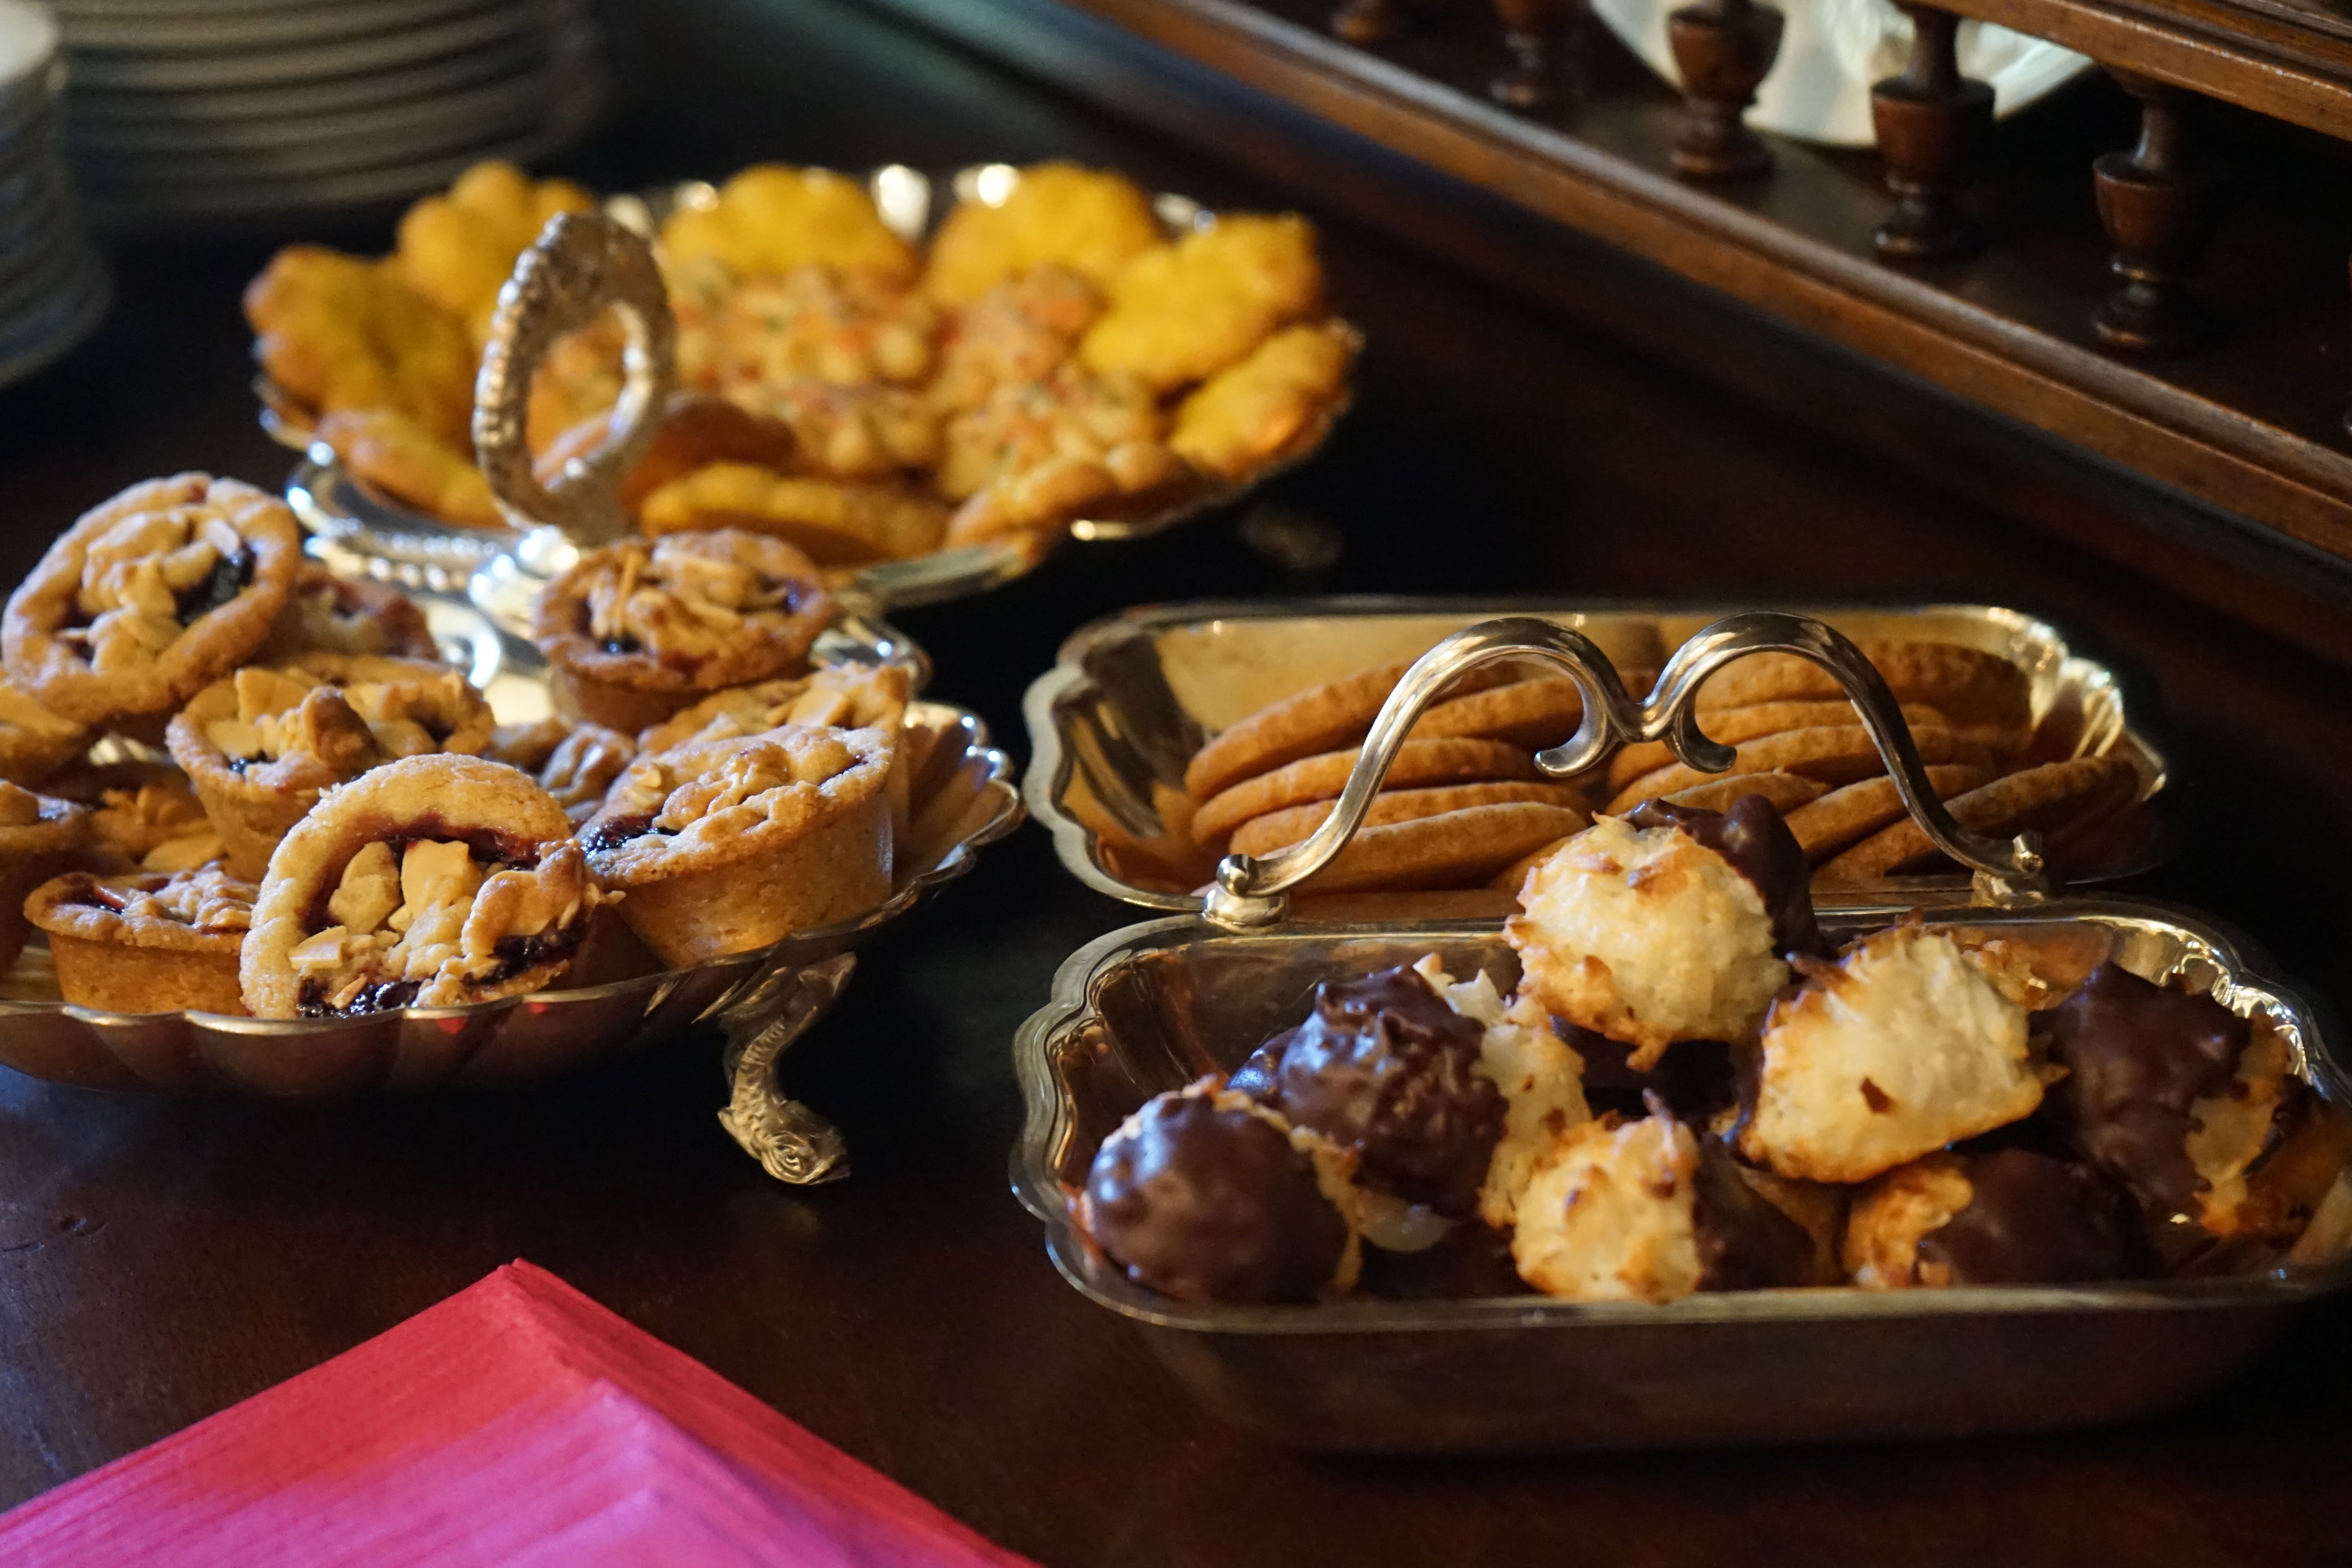
If you follow my blog, you know that I make cookies for every party. Maybe it’s the child within us that smiles when we reach for a cookie.

At this party, at Krista’s request, we ordered a glorious cake from her favorite bakery. I know the pastry chef who created this confection and it’s stellar with layers of chocolate cake, white cake, chocolate mousse and strawberries. Even though the cake was a wow, the first comment I heard over dessert was, “Judith, you nailed the macaroons!”

I drizzled chocolate on some but you can leave them totally plain. The recipe makes approximately 12 macaroons, so you might want to double it. They freeze beautifully.

Add this to your collection of delectable cookies.

COCONUT MACAROONS

EVENT: Baby Shower

MAKES: 12 Cookies

Ingredients

2 large egg whites

Pinch salt

1/3 cup sugar

1/2 teaspoon vanilla

2 cups sweetened shredded coconut

2 1/2 oz. bittersweet dark chocolate (optional)

Equipment

Small ice cream scoop

Parchment lined baking sheet

Directions

1. Preheat oven to 350 degrees.

2. Using free standing or hand held electric mixer, beat egg whites with salt until they form stiff peaks.

3. Fold in sugar and vanilla.

4. Stir in coconut.

5. Using a small ice cream scoop, form 12 cookies and place on parchment lined baking sheet.

6. Bake for approximately 15 minutes or until lightly golden.

7. Cool on a baking sheet for 30 minutes.

8. Store in airtight container at room temperature 3 days or wrap carefully and freeze for 4 weeks.

Optional chocolate:

9. Melt chocolate in microwave or small saucepan. Pour into bowl.

10. Dip bottoms of macaroons or 1/2 of each cookie and return to parchment lined baking sheet.

11. Leave on baking sheet until chocolate has hardened.

12. Store either 3 days at room temperature or frozen for 4 weeks.

March 2, 2015
At Home with Friends

1 comment

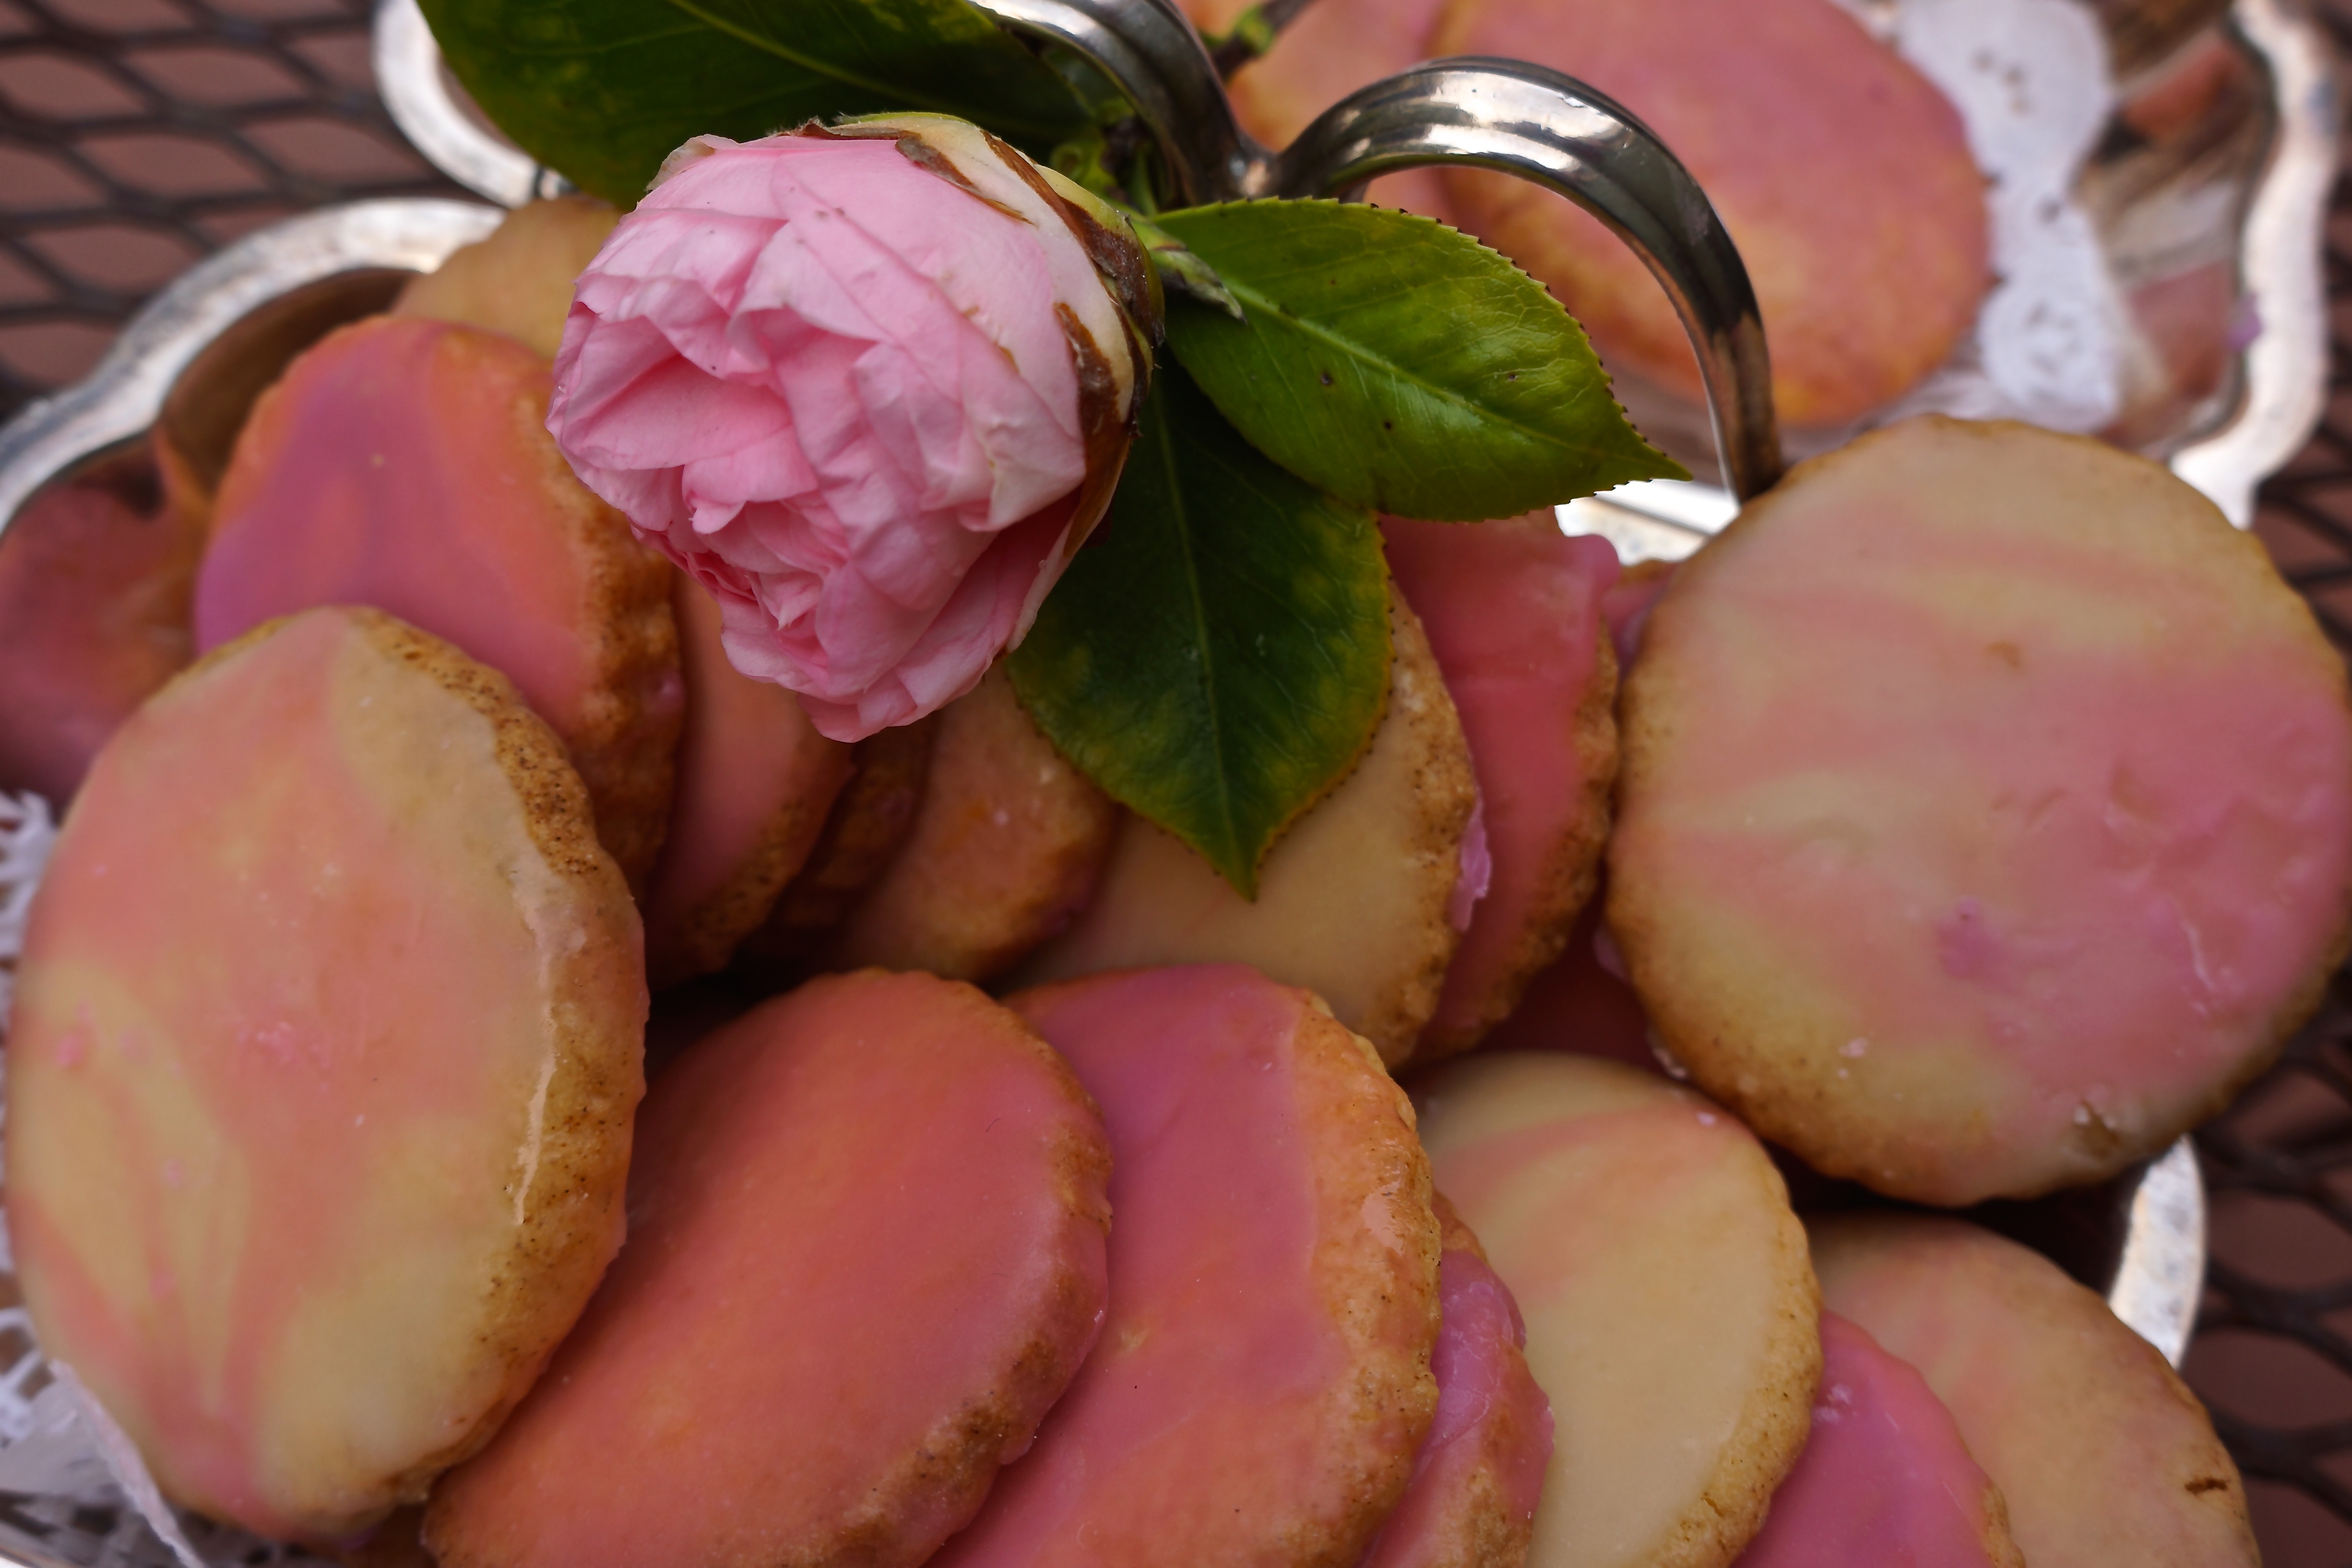
Pink Grapefruit Cookies

I had never eaten these and was intrigued by the recipe. It came from Martha Stewart, so how could it be bad?

They definitely have the flavor of grapefruit from the grapefruit zest. Her original recipe used this recipe for sandwich cookies with creamy grapefruit flavored filling.

Sandwich cookies usually don’t hold up well and the sandwiches must be put together just before serving. I wanted something I could make in advance. So I used the cookie recipe and decided to add a sugar icing.

This icing is simple to make. It starts out a creamy white color and you can frost the cookies with this. I used this first and then added food coloring to the remaining icing to create two tone cookies.

This icing dries out hard and helps the cookies stay fresh, covered, at room temperature, for several days.

It’s so simple to make, you can create several batches in different colors and allow your inner artist to go crazy.

PINK GRAPEFRUIT COOKIES 

EVENT: Baby Shower

YIELDS: 30 Cookies

Ingredients

For cookies:

Grated zest 1 ruby red grapefruit PLUS ¼ cup freshly squeezed juice

1 cup sugar

1 ½ cup all purpose flour (plus more for work surface)

¾ cup cake flour

1 teaspoon baking powder

½ teaspoon salt

½ cup (1 stick) unsalted butter, softened

2 large egg yolks

For icing:

1 cup confectioner’s sugar

2 tablespoons water

1 tablespoon light corn syrup

Up to 10 drops food coloring

Equipment

Parchment lined baking sheet

2-inch round cookie cutter

Directions

Make cookies:

1. Preheat oven to 350 degrees.

2. In small bowl, combine zest with 1 tablespoon sugar and set aside.

3. In a medium bowl, whist together both flours, baking powder and salt. Set aside.

4. In the bowl of electric mixer, fitted with paddle attachment, beat butter and remaining sugar on medium-high speed until light and fluffy, about 2 minutes, scraping down sides of bowl as needed.

5. Add egg yolks and beat until well combined, scraping down sides of bowl as need.

6. Beat in reserved zest / sugar mixture. Add flour mixture in two batches, alternating with the juice; and beat to combine.

7. Turn out dough onto a piece of plastic wrap, and shape into a 1-inch thick disk. Wrap in plastic and refrigerate until firm, about 30 minutes.

8. On a lightly floured surface, roll out disk to 1/8-inch thick, using a slightly floured rolling pin.

9. Using a lightly floured 2-inch round cookie cutter, cut out rounds and place about 1 inch apart on prepared sheet.

10. Bake, rotating sheet halfway though, until edges are golden, 18 to 20 minutes.

11. Transfer sheet to a wire rack to cool 5 minutes.

12. Transfer parchment paper and cookies to rack to cool completely.

Make icing:

13. Sift confectioner’s sugar two times.

14. Stir together confectioner’s sugar, corn syrup. Stir in water and food coloring to desired color.

15. Stir until smooth.

16. Either dip top of cookies or spoon icing on top.

17. Place on wire sheet. Allow icing to dry completely. It will dry slightly hard.

February 27, 2015
At Home with Friends

2 comments

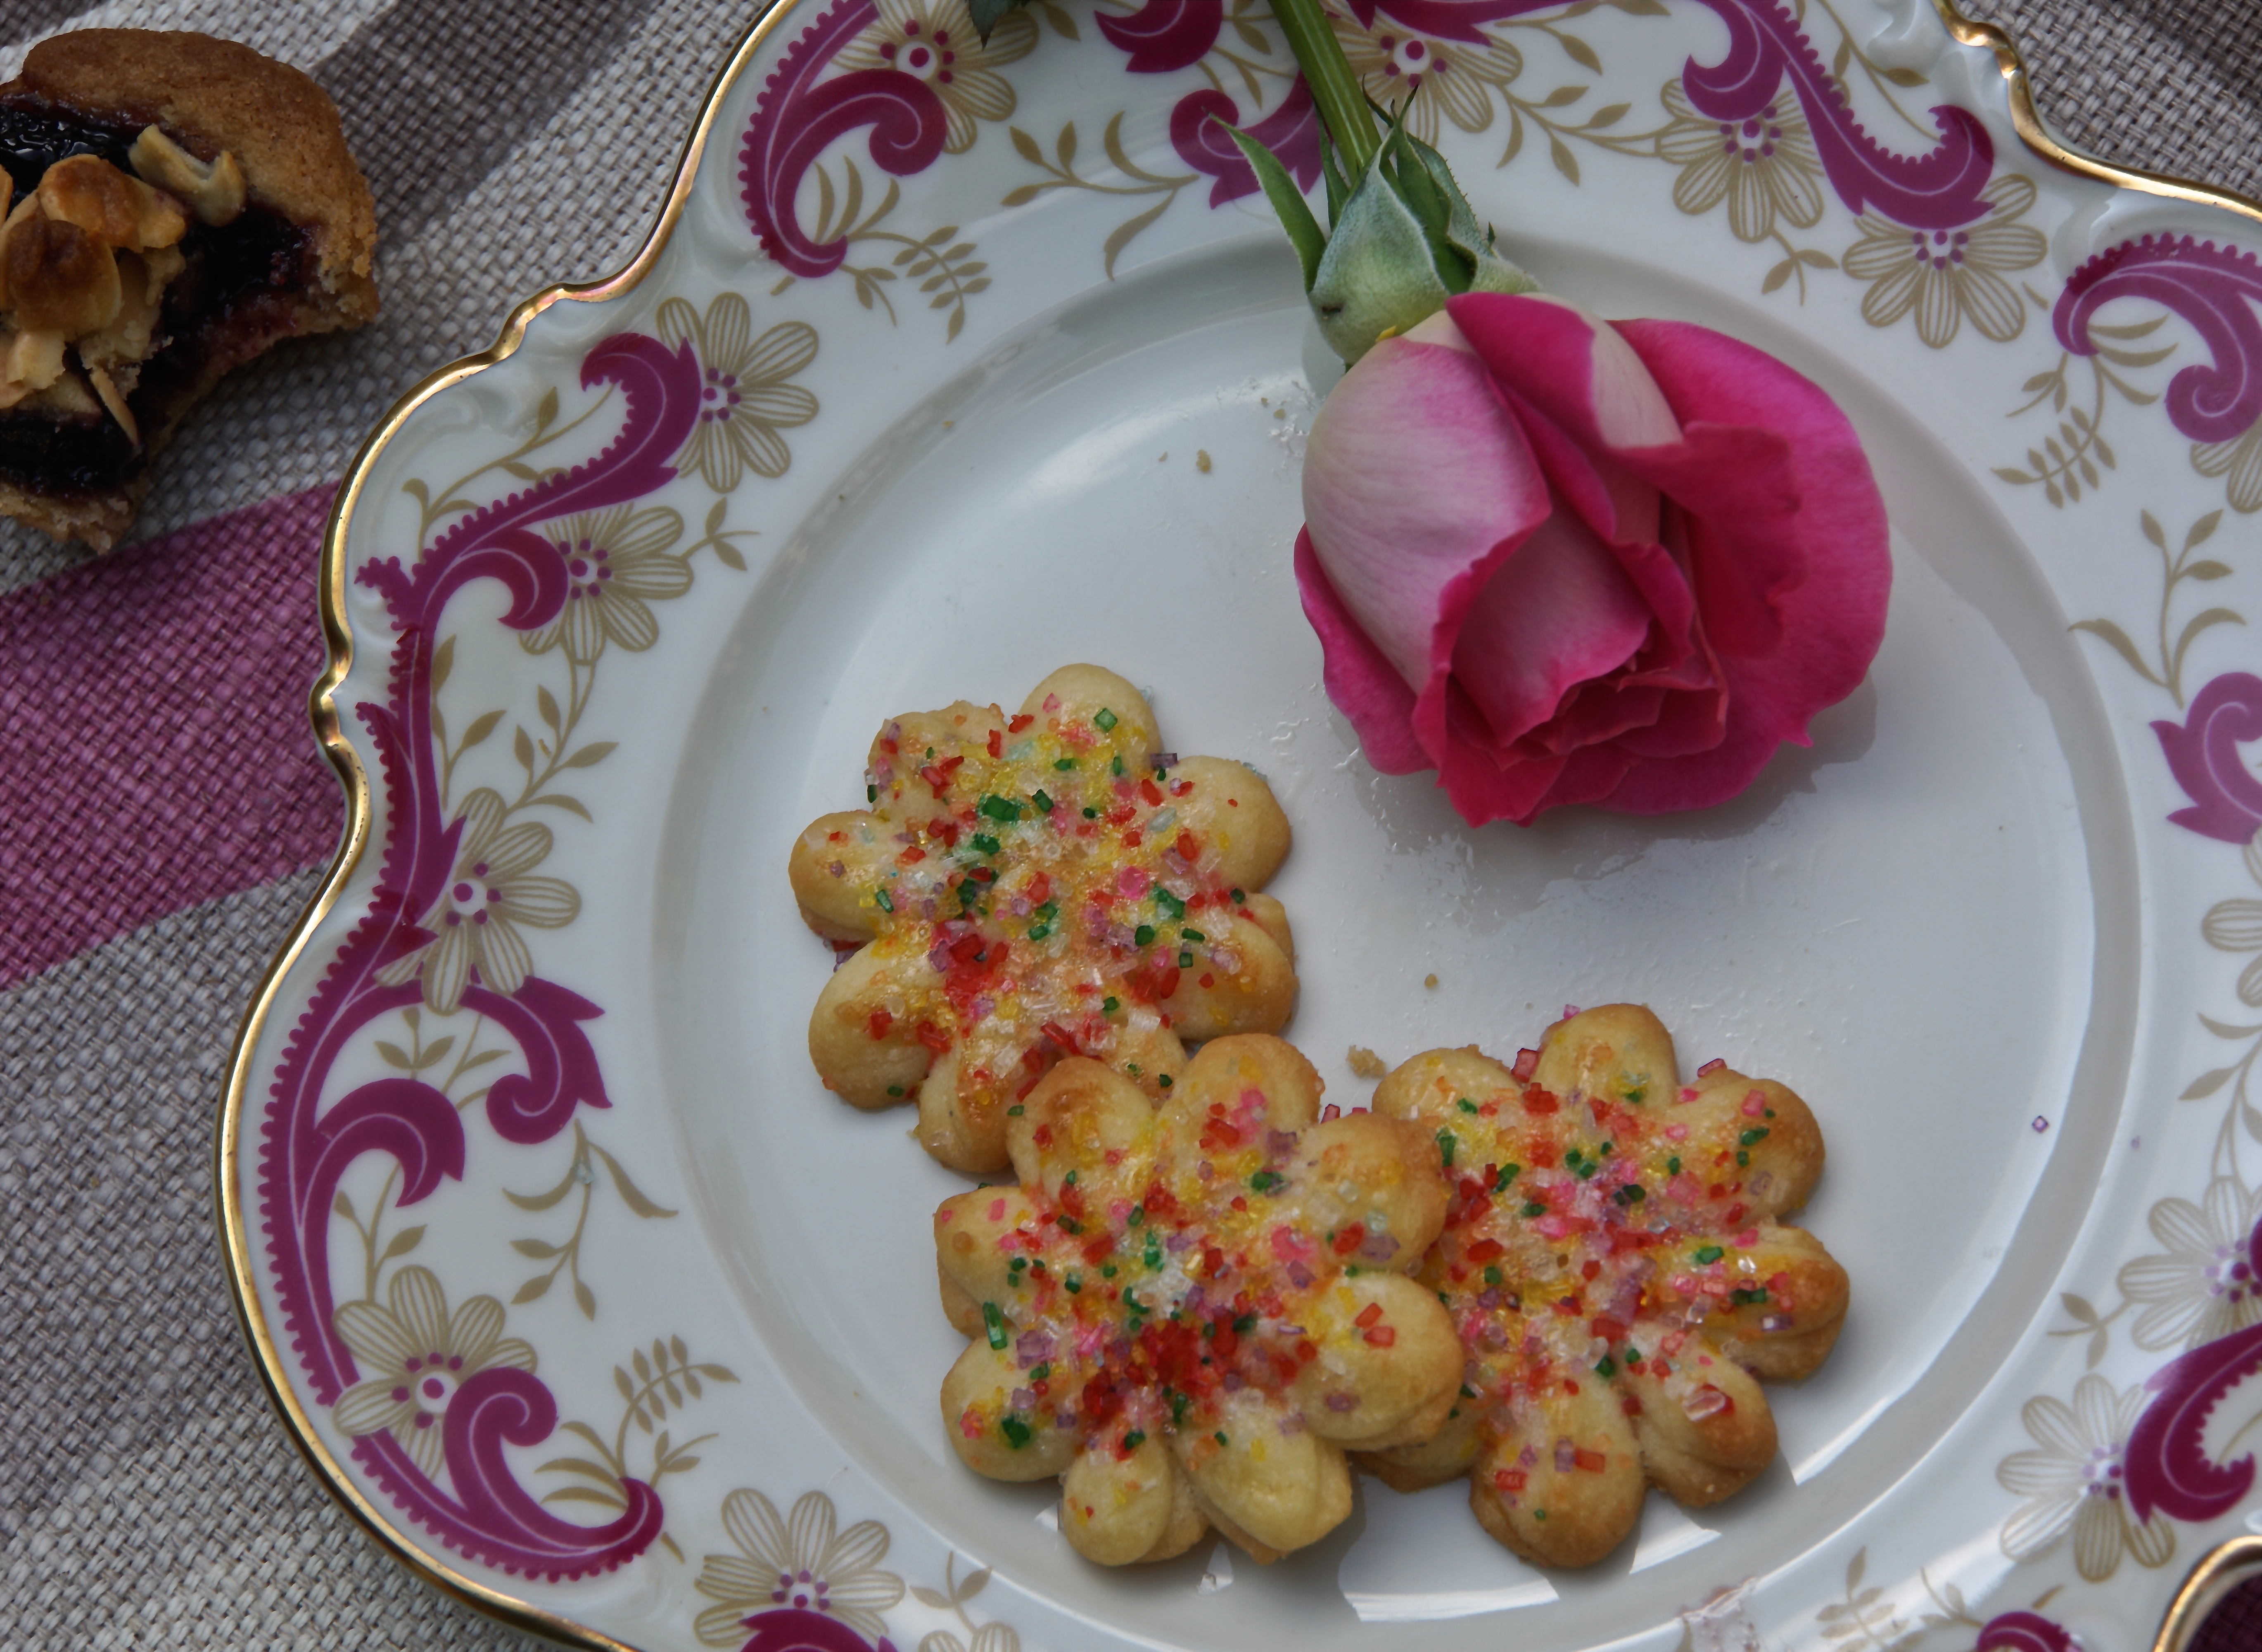
Party Cookies

In my house, party cookies meant the rich butter cookies that were covered with colored sprinkles that my mom bought at the bakery only when there was a party. These actually come close and you make them yourself.

The fun part is that they are made with a cookie press and sprinkled with sanding sugar. They look like the perfect bakery cookies but they have cream cheese. So they taste even better.

They can be made ahead and frozen. You can vary the disk and color of sugar to create multiple versions of this cookie.

PARTY COOKIES

EVENT: Baby Shower

YIELDS: About 100 Cookies Depending on Size and Style


Ingredients

8 oz (1 cup) unsalted butter, softened at room temperature

3 oz cream cheese, softened at room temperature

1 cup granulated sugar

1 large egg yolk

1 teaspoon vanilla extract

¼ teaspoon almond extract

2 ½ cups all purpose flour

1 egg white lightly beaten

Colored sugars or sprinkles

Equipment

Cookie sheets

Cookie press

Directions

1. Preheat oven to 350 degrees.

2. Using stand mixer with paddle attachment, beat butter, cream cheese and sugar until light and fluffy, approximately 4-5 minutes.

3. Add egg yolk, and vanilla and almond extract.

4. Beat until blended.

5. Slowly add flour and mix on low until incorporated.

6. Follow the directions for your individual cookie press.

7. Slide the log into the cookie press and spritz the cookies directly onto the ungreased cookie sheet. Don’t line the cookie sheets.

8. Brush the top with beaten egg whites and sprinkle with sugars. Repeat with remaining dough.
9. Bake 10-12 minutes just until cookies are golden around the edges.

10. Cool cookies on sheet for 5 minutes and carefully transfer them to a rack and cool completely.

11. Freeze in airtight container separating layers of cookies with wax paper.

February 25, 2015
At Home with Friends

1 comment

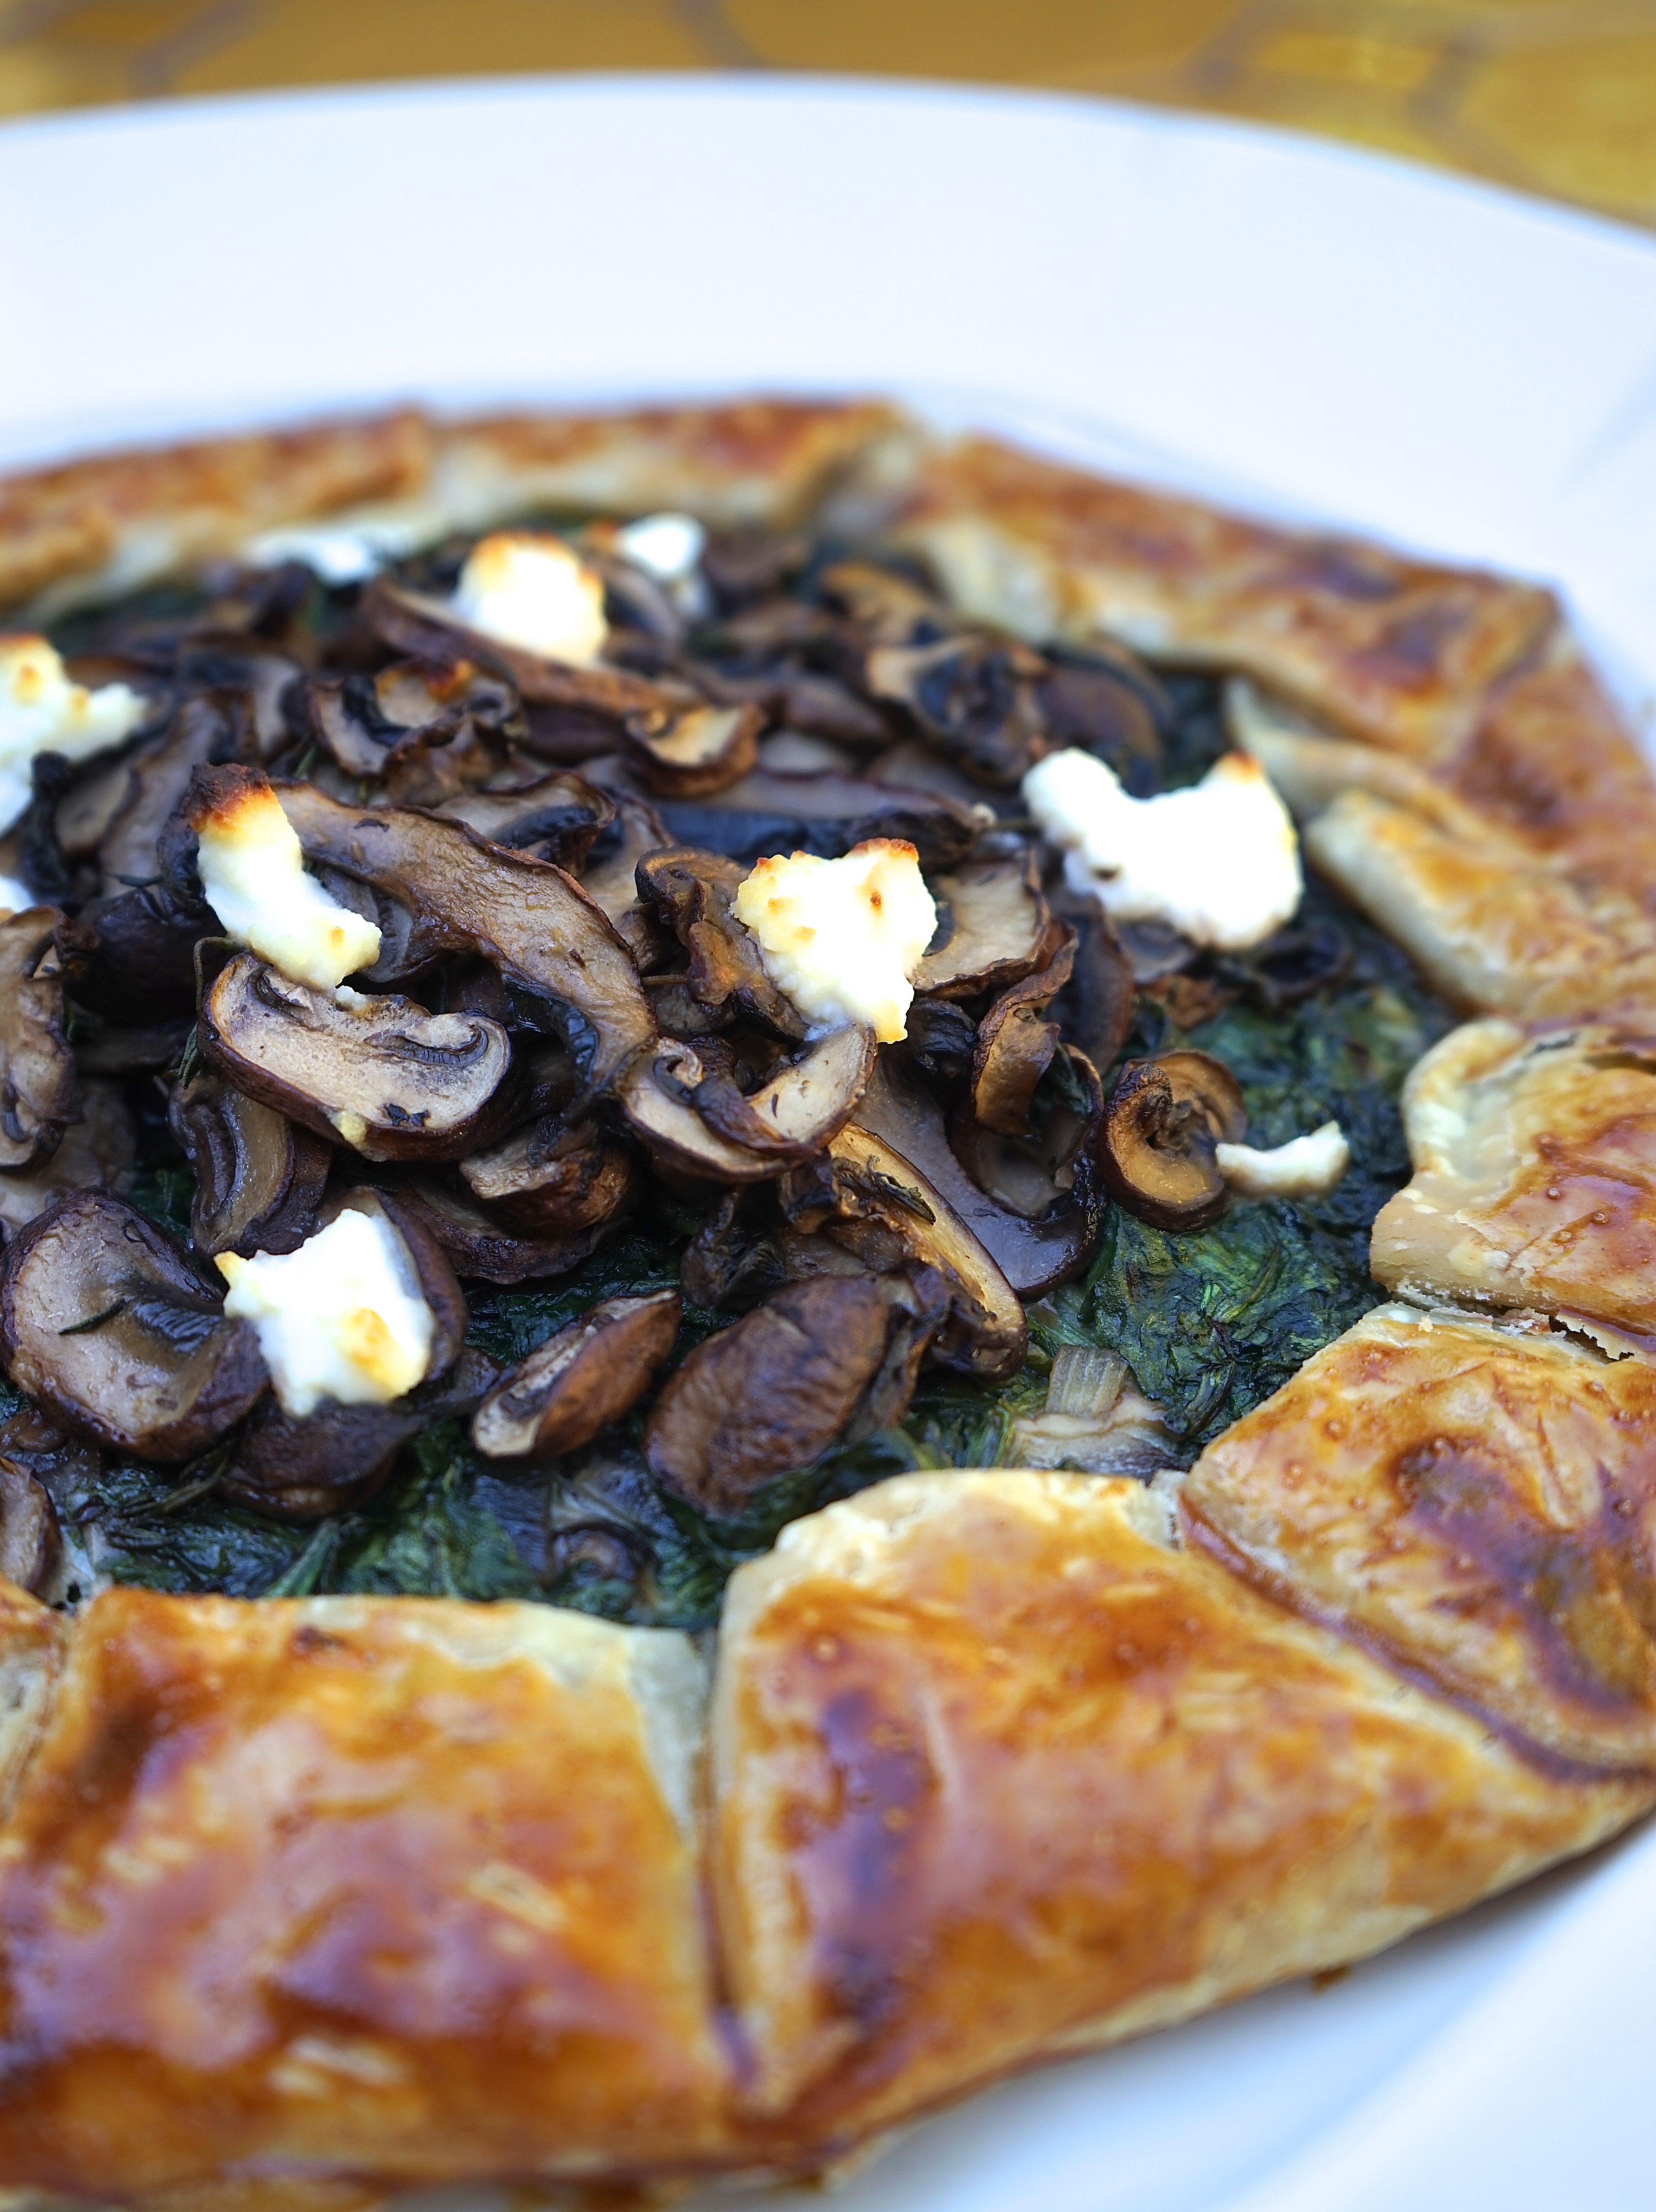
Mushroom & Chard Galette

I love making savory or sweet rustic tarts or galettes. I usually make my own dough but for this party, with such a large number of guests, I needed to save time.

I used one of my go-to shortcuts: Refrigerated Pie Crust. Yes, handmade dough is wonderful but this works just fine. I made two of these galettes because I had 18-20 guests. It can easily be doubled or even tripled, and you might want to do this.

This galette has a combination of exceptional flavors: the thyme in the mushrooms, the garlic and shallots in the greens, the creamy ricotta base and topping, and the fresh lemon zest.

When I was developing and testing this recipe, I ate a sliver and shared a slice with a few tasters. Before I knew it, it had totally disappeared and I hadn’t even taken photos. Oops! I had to make it again. And again.


MUSHROOM & CHARD GALETTE

EVENT: Baby Shower

MAKES: 10-12 Small Slices (Can easily be doubled or tripled)


Ingredients

1 package Refrigerated Pie Crust

1 1/4 cup whole milk ricotta cheese (separated: 1 cup and 1/4 cup)

8 oz. crimini or bella mushrooms, thinly sliced *

2-3 tablespoons olive oil

1 shallot, minced

1 clove garlic, crushed

1/2 purple onion, diced

1 5-oz. bag of kale, chard and spinach mix, roughly chopped

5 sprigs of fresh thyme

1 large egg, beaten

Zest of 1 lemon

Salt and pepper to taste


Equipment

Large baking sheets lined with parchment paper


Directions

1. Preheat oven to 400 degrees.

2. Heat 2 tablespoons of olive oil in large saute pan and saute the mushrooms. Season with salt and pepper and sprigs of thyme.

3. Transfer to a bowl to cool.

4. In same saute pan, over medium pan, add 1 tablespoon of olive oil and cook garlic, shallots and onions. When the garlic and onions are soft, add the chopped kale, chard and spinach and toss until wilted.

5. Remove from pan.

6. Roll out dough on a lightly floured surface to a 14-inch diameter. Transfer to a baking sheet, lined with parchment.

7. Spread 1 cup of ricotta cheese over dough, leaving a 1 1/2-inch border. Use an offset spatula to spread cheese.

8. Top cheese with wilted chard. Top chard with mushrooms.

9. Bring edges of dough up and slightly over edge of filling. Create a rustic folded border. Brush border with egg wash.

1o. Dot-top with 1/4 cup ricotta cheese.

11. Bake 35-40 minutes.

12. Top with lemon zest. Allow to cool slightly on the sheet.

* A NOTE: I buy crimini or bella mushrooms at Costco.

February 23, 2015
At Home with Friends

1 comment

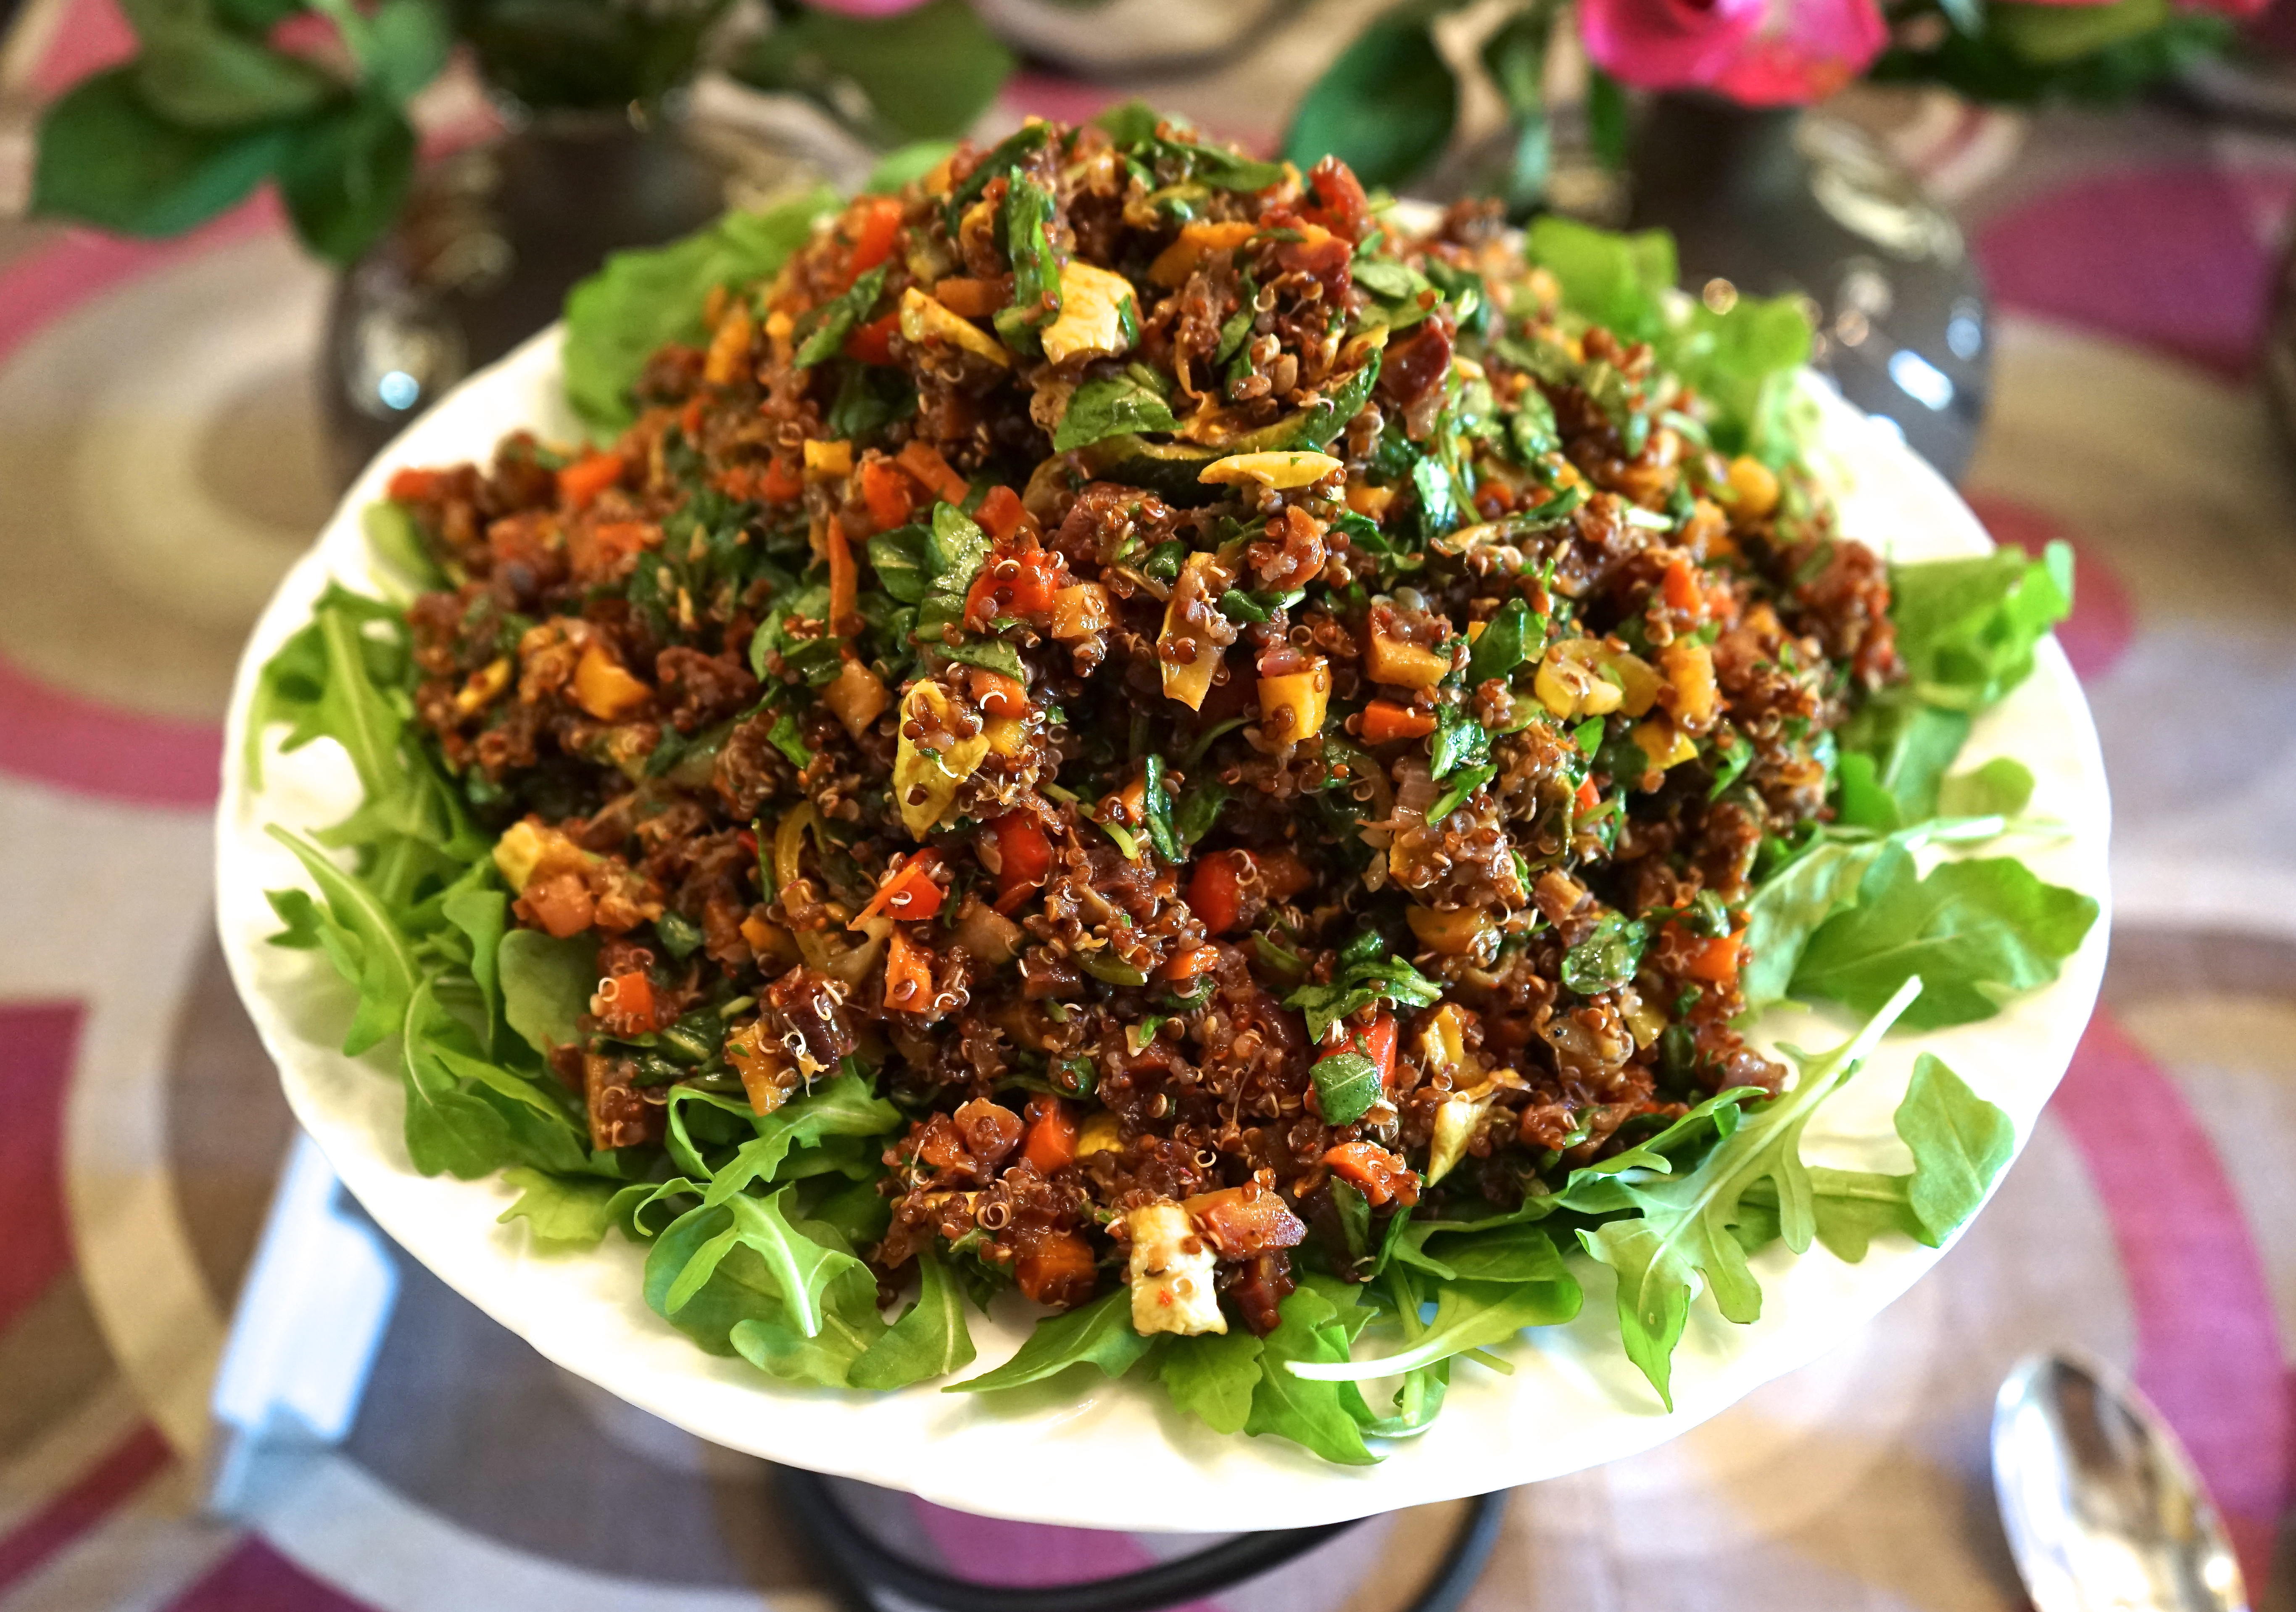
Quinoa Salad with Roasted Vegetables

Quinoa is a super food. I could give you all the latest nutritional facts or just tell you it is a staple in my kitchen because I can use it multiple ways. It’s loaded with nutrients and it’s gluten free. If you’re trying to get your friends and family to eat it, don’t tell them it’s healthy, don’t tell them it’s gluten free, don’t tell them it’s good for them; just make this recipe — and they will be hooked!

I used a combination of zucchini, yellow squash, multicolored carrots and red pepper. You can change up the vegetables but be sure you chose vegetables with lots of color. I mix it with arugula because arugula adds a slightly spicy note.

I roast the vegetables and cook the quinoa the day before. I store them both in the refrigerator and actually make the salad the day of the party.

Instead of piling the quinoa on the arugula, I toss it all together so that you get a marvelous mix of flavors with each and every mouthful.

This is so good, no one will suspect it’s really healthy.

QUINOA SALAD WITH ROASTED VEGETABLES

EVENT: Baby Shower

SERVES: 10-12 People


Ingredients

For the salad:

4 cups cooked organic red quinoa (2 cups dried quinoa)

8 small zucchini, striped and sliced

7 medium yellow squash, sliced

1 32-oz. bag of multicolored carrots, peeled and julienned

1 red bell pepper, sliced

1 red onion, sliced into half-moons

1 cup sliced in half cherry tomatoes

Olive oil

1 16-oz. bag arugula, torn into small piece

For the dressing:

6 tablespoons balsamic vinegar *

3 tablespoons olive oil

Juice of 2 lemons

Salt and pepper to taste


Directions

1. Preheat oven to 375 degrees.

2. Cook quinoa according to package directions.

3. Slightly drizzle all the vegetables with olive oil (on 2 baking sheets) and slowly roast for 1 – 1 1/2 hours. Set aside to cool. (This can be made ahead and refrigerated overnight.)

4. Cut all the vegetables into small cubes.

5. Add quinoa, cherry tomatoes and torn arugula to the vegetables, and toss.

6. Mix the ingredients for the dressing and add to the salad. Mix thoroughly.

7. Taste. Add salt and pepper as needed.

* A NOTE: I always buy my balsamic vinegar at Costco.

February 20, 2015
At Home with Friends

1 comment

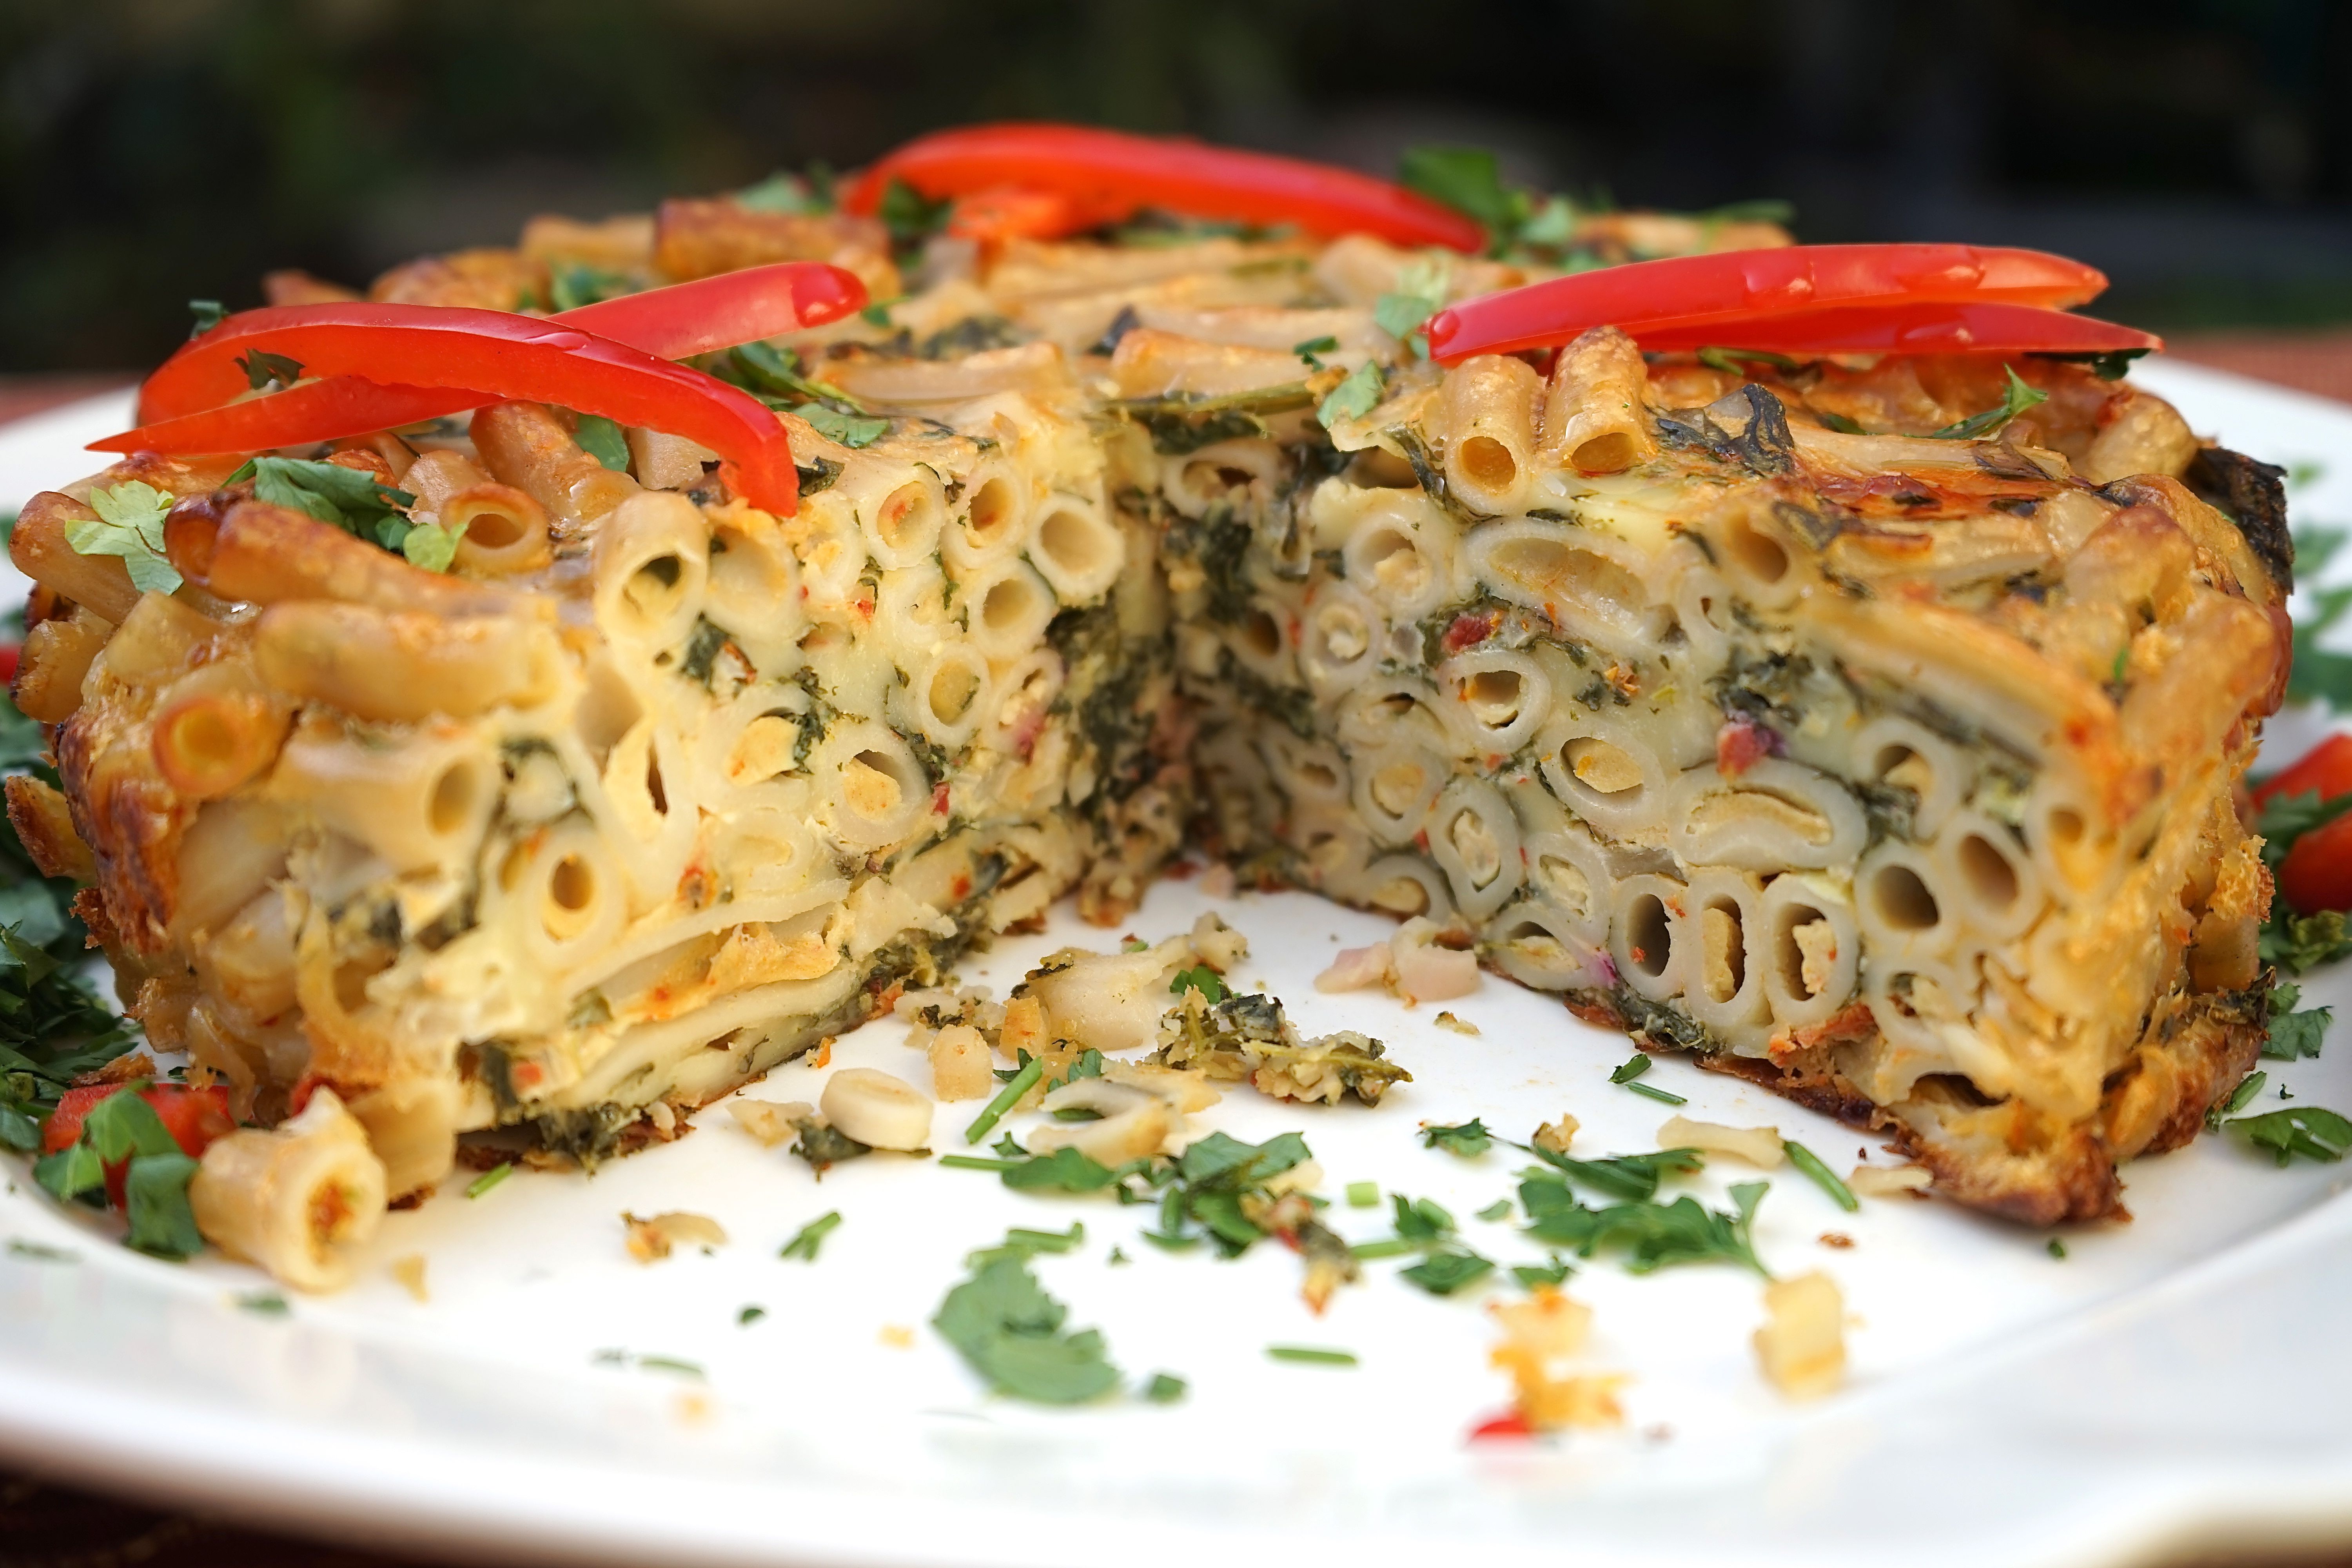
Pasta, Chard & Fontina Torte

Baked pastas are always great as part of a lunch buffet. This one is both vegetarian and gluten free. I wanted to come up with a way to use brown rice pasta (for my gluten free guests) that tasted as good as regular pasta.

You can use spinach or chard or kale. I love to buy bags that have all three mixed.

Because this is made in a springform pan, it looks impressive when served. You can use your imagination and tweak this to your taste. You can switch out the fontina for cheddar and the Parmesan cheese for gruyere. You can add more vegetables like diced red pepper or hot peppers if you want to spice it up. It’s also great as a main course dish served with just a salad.

This can and should be made and baked the day before. Store covered at room temperature, overnight. Store leftovers in the refrigerator for 2 days, if they last that long.

PASTA, CHARD AND FONTINA TORTE

EVENT: Baby Shower

SERVES: 8-10 People

Ingredients

1 1/2 cups chopped onion

2 cloves garlic, crushed

1/4 cup sun dried tomatoes, rehydrated in warm water and diced

3 tablespoons olive oil

2 5-oz. bags chard, spinach, kale or combo, roughly chopped

10 oz fontina cheese, rind discarded and cut into 1/4-inch cubes *

2/3 cup grated Parmesan cheese *

1/2 cup gruyere *

6 large eggs

1/2 cup heavy cream

1/2 cup mascarpone cheese

1 teaspoon salt and pepper to taste

1/2 teaspoon red pepper flakes (optional)

1/3 cup Kalmata olives, chopped

2 scallions, chopped

1 lb brown rice penne pasta


Equipment

9-inch springform pan

Reusable parchment paper (optional)


Directions

1. Preheat oven to 350 degrees with rack in middle.

2. Butter springform pan or line inside of pan with reusable parchment (available at my Amazon Affiliate Store). Wrap outside with foil, to catch any possible leaks.

3. Cook onion, garlic and rehydrated diced sun dried tomatoes in large saute pan with olive oil.

4. Add red pepper flakes (optional), and salt and pepper.

5. Add roughly chopped greens and toss to evenly distribute onion mixture and greens are slightly wilted. Set aside in large bowl.

6. Cook pasta according to package directions just until al dente.

7. Drain in a colander. Toss with greens and add Parmesan cheese and fontina cheese. Mix until well combined. Add Kalmata olives and chopped scallions.

8. In a blender, combine eggs, heavy cream and mascapone cheese. Blend well.

9. Pour mixture into bowl with pasta and greens. Mix well.

10. Pour into prepared springform pan.

11. Bake until set, approximately 50 minutes. After 25 minutes, check pan: If pasta is getting too brown, loosely cover with foil.

12. Cool in springform pan on a rack at least 10 minutes.

13. Remove sides of pan and serve torte hot or room temperature.

* A NOTE: Costco is a great place to purchase a variety of cheese! For this recipe, I buy fontina, gruyere and the grated Parmesan cheese there. 

BABY SHOWER – GAME PLAN

Saturday Afternoon

4 Weeks Before

  • Invite guests
  • Think about menu
  • Think about Baby Shower games / activities
  • Decide logistics such as where to set up bar, buffet and design or art station

3 Weeks Before

2 Weeks Before

  • Review menu
  • Book support staff if needed
  • Organize all dishes and glasses and serving platters
  • Buy all beverages including alcohol

1 Week Before

  • Finalize menu and confirm guest list
  • Buy and store ice

Monday

  • Set-up table, dishes, glasses, silverware, serving platters and utensils

Tuesday

  • Do all grocery shopping except chicken and shrimp.
  • Wash all vegetables.

Wednesday

Thursday

Friday 

Saturday

February 18, 2015