first

November 9, 2015
At Home with Friends

2 comments

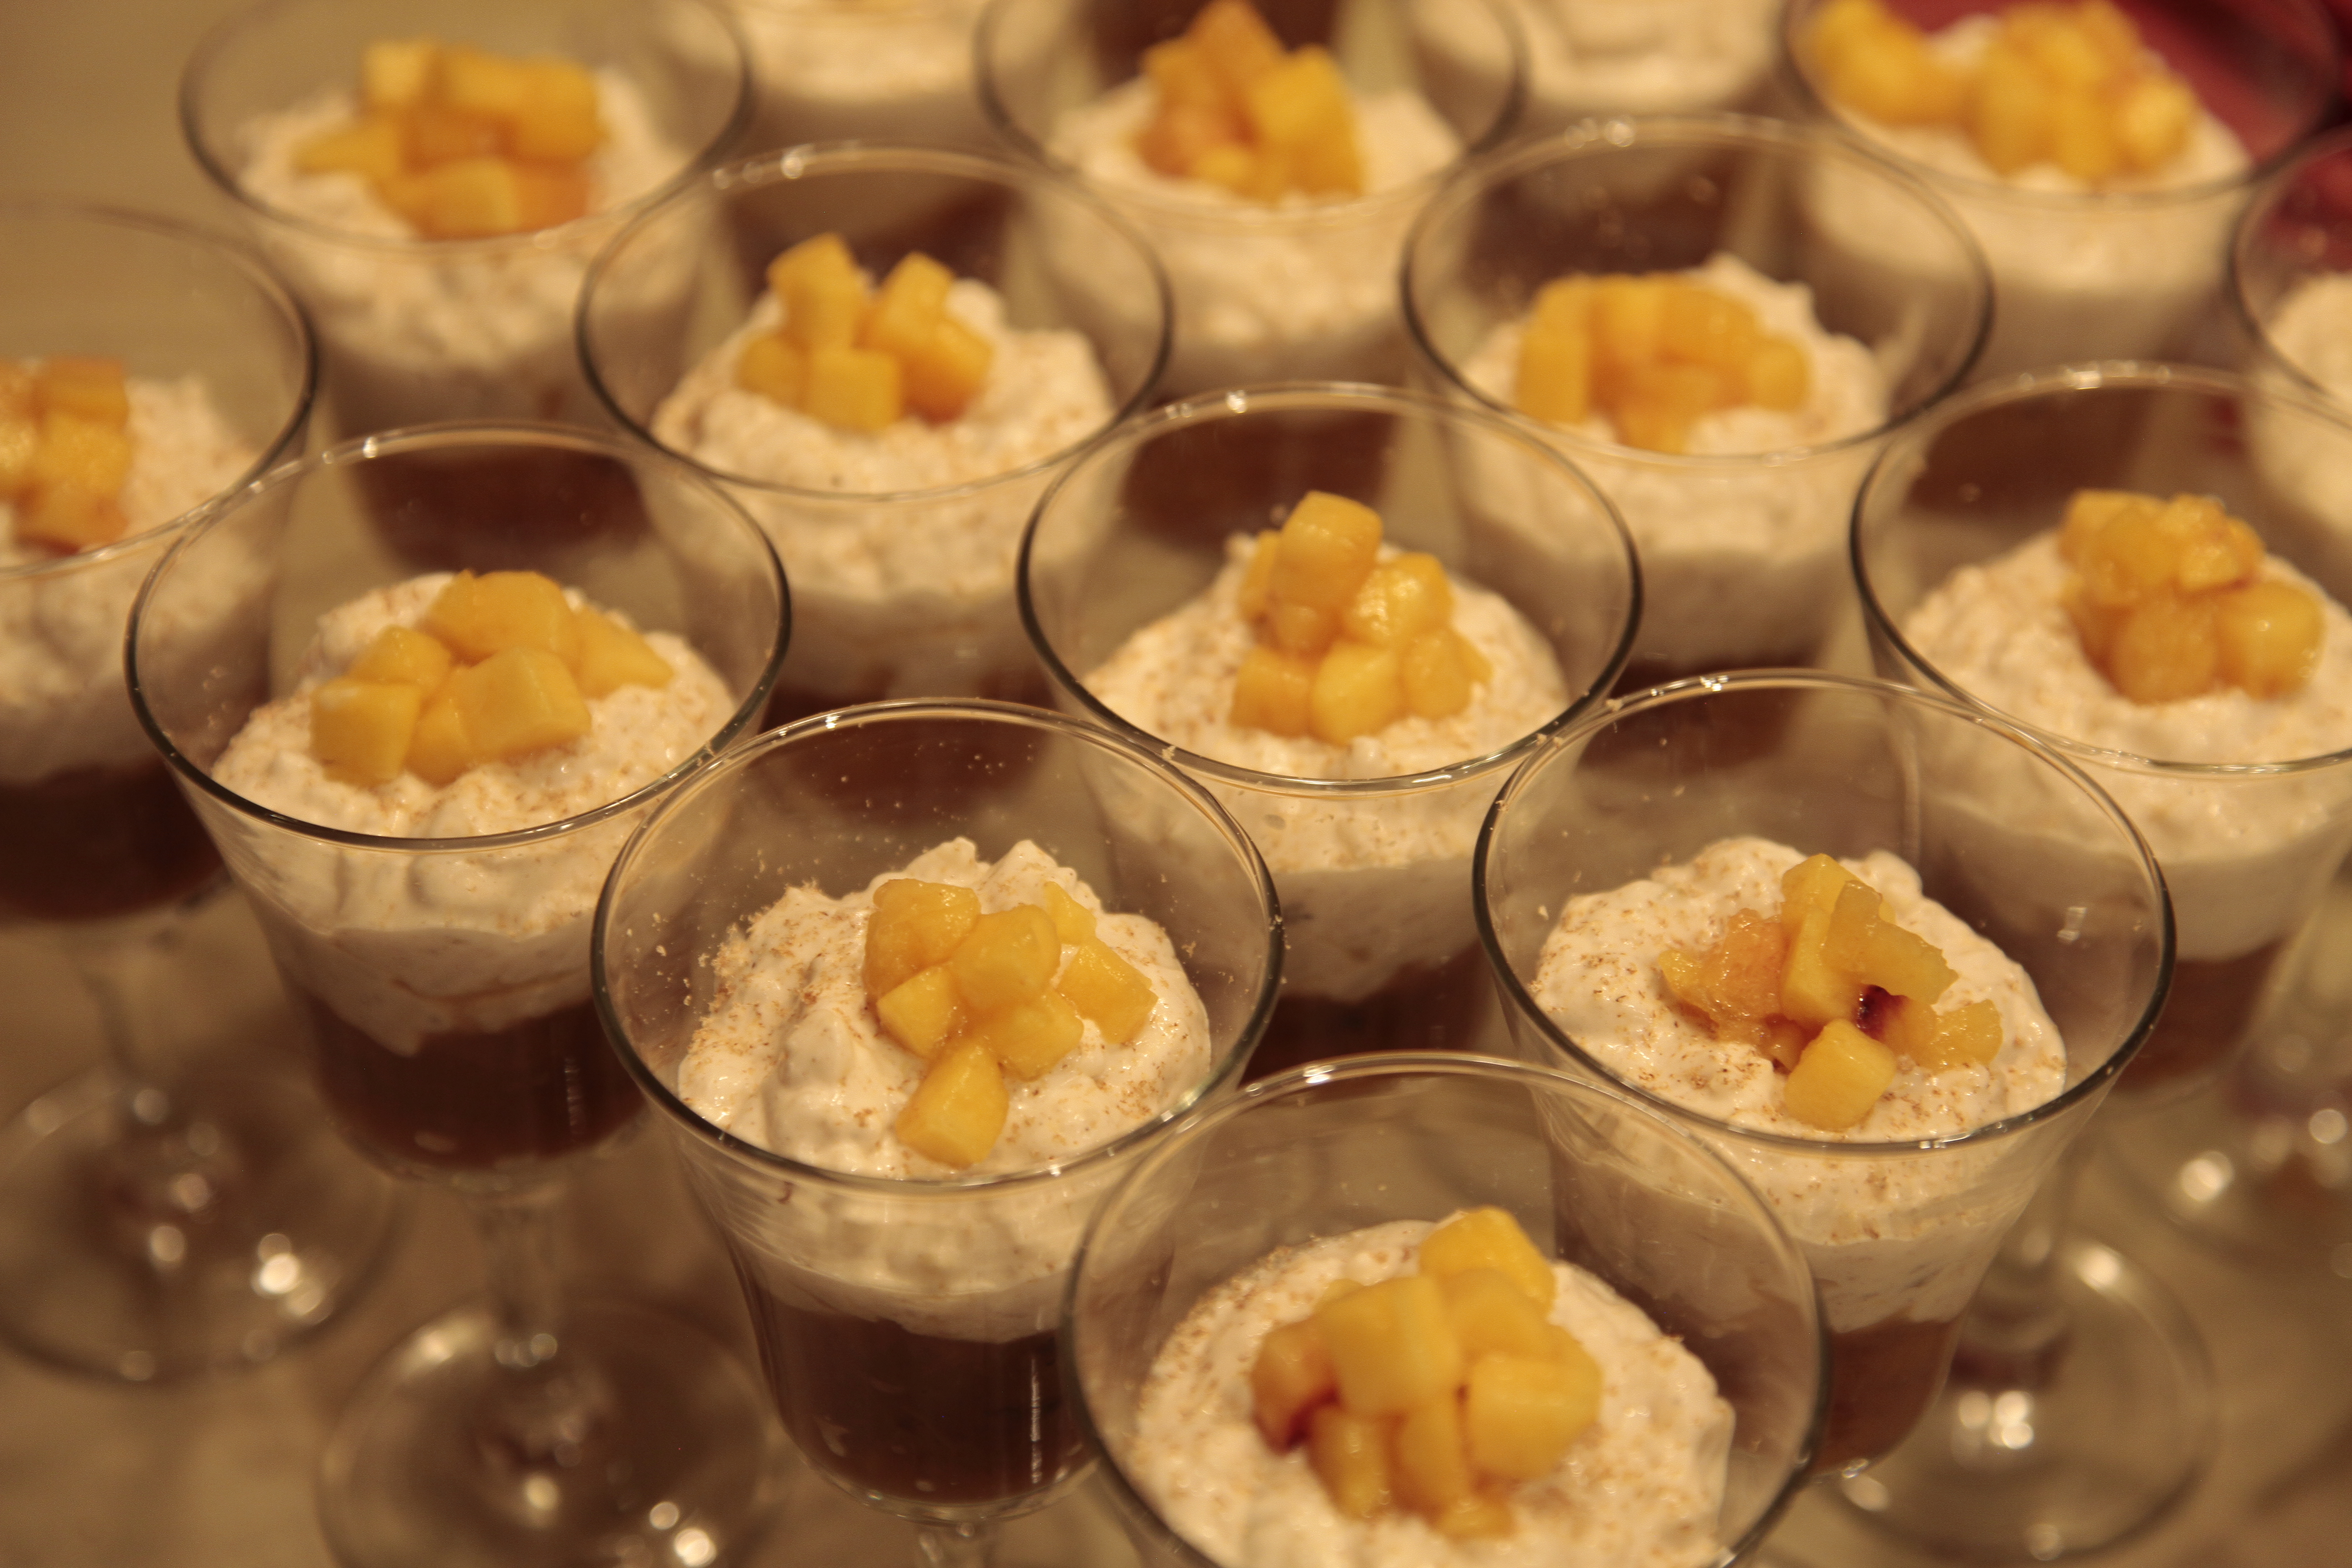
Cardamom Rice Pudding with Peach Chutney

While lots of people remember rice pudding as a beloved childhood food, this is definitely an adults-only Rice Pudding. Adult because it contains Amaretto liqueur and also because of the sophisticated mix of flavors. Cardamom, almond extract, orange extract, cinnamon and a savory Peach Chutney are complex and oh so satisfying.

You might think it’s a typo that the recipe contains no added sugar, but it isn’t a mistake. The combination of basmati rice, golden raisins, whole milk, heavy cream, extracts and spices blend to create an indulgent sweetness.

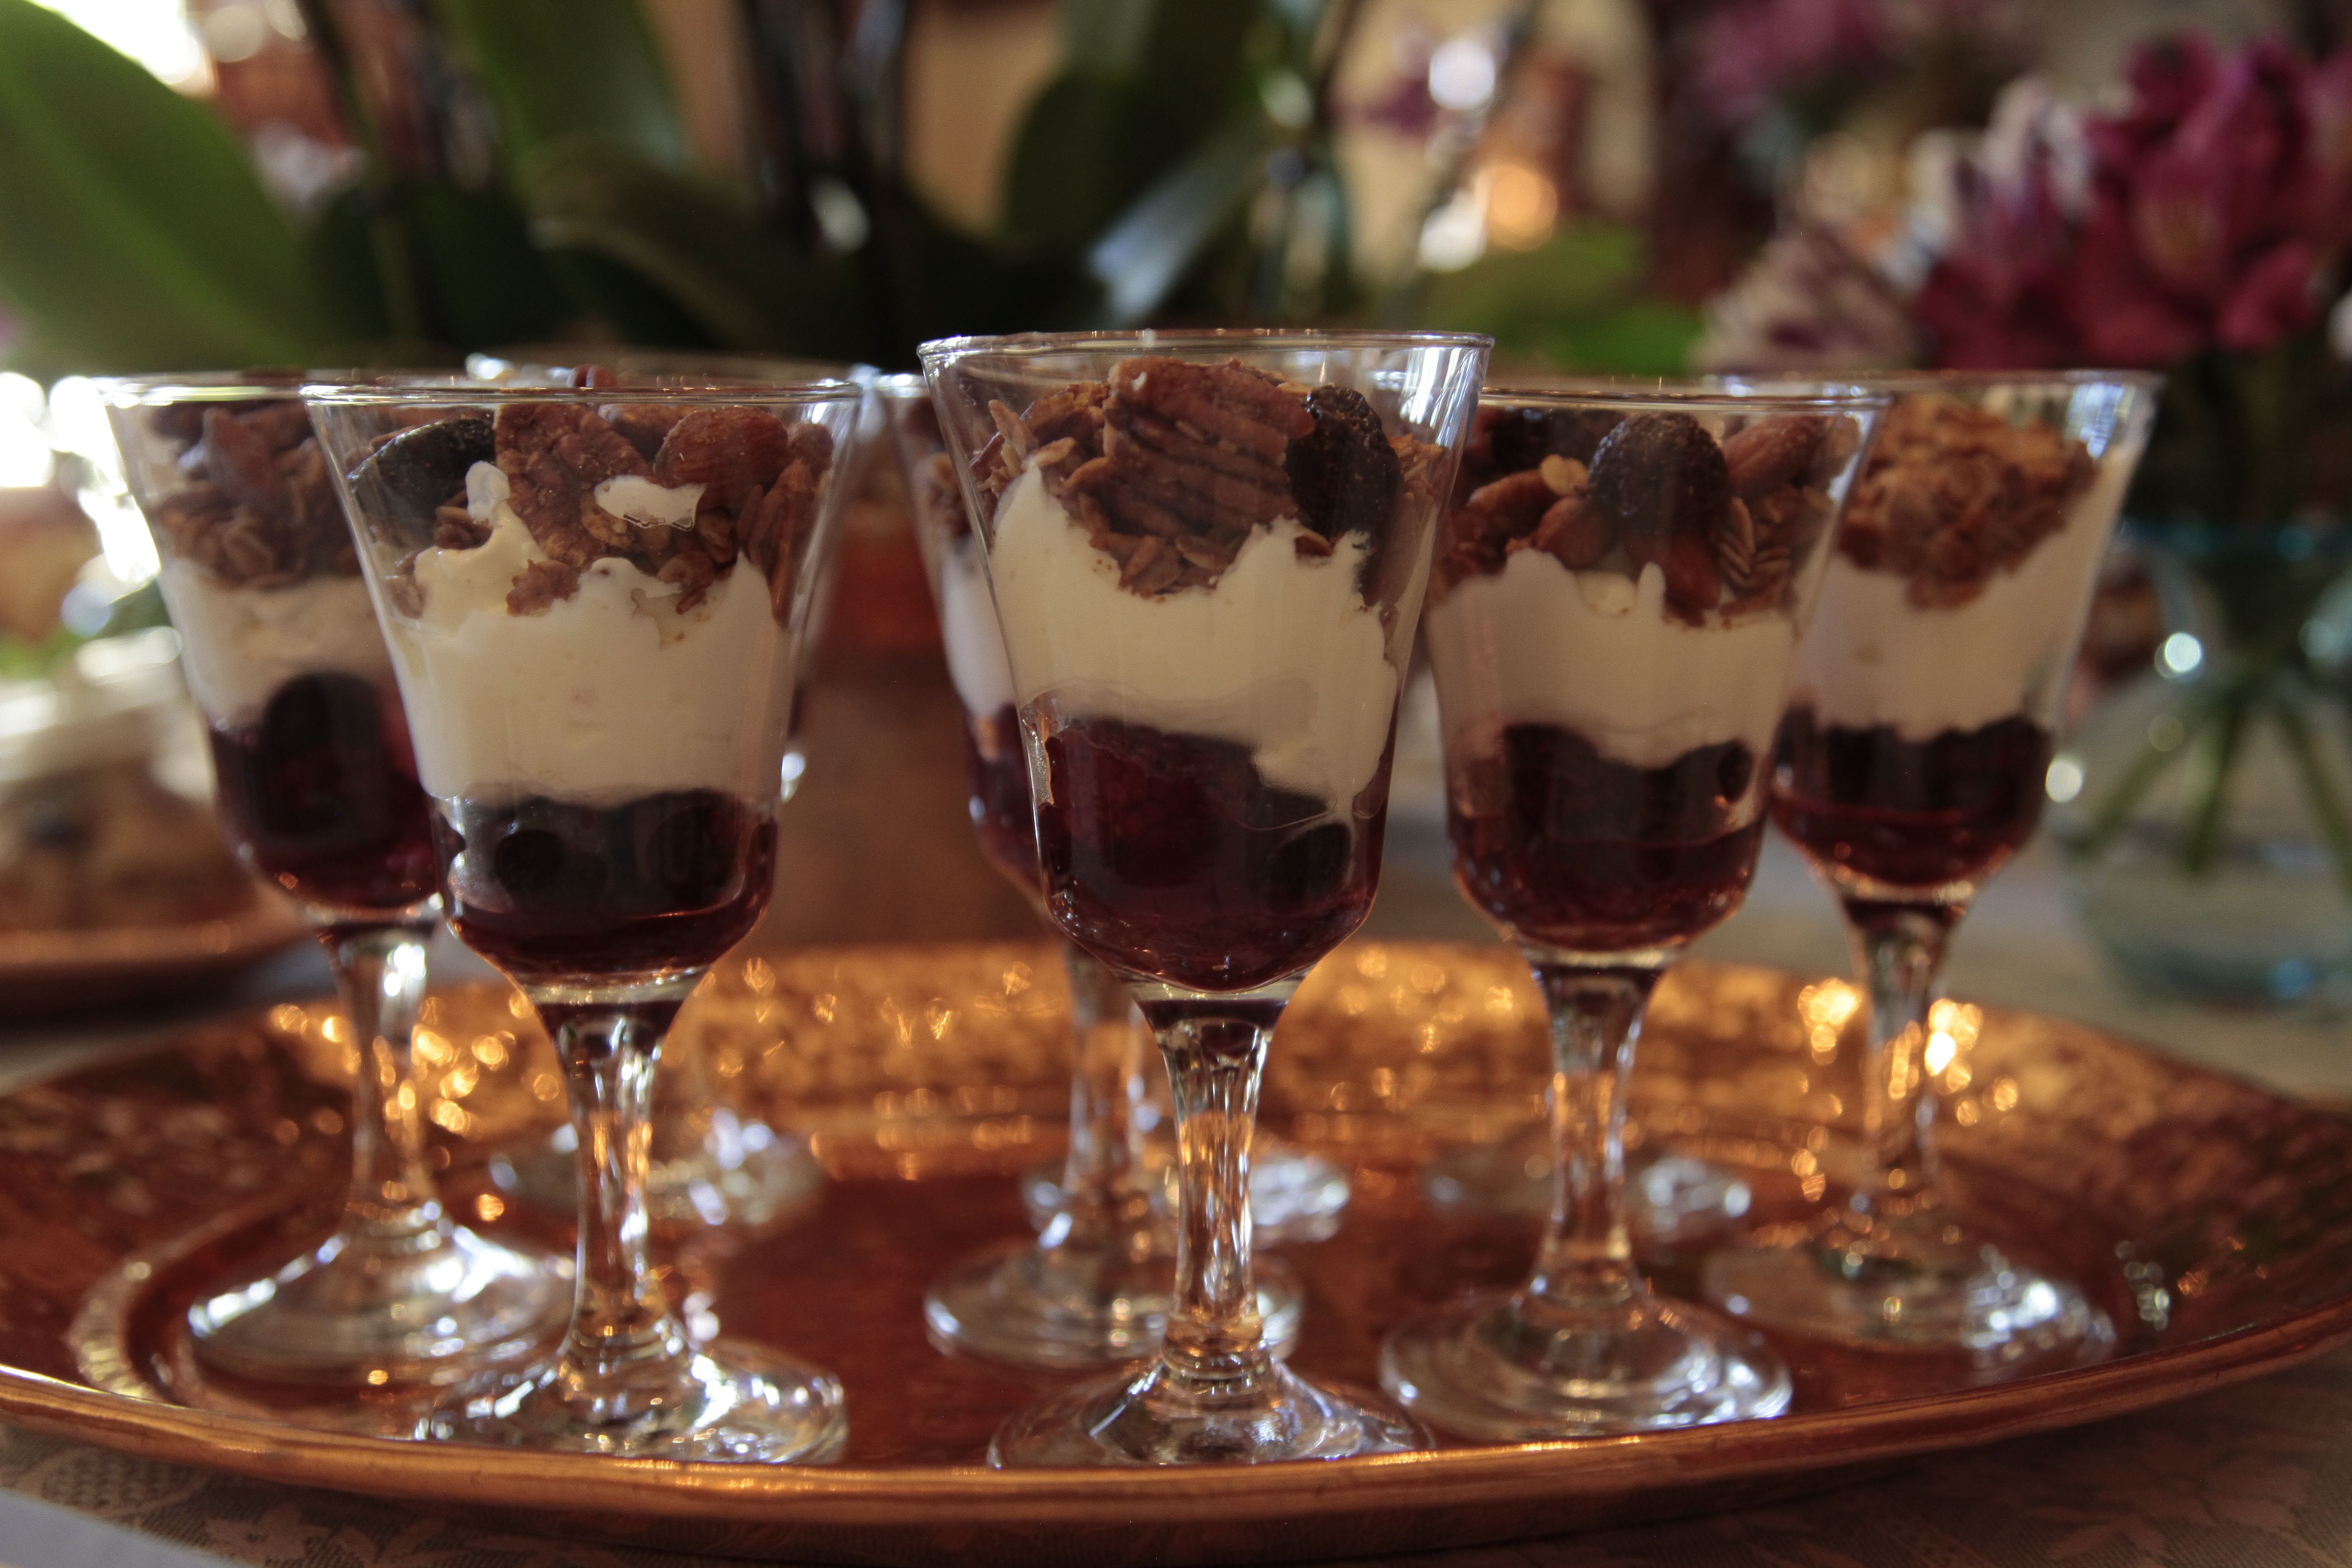
The Peach Chutney on the bottom adds the surprise of a savory component and the topping of crushed Graham crackers and chopped pistachio nuts add salt and crunch. Think of it as a Rice Pudding sundae with the Rice Pudding standing in for the ice cream, the Chutney as the fruit topping and the cookies and nuts as the final touch.

The Rice Pudding itself is easy to make but you must stir constantly and pay careful attention to it on the stove. You don’t want it coming to a boil. Also, it must be completely cool before adding the whipped cream.

It works best to make this a few days before the party and assemble just before serving. If you run out of time, or the Peach Chutney is a bit too adventurous for you, just cut up some fresh ripe mango or other fresh fruit, put that on the bottom and enjoy.

CARDAMOM RICE PUDDING WITH PEACH CHUTNEY

EVENT: 2nd Annual Apps & Alcohol

SERVES: 8 people

Ingredients

For the Pudding:

1/3 cup golden raisins

1/2 cup Amaretto liqueur

4 cups whole milk

1/2 cup basmati rice

1/4 teaspoon cinnamon

1/2 teaspoon almond extract

1/2 teaspoon orange extract

1/4 teaspoon ground cardamom

1 cinnamon stick

Pinch of salt

3/4 cup heavy whipping cream

For the Peach Chutney:

5 ripe peaches

2 tablespoons fresh lemon juice

1/2 cup Amaretto liqueur

1/4 cup light brown sugar

1 teaspoon finely minced fresh ginger

1 clove garlic minced

1/4 teaspoon cinnamon

1/4 teaspoon ground cloves

1/4 teaspoon red pepper flakes

Pinch of salt

1 small onion, finely chopped

For the topping:

Freshly grated nutmeg

Salted pistachio nuts or toasted almonds, chopped

Crumbled Graham crackers or other cookie

Directions

Make the Pudding:

1. Soak the raisins in Amaretto for several hours or overnight.

2. In a medium saucepan, combine all the other pudding ingredients, except for the whipping cream.

3. Reduce the heat and simmer uncovered (approximately 30 minutes or until the rice is cooked). Stir constantly, you don’t want it to boil.

4. When the rice is cooked, drain the raisins, reserving the Amaretto liqueur, and toss them into the mixture. Let it cool completely.

5. Add 1/4 cup of the reserved Amaretto to the 3/4 cup heavy cream.

6. Whip the whipping cream until it forms stiff peaks.

7. Fold the whipped cream into the cold rice pudding just until combined.

8. Put into a bowl and cover with plastic food wrap. Chill.

Make the Peach Chutney:

1. Cut a small X in each peach and put peaches in a pan of simmering water for 1-2 minutes. Remove from water and run under cold water.

2. The peach skins should easily come off.

3. Dice the peaches.

4. In a medium saucepan, combine lemon juice, Amaretto, brown sugar, ginger, garlic, cinnamon, ground cloves, red pepper flakes and salt.

5. Simmer over low heat until sugar completely dissolves and continue cooking over low heat approximately 5 minutes.

6. Reserve some of the diced peaches (1/4 cup) for the top.

7. Add the rest of peaches and onions and continue cooking for approximately 20 minutes. The peaches will turn dark and become very tender. Let Chutney cool completely and store in an airtight container in the refrigerator.

To serve:

1. Place a small amount of Chutney or chopped fruit (if using) into the bottom of glass. Top with a few generous tablespoons of Rice Pudding.

2. Using a grater, shave fresh nutmeg over the top. Sprinkle with Graham or cookie crumbs. Top with chopped salted pistachio nuts.

November 5, 2015
At Home with Friends

2 comments

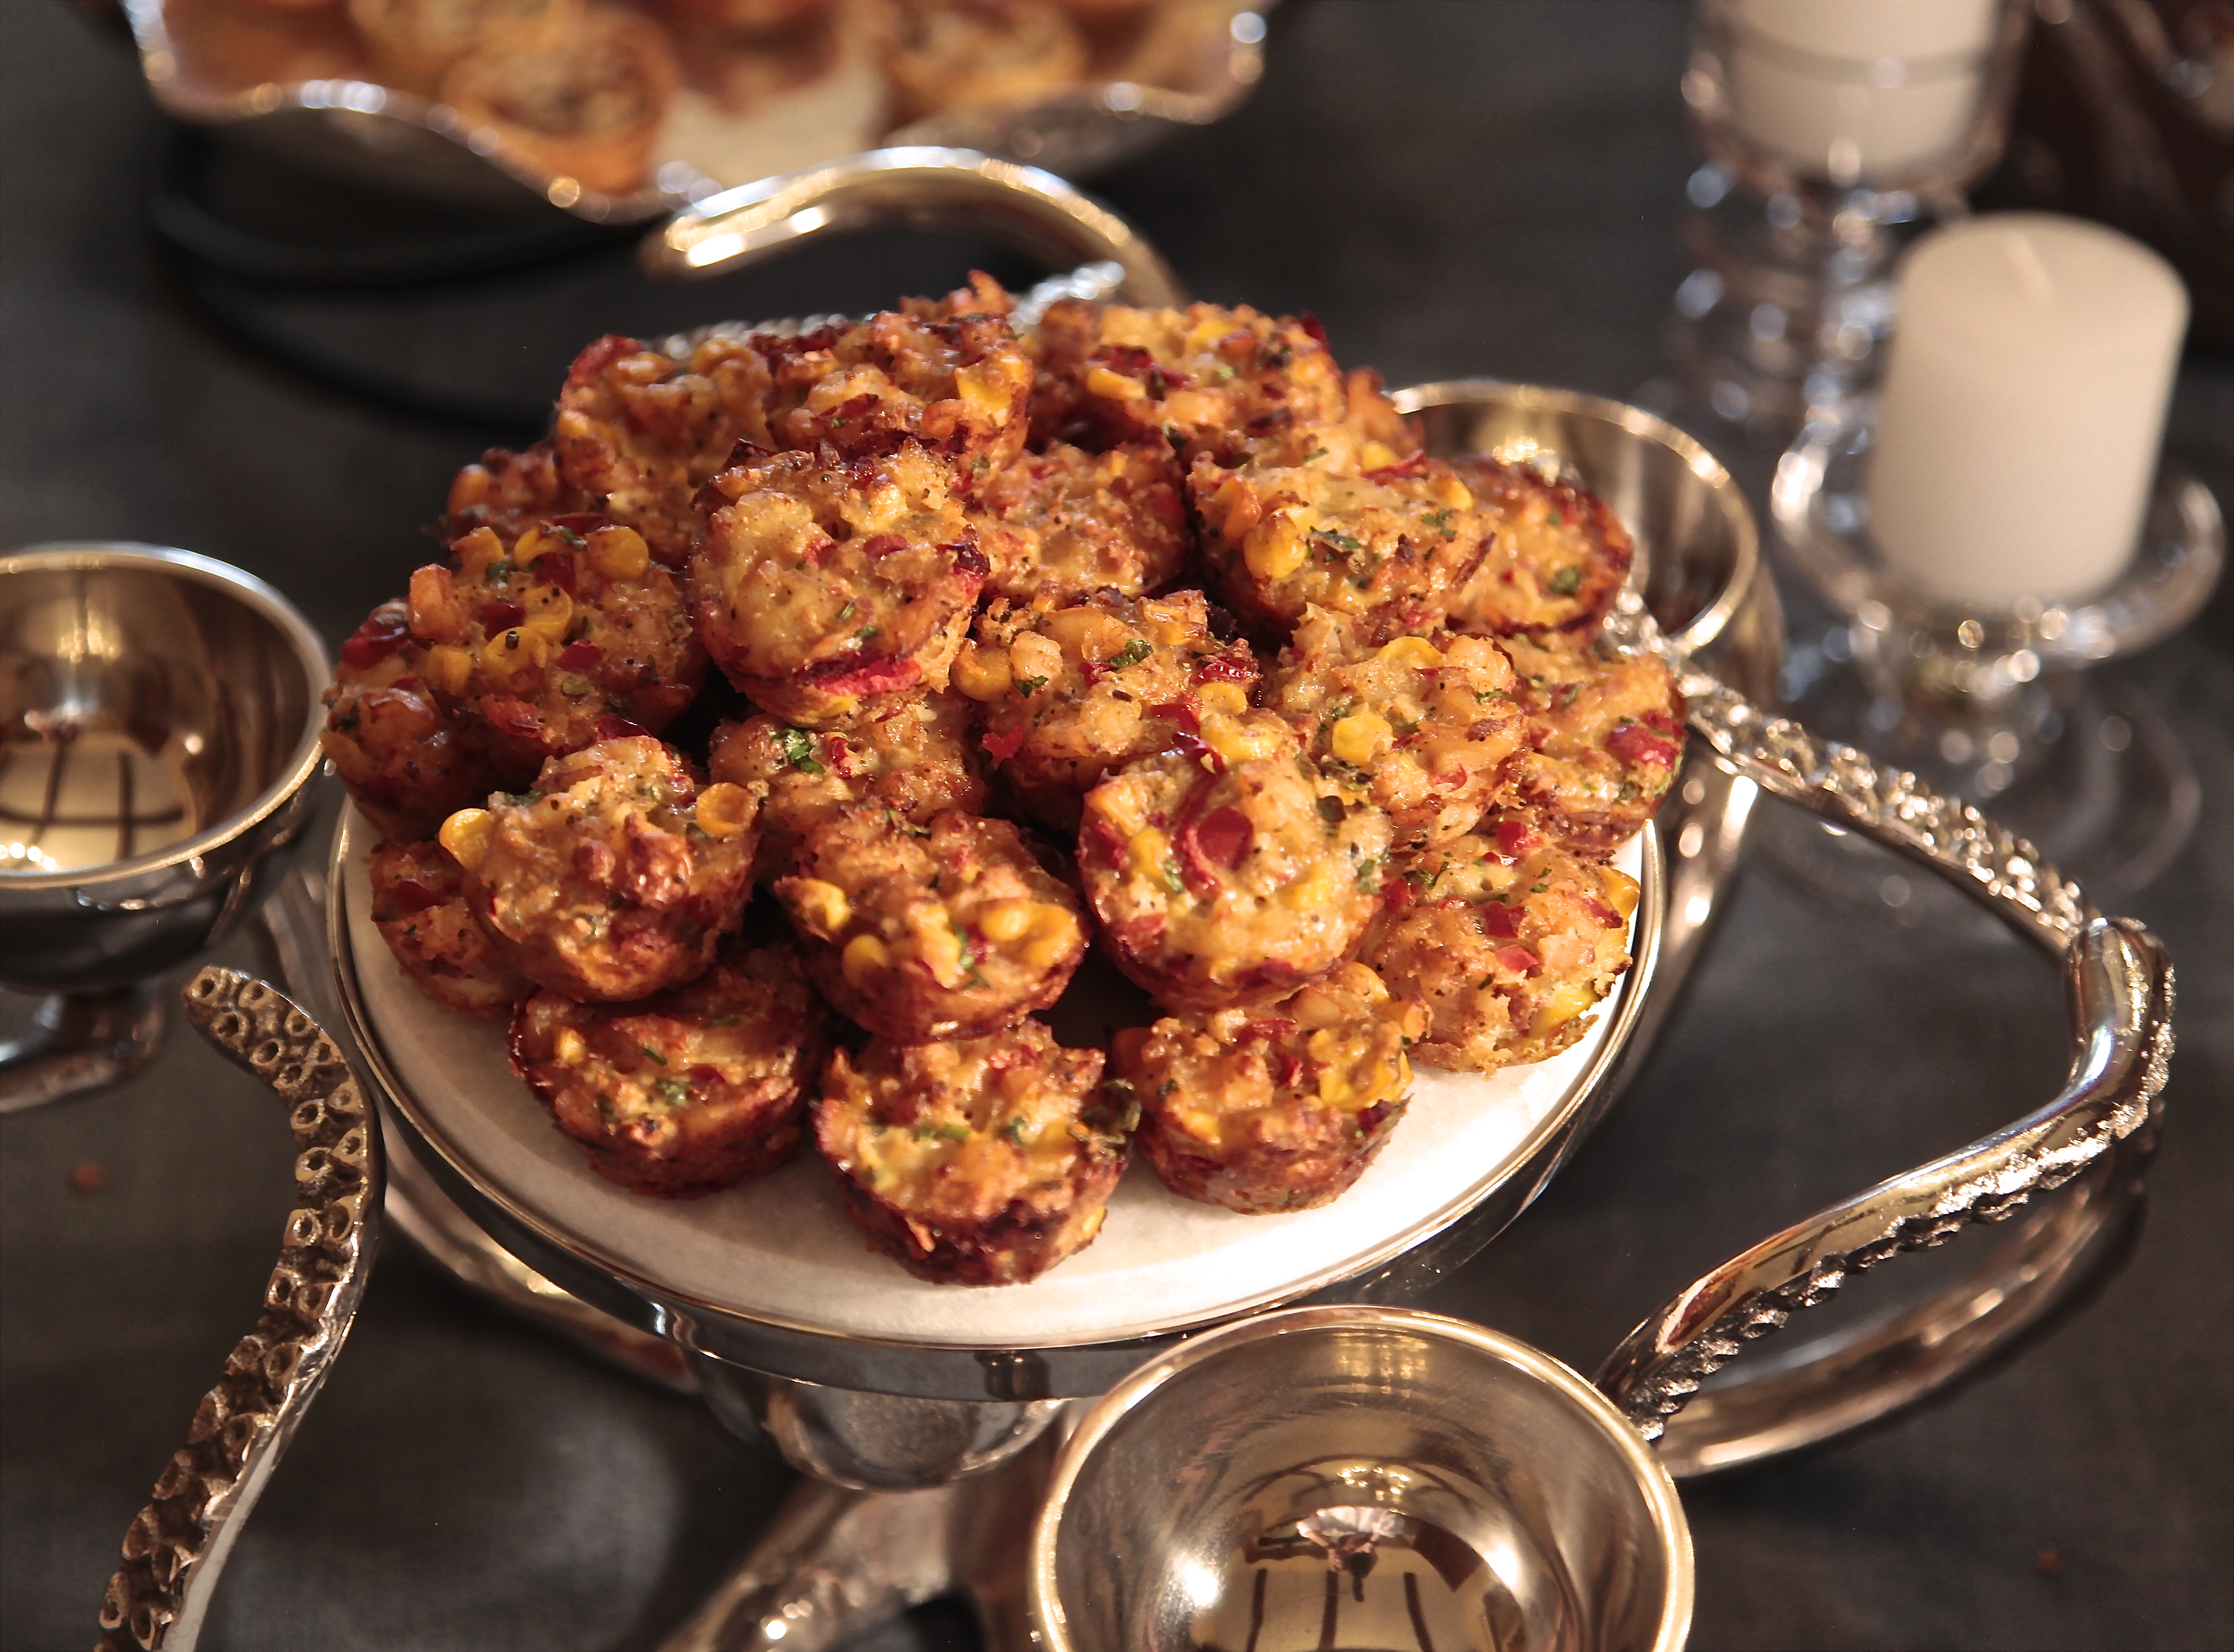
Shrimp & Corn Cakes with Sauces

I love crab cakes but I wanted to make something different for this party. So this is my riff on a crab cake. This is as enticing but uses wild shrimp, corn and gluten free crackers, so my friends with true gluten intolerance could enjoy them.

Also, usually crab cakes are pan seared so they are fairly time consuming when making a large quantify. These are baked in mini muffin pans so they are less labor intensive.

I got rid of the gluten, simplified the labor and the result was sensational and even tastier than crab cakes.

I served them with different dipping sauces including an aioli, a mustard aioli and a spicy red chili garlic sauce.

As I watched my friends make their way around the buffet table, filling their plates, I saw them pop these in their mouths like bites of candy: You don’t see people do that with crab cakes.

SHRIMP & CORN CAKES WITH SAUCES

EVENT: 2nd Annual Apps & Alcohol

YIELD: 18-24 Cakes

Ingredients

1 lb wild shrimp, peeled and deveined

1 cup corn kernels (frozen or canned are fine)

2 shallots, finely minced

1/2 red bell pepper, finely chopped

1/2 – 3/4 cup crushed crackers (preferably Milton’s Gluten Free Crackers)

1/2 teaspoon ground coriander

1/4 teaspoon ground ancho pepper (optional)

Salt and pepper to taste

1 large egg, beaten

Grape seed or other neutral oil

Equipment

Non-stick mini muffin pans, sprayed with non-stick baking spray

Directions

1. Preheat oven to 350 degrees.

2. Season shrimp with coriander and ancho pepper and pan saute.

3. Chop shrimp and set aside.

4. In a food processor fitted with metal blade, process the corn slightly. Do not puree!

5. In a large bowl, combine shrimp, corn, shallots, egg and cracker crumbs. You want the mixture to hold together. If it is too wet, add more cracker crumbs, too dry — add just a bit of water.

6. Pan saute one piece to test for seasonings.

7. Add salt and pepper to taste.

8. Form small mounds and place each one in a mini muffin pan. Make them fairly full as they will not rise or change size when they bake.

9. Bake at 350 degrees 15-17 minutes. Use an offset spatula to carefully remove cakes from pan.

November 2, 2015
At Home with Friends

1 comment

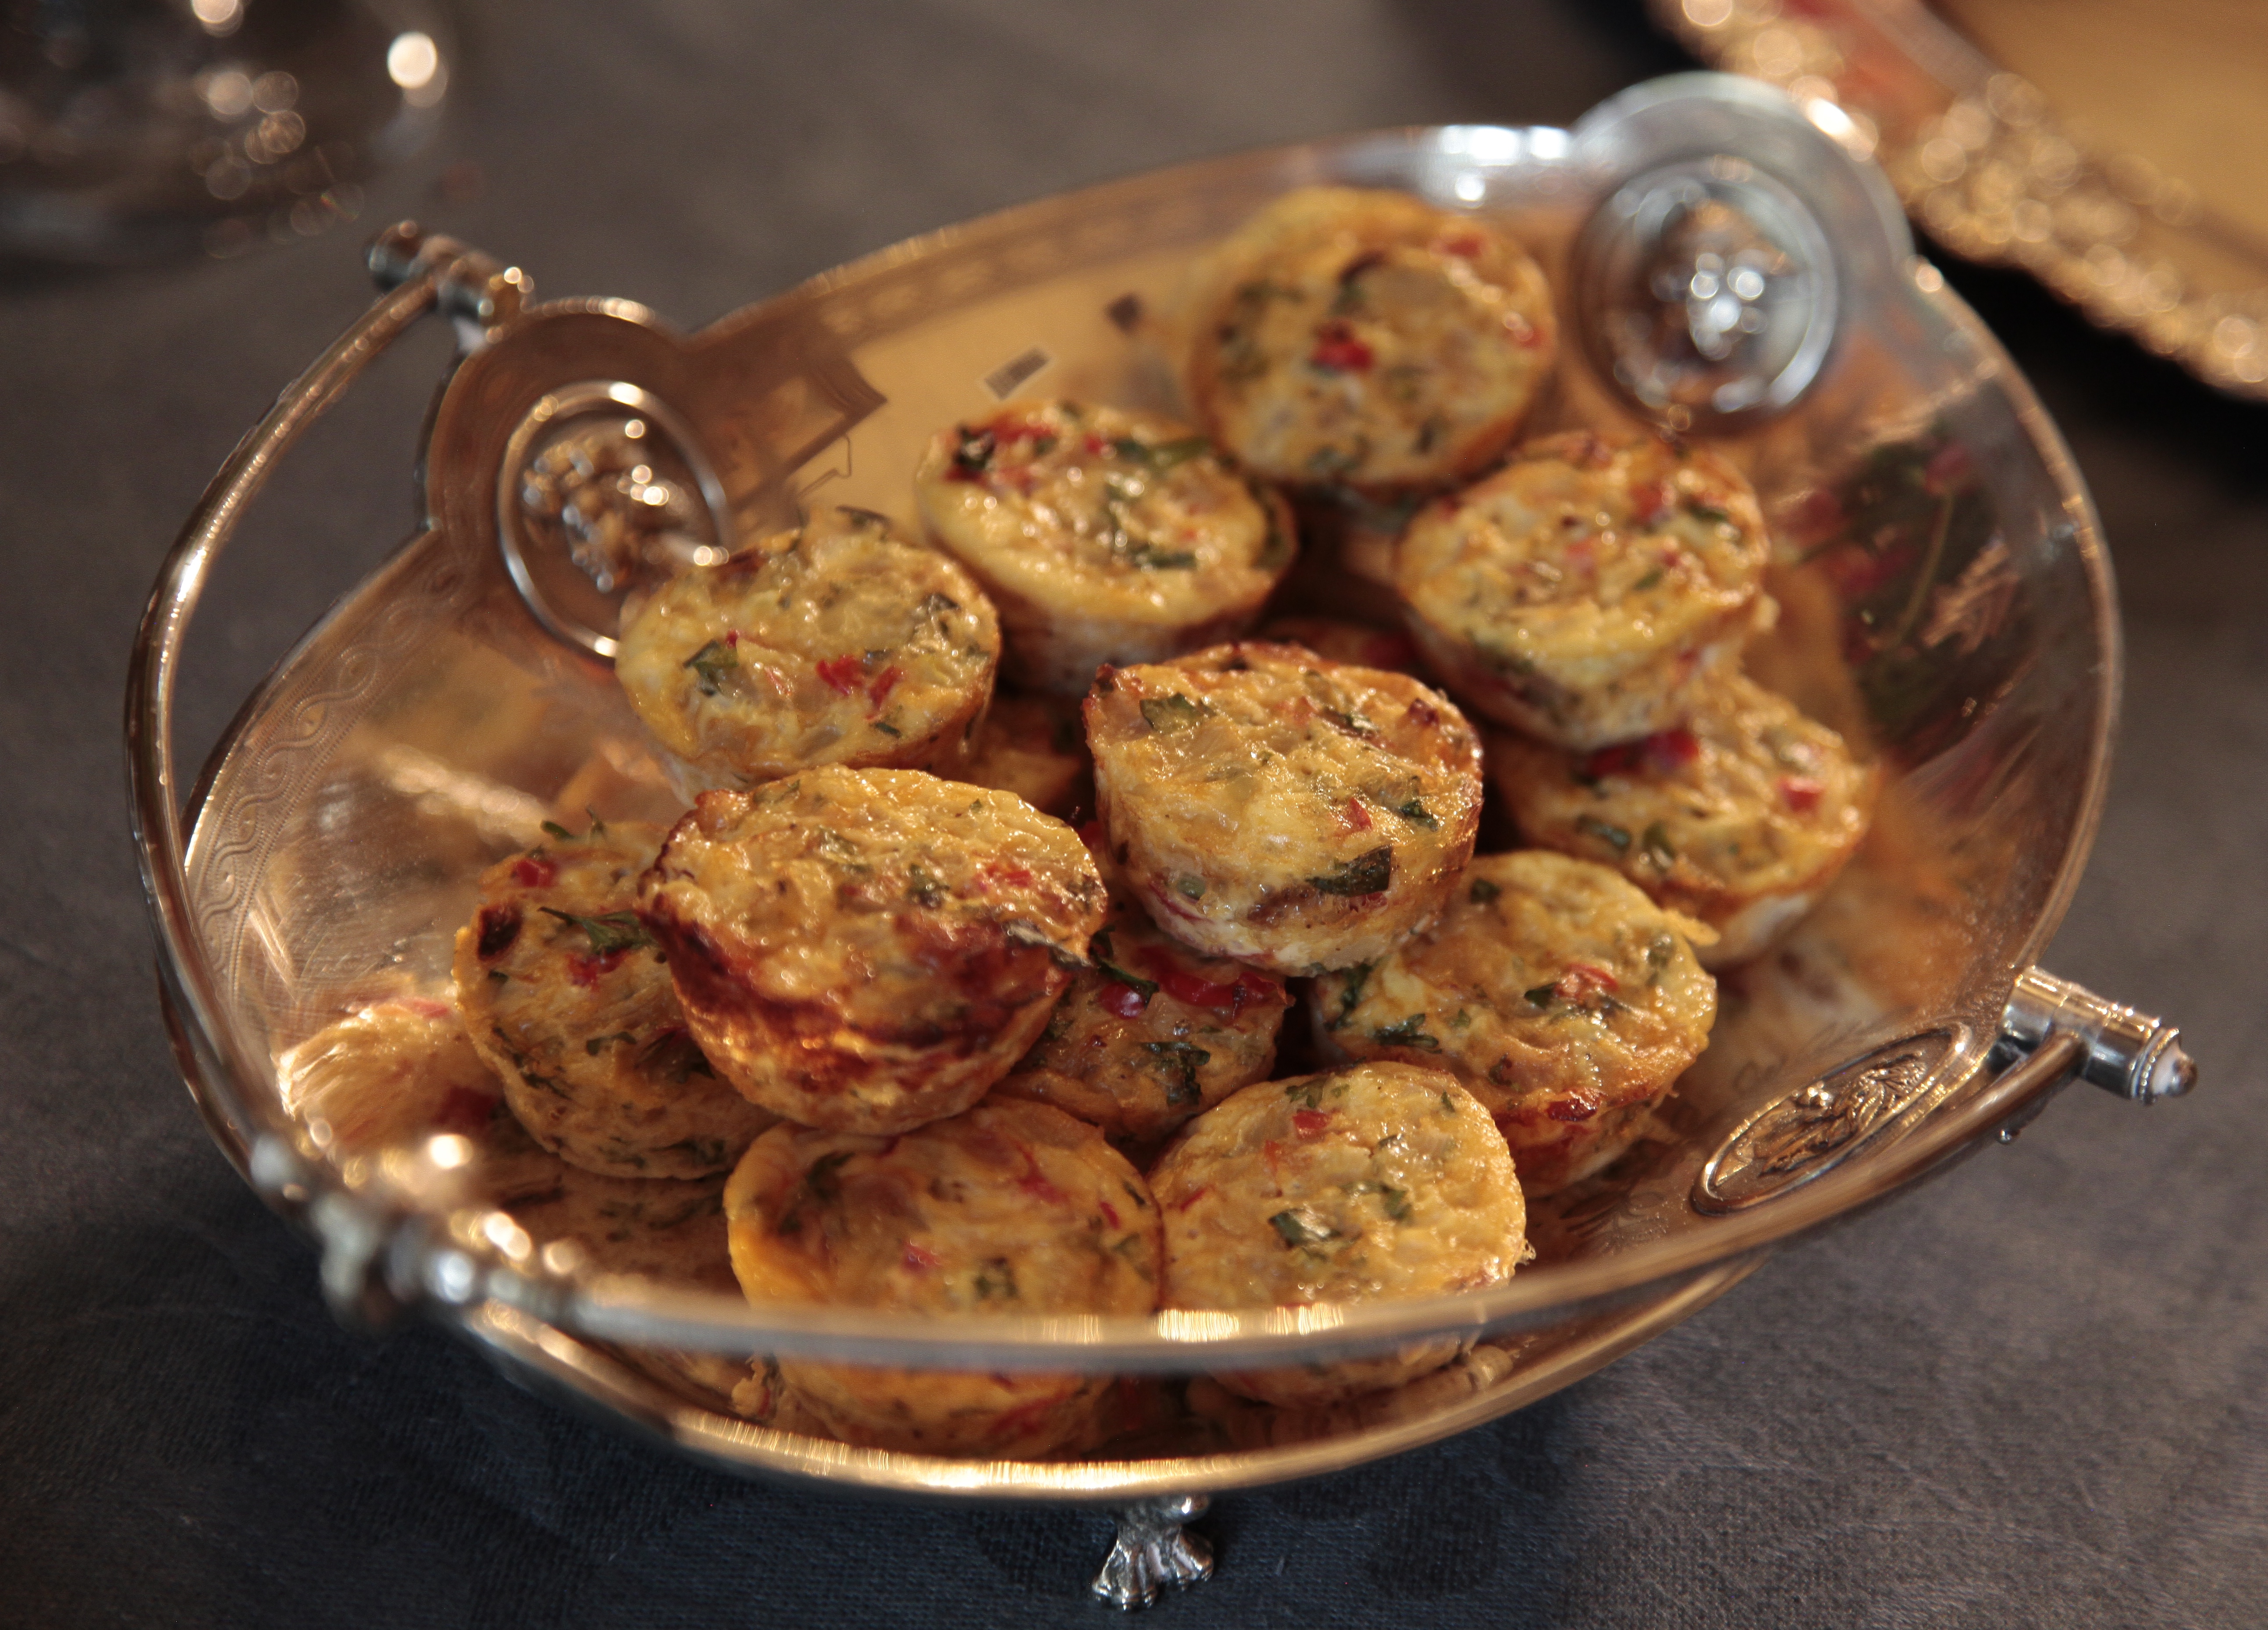
Individual Mini Veggie Frittatas

When I was growing up, eggs were strictly for breakfast. Occasionally, they were hard boiled and turned into egg salad or deviled eggs. They were never considered party fare for guests.

It wasn’t until I started spending time in Italy and saw people ordering artichoke frittatas as a first course that I realized they make great appetizers. Since that experience, which was many years ago, I started making frittatas as appetizers. If I have a smaller party, I make one large frittata and cut it up. It can make a beautiful presentation cut into diamond shapes.
For Apps & Alcohol, I wanted things bite size, and I wanted to be able to keep some in a warming oven while some were out on the buffet. The mini muffin pans were the perfect solution. You need to cut your vegetables smaller than you might when making a large frittata. But other than that, it’s pretty simple.

Also, while mine were vegetarian, you could easily make this recipe, divide it in half and add diced ham or crumbled bacon to half of the batter. One recipe, two different flavor profiles. And it happens to be gluten free!

It’s really important to figure out how much frittata batter each cup of your muffin pan holds. Mine hold 1 tablespoon each, which is why I have a yield of 44-48 mini frittatas. If your muffin pans hold more or less, the yield will change and you will have to increase the baking time for larger muffin cups.

These are puffed up when they come out of the oven and then fall slightly as they cool. Don’t worry, this is what is supposed to happen.

I know a lot of people think “eggs for dinner”. It’s time to start thinking about eggs as party fare.

P.S.: If you don’t have non-stick mini muffin pans, buy some immediately! You’ll use them over and over and probably send me a thank you email.

INDIVIDUAL MINI VEGGIE FRITTATAS

EVENT: 2nd Annual Apps & Alcohol

YIELDS: 44-48 Mini Muffin Size Frittatas

Ingredients

8 large eggs

1/4 cup whole milk

1/2 teaspoon ground black pepper

1/4 teaspoon kosher salt

1/2 cup grated Parmesan cheese

1/2 cup grated while cheddar or Swiss cheese

1 medium zucchini, finely chopped

1 red bell pepper, finely chopped

2 scallions, finely chopped

Non-stick spray

Equipment

Non-stick mini muffin pans

Directions

1. Preheat oven to 350 degrees.

2. Spray mini muffin pans with non-stick spray.

3. Whisk together the eggs, milk, pepper and salt in a bowl to blend.

4. Stir in the vegetables and cheeses.

5. Fill prepared muffin cups almost to the top.

6. Bake 15-17 minutes. Let cool 5 minutes and using an offset spatula remove from pans.

7. Serve immediately or serve room temperature, or place baked frittatas on a wire rack on a cookie sheet and keep warm in low oven until ready to use.

October 29, 2015
At Home with Friends

2 comments

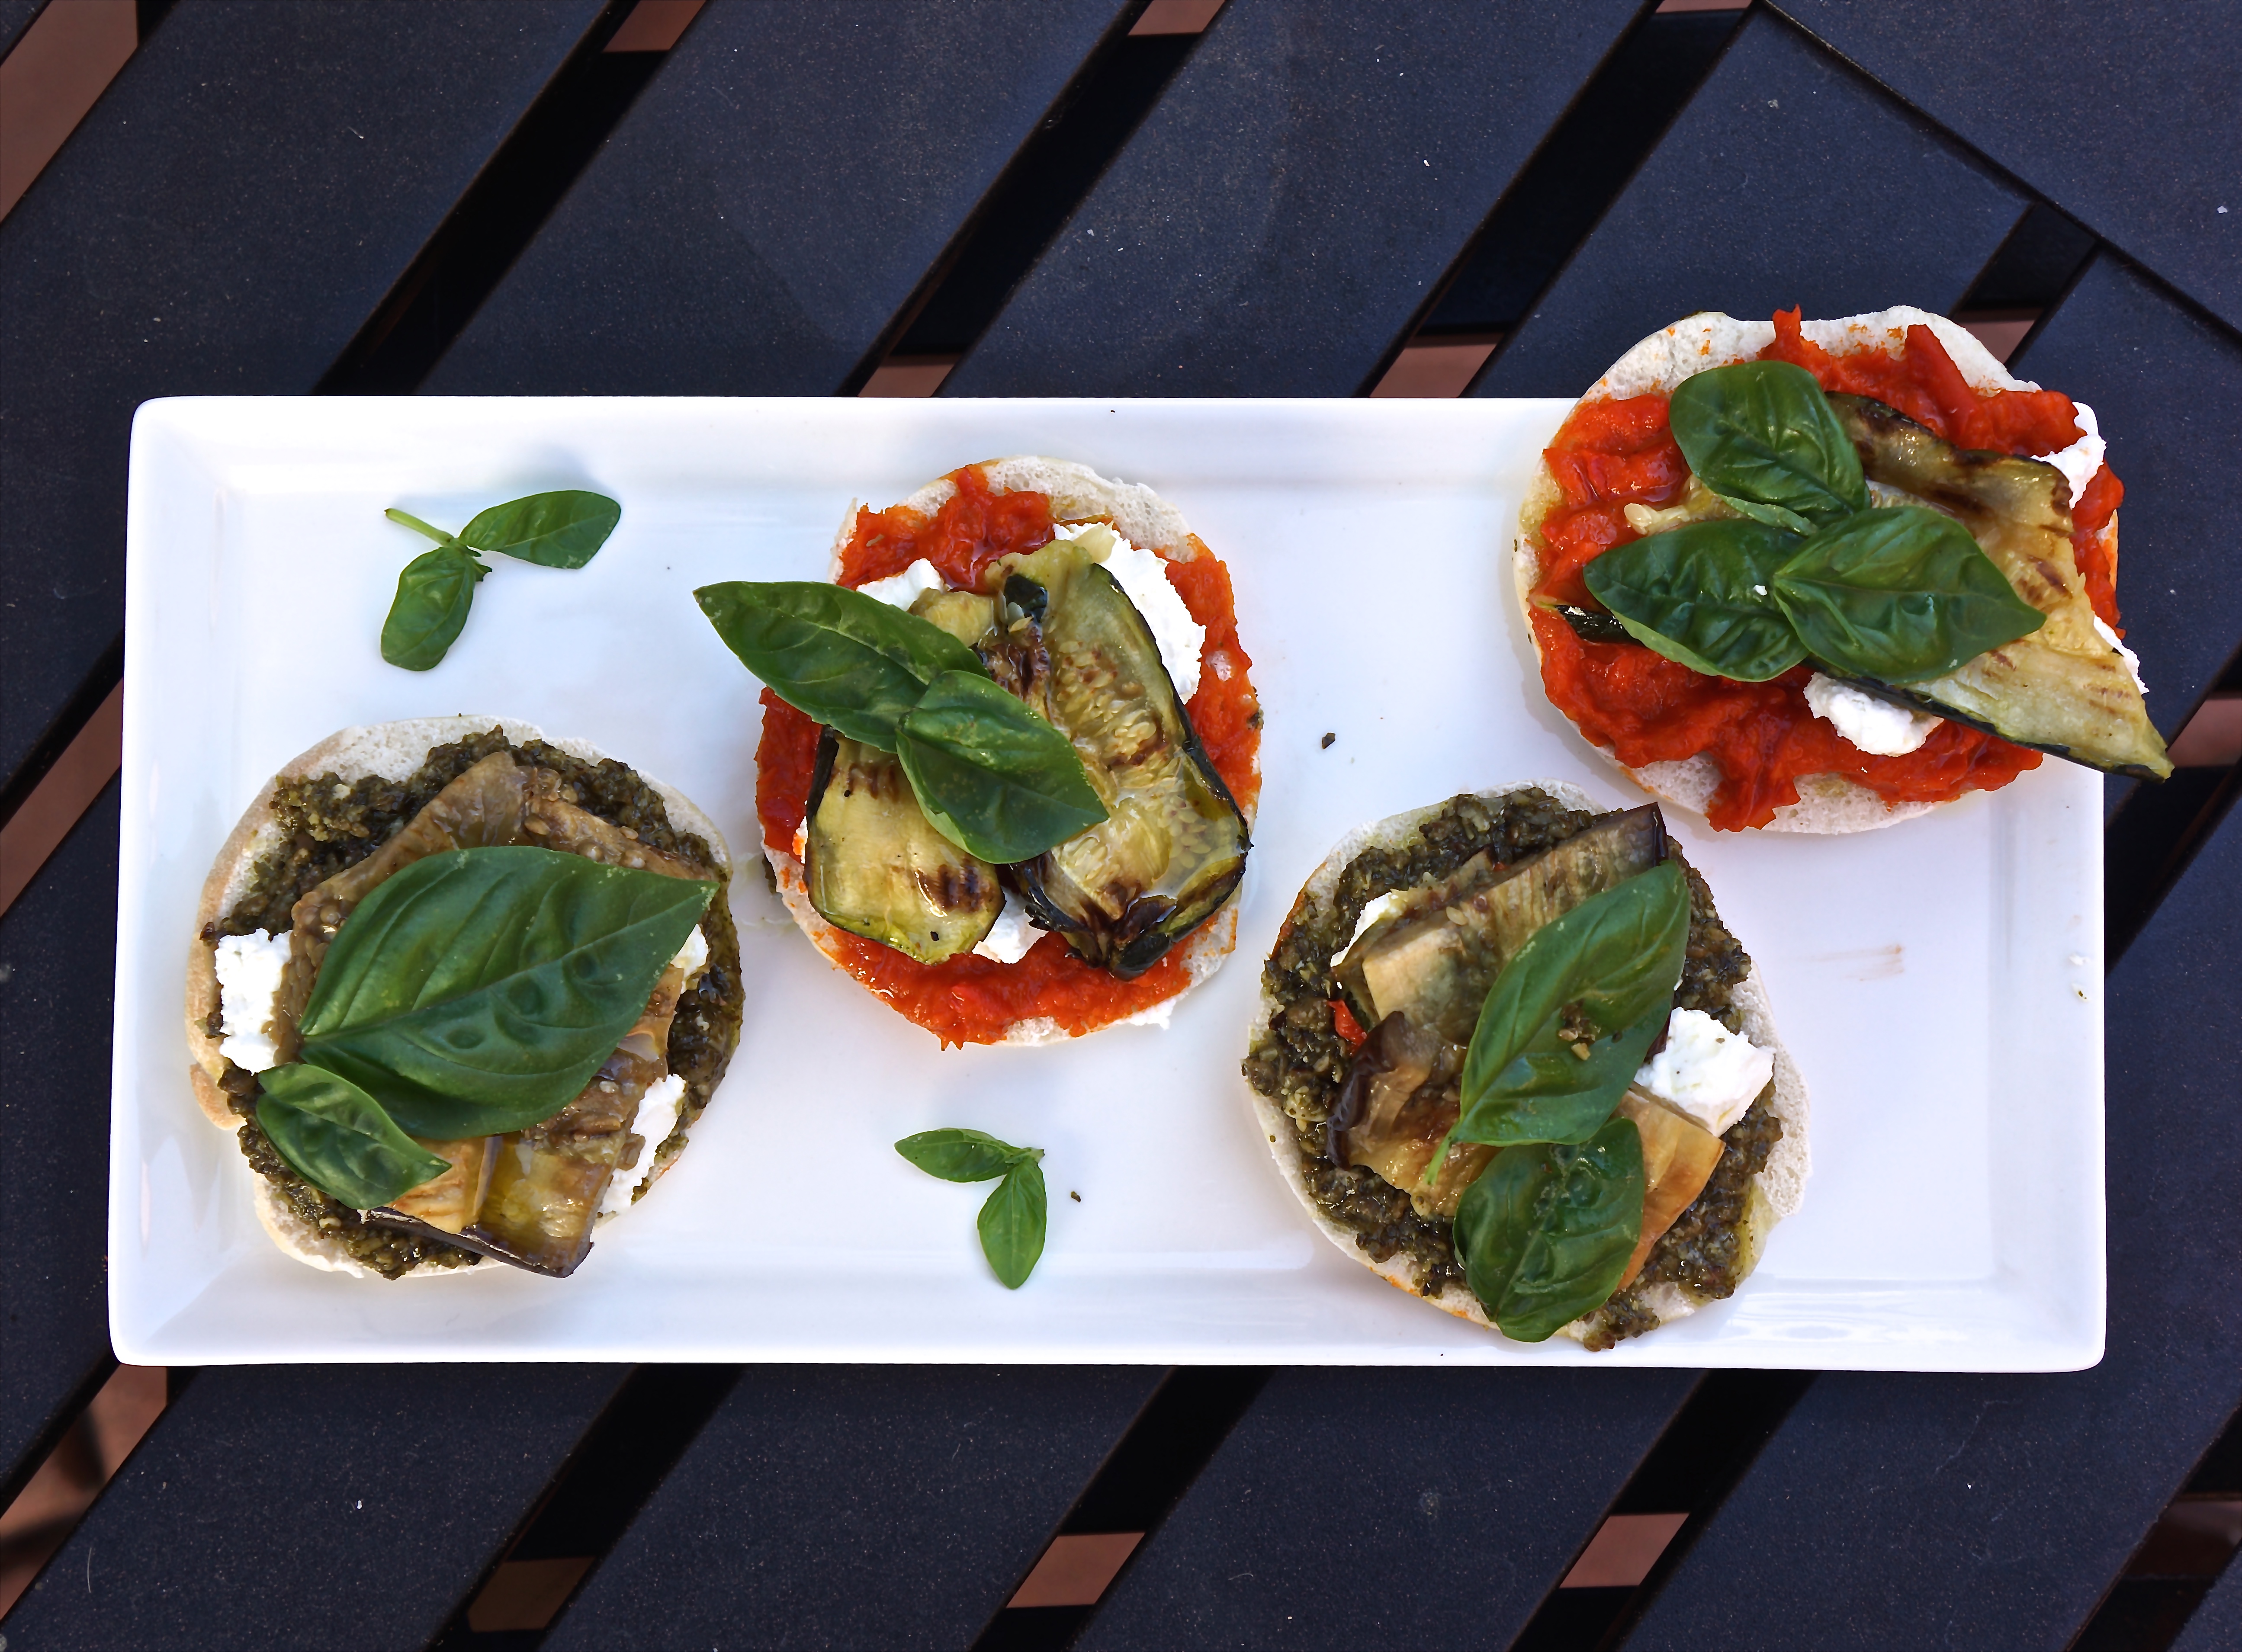
Grilled Veggie Crostini with Goat Cheese & Red Pepper Spread or Pesto

This is another recipe that you will see different variations of on my blog.

Just in case you wondered, I test recipes several times before I post them. I want to be sure they work and that my tasters rate them as totally delectable.

These are crostini composed of a vegetable spread called Ajvar (available at my Amazon Affiliate Store), pesto, goat cheese, grilled vegetables and fresh herbs from my garden.

The inspiration actually came from these appealing mini pita breads I found at my local ethnic market. I thought they would be great smeared with pesto or Ajvar spread, a layer of goat cheese and topped with grilled vegetables.

I made them for friends at a sit-in-the-kitchen dinner and they disappeared in a flash. Everyone agreed that the mini pitas made them very unique.

You can grill the vegetables a day ahead and keep them in the refrigerator until time to assemble and serve. You buy the Ajvar and can even buy readymade pesto for these.

These couldn’t be easier, except the day before the party when I went to my local ethnic to buy the pitas, they were sold out. My vision of these darling mini pitas went right out the window. Oops. What to do? I bought fresh baguettes and made them into crostini instead. Maybe not as unique but equally delectable.

For the recipe, I’m just giving you a list of ingredients. You can scale this up or down. You can even just put all the ingredients on a platter and let guests make their own if you’re short on time. If you do it this way, make up one or two pieces so your guests get the idea. Tell them it’s intentional so everyone can customize their crostini.

GRILLED VEGGIE CROSTINI WITH GOAT CHEESE & RED PEPPER SPREAD OR PESTO

EVENT: 2nd Annual Apps & Alcohol

Ingredients

Mini pita bread or baguettes sliced into 1/2 – 3/4-inch slices

Grilled zucchini

Grilled eggplant

Pesto sauce

Ajvar vegetable spread (available at my Amazon Affiliate Store)

Soft goat cheese

Fresh basil or tarragon

Directions

1. If you are lucky enough to find really good quality fresh mini pitas, slice them in half to make two flat pieces and proceed.

2. If you can’t find pitas and are using a baguette, cut into slices, place the slices on a large baking sheet and lightly toast one side in the oven. This gives the bread more stability. You don’t have to add olive oil: The Ajvar and pesto are moist enough to keep the bread from being dry.

3. With the un-toasted side up, spread half the crostini with the pesto and half with the Ajvar spread.

4. Top all the pieces with a generous amount of soft creamy goat cheese, then top with pieces of grilled zucchini or grilled eggplant.

5. Finish each piece with fresh herbs of your choice. I grow basil and tarragon, so I use these. It’s important that the herbs are really fresh if you want the perfect flavor.

October 26, 2015
At Home with Friends

3 comments

Cauliflower Fritters with Cumin & Raita

If you’re planning a party of all appetizers and alcohol, you need at least one fried appetizer. Somewhere there is a written rule about this. Alcohol and fried food are a natural combination.

But fried food doesn’t have to be greasy or heavy. You need a combination of the right batter, the correct oil and a high enough heat for a perfectly fried tidbit.

This batter is similar to a tempura batter but it’s loaded with flavors from cumin seeds, mustard seeds and dried chilies and has a gorgeous golden color from the turmeric. The taste is reminiscent of what you might get at an Indian restaurant if you ordered pakoras. That’s why I added the Raita dipping sauce.

When I first made this recipe, before the party, I used a scant 1 1/2 cup water and made a fairy thick batter. I deep fried the cauliflower and you can see from the pictures how delectable they turned out.

For the party, I added a bit more water for a thinner batter and pan fried these so they could be made in the late afternoon and kept in a warming oven. The thicker the batter, the sooner you want to serve them or they risk getting soggy.

The beauty of this recipe is that you can tweak it to your preference. Make the batter, decide on your frying method and test one piece. You can always add a bit more liquid and thin the batter. And when you’re testing one piece, also test for flavor. Does it need more salt and pepper? Do you want more crunch? Add more cumin seeds. Play with the recipe and make it your own.

If your guests say, “I didn’t know you could make Indian food,” just smile and say thanks and send me an email and tell me about it.

CAULIFLOWER FRITTERS

EVENT: 2nd Annual Apps & Alcohol

YIELDS: 10 Servings as Part of Appetizer Buffet

Ingredients

1 head of cauliflower

Sea salt

1 3/4 cup self-rising flour

2 teaspoons cumin seeds, separated into 2 portions

2 teaspoons black mustard seeds

2-3 chile de arbol

1/2 teaspoon turmeric

Fresh ground pepper

1 1/2 cups cold sparkling water or beer (add more for lighter batter)

Grape seed oil as needed depending on size of pan used

Equipment

Spice grinder or mortar and pestle

Deep fry thermometer or a few crusts of bread

Directions

Prepare the cauliflower: 

1. Trim the bottom of the stock and break the cauliflower into bite sized florets. Season with sea salt. Set aside.

Prepare the batter:

2. Place 1 teaspoon cumin seeds, mustard seeds and chile de arbol in a spice grinder and grind.

3. Place the flour in a mixing bowl and mix with ground spices, remaining 1 teaspoon whole cumin seeds and turmeric until spices are evenly distributed.

4. Add the liquid and whisk gently.

5. The consistency should be like heavy cream or lighter if you prefer less batter.

6. Season with salt and pepper.

7. Pour grape seed oil into a deep saucepan. The oil should be 2-3 inches deep.

8. Heat the oil to 350 degrees on a thermometer. But if you don’t have a thermometer, drop a piece of bread into oil. When it floats to the surface and starts to sizzle, the oil is ready. You can also pan saute in a non-stick pan with 1/2 inch of oil.

9. One at a time, dip cauliflower pieces into the batter and place them into the hot oil. Do this in batches and don’t overcrowd the pan.

10. Fry the pieces, turning them with a slotted spoon. When they are browned and crisp, remove to a baking sheet lined with paper towels to drain any excess oil.

11. Place on a wire rack on a baking sheet and keep in a 325 degree oven until ready to serve.

12. Serve with Raita dipping sauce on the side.

October 22, 2015
At Home with Friends

2 comments

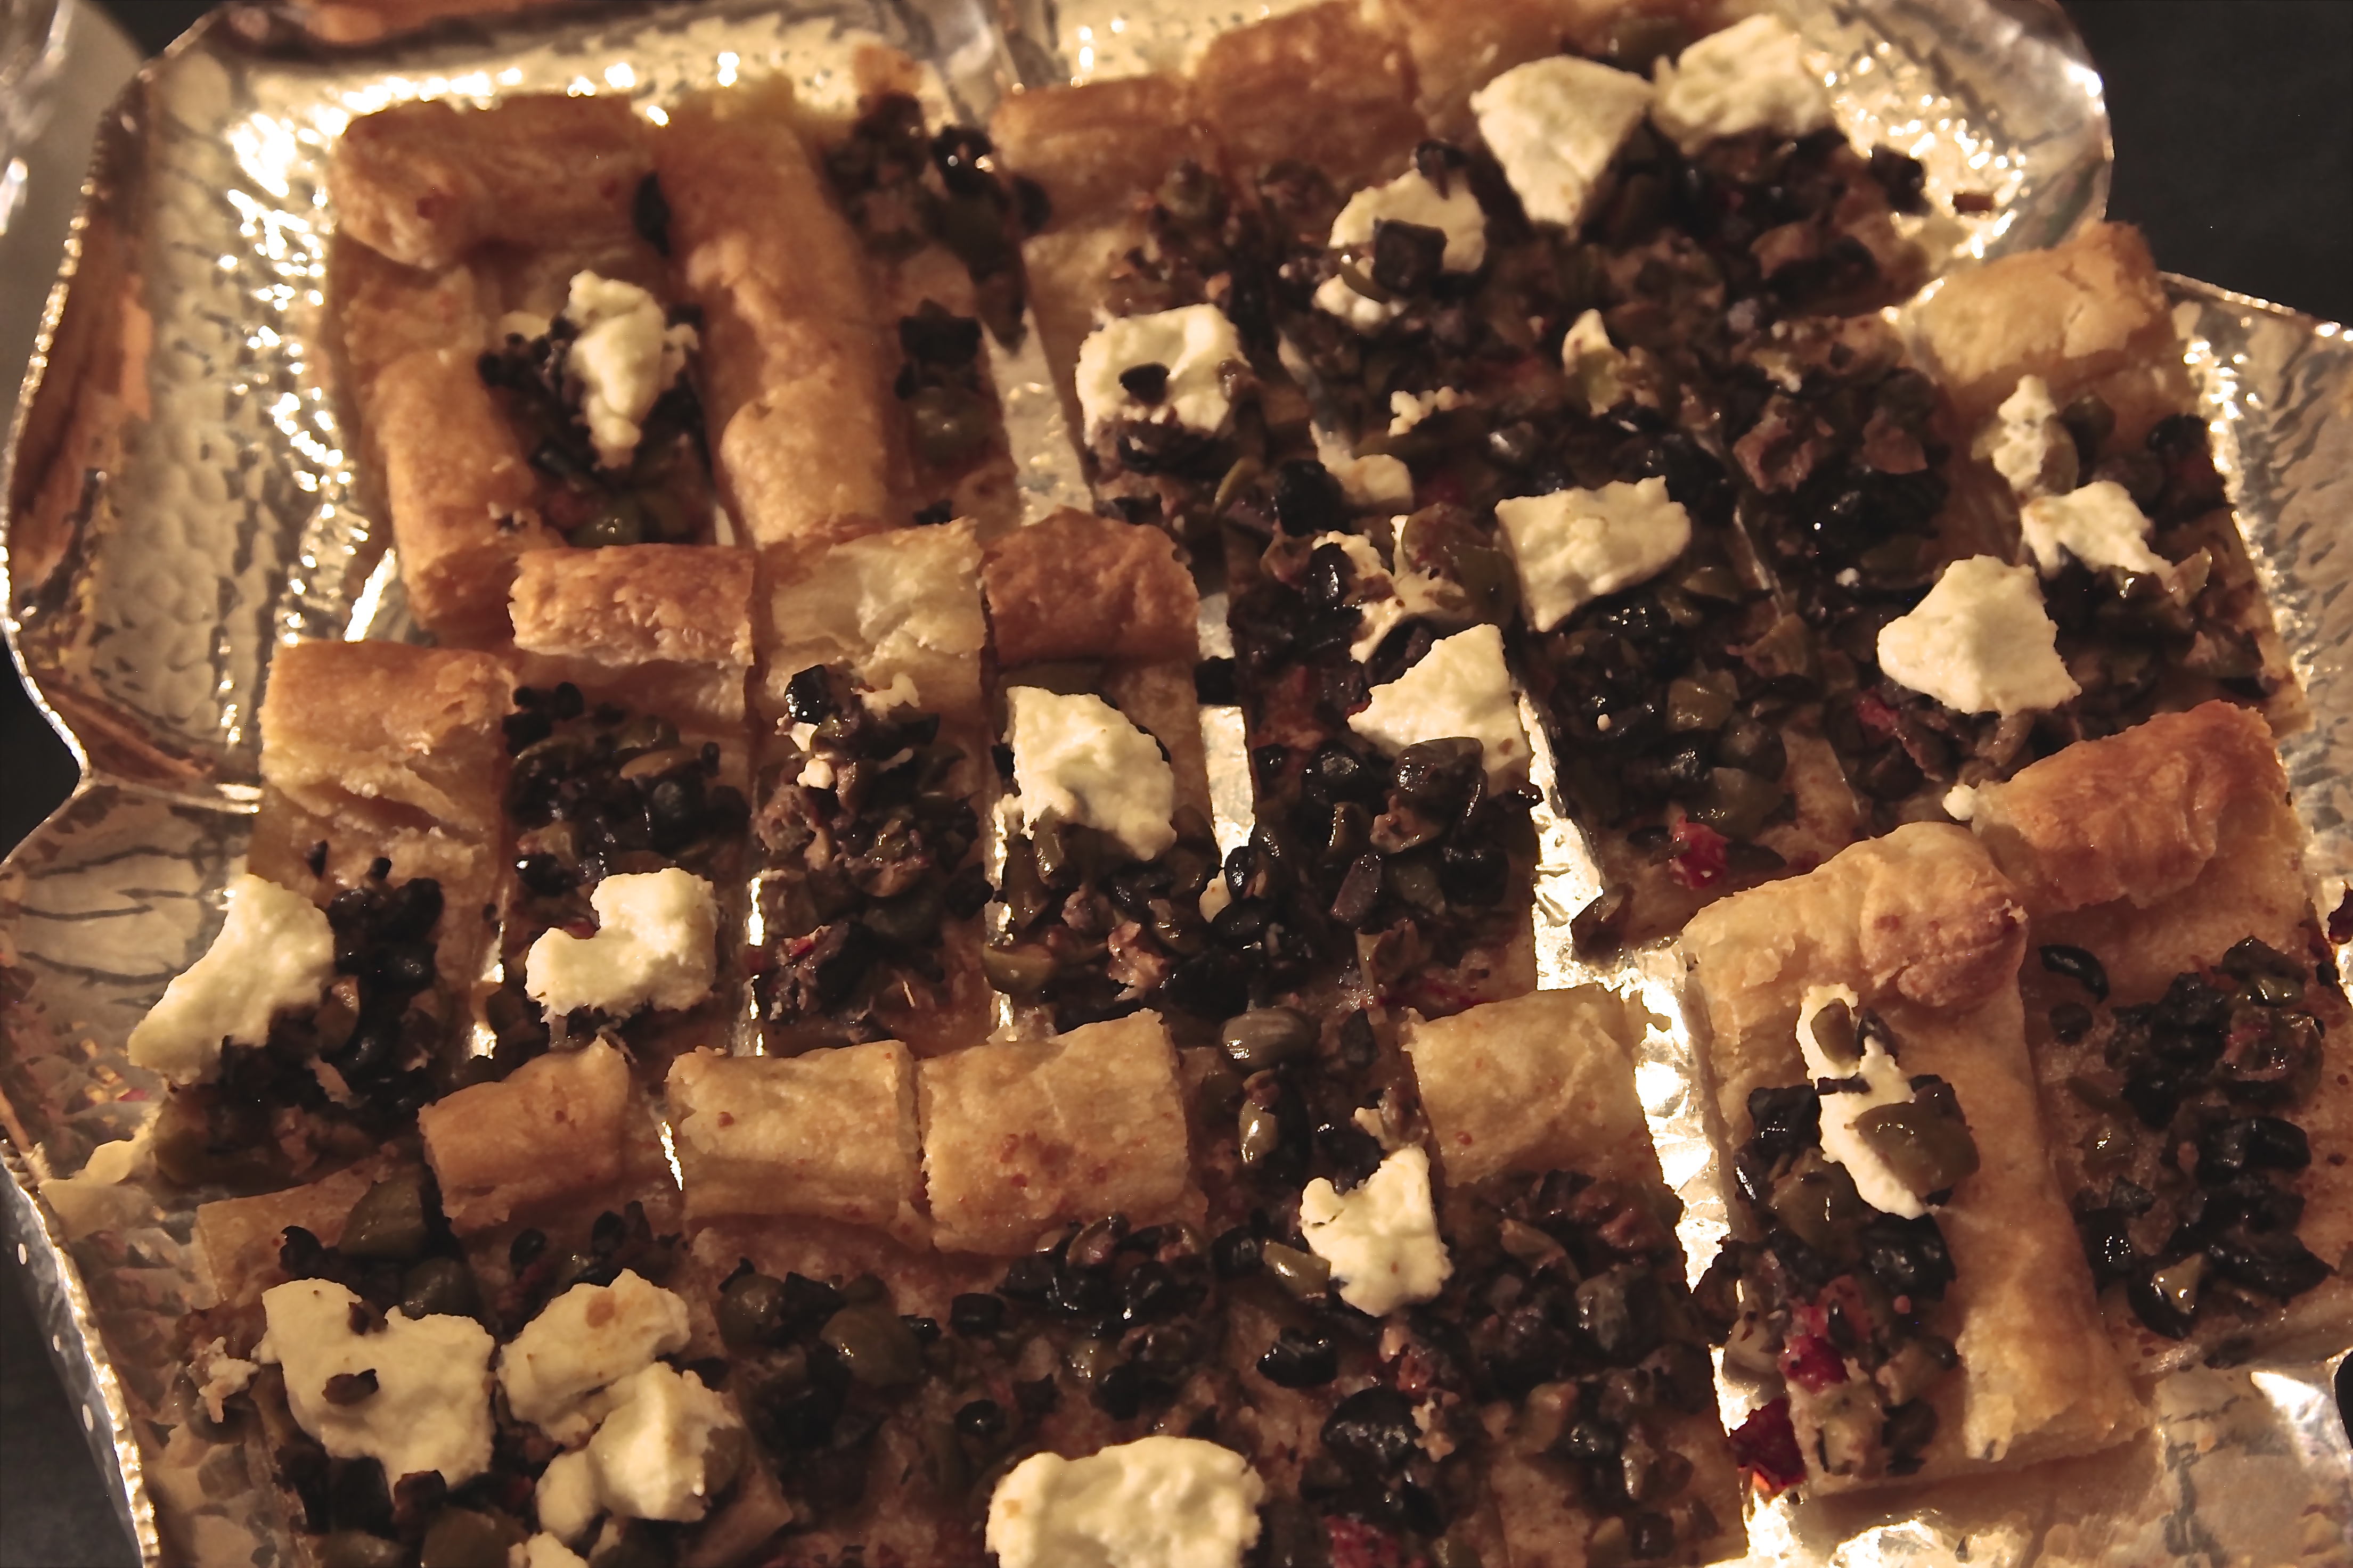
Olive Tapenade Tart with Ricotta Cheese

This is another one of those recipes that I can put together using pantry staples. I always keep different kinds of olives in my pantry, frozen puff pastry thawed in the refrigerator and whole milk ricotta or soft goat cheese in the cheese drawer.

Even though I make my own tapenade, you can even use readymade store bought tapenade in a pinch.

The saltiness of the olives, the freshness of the lemon zest, the creaminess of the ricotta or goat cheese on rich puff pastry combine for a delectable appetizer. It’s also vegetarian and looks close enough to pizza to entice picky eaters (aka kids). In fact, I think this would be a great afternoon or after school snack.

It’s simple, tasty and I guarantee that there will be no leftovers.

OLIVE TAPENADE TART WITH RICOTTA CHEESE

EVENT: 2nd Annual Apps & Alcohol

YIELDS: One 8 X 10-Inch Tart. Cut Into Small Squares as Part Appetizer Platter or Larger Squares as First Course

Ingredients

1 cup mixed olives, black and green, pitted

1 clove roasted garlic, minced

2 teaspoons lemon juice

1 teaspoon lemon zest

1 tablespoon olive oil

1 sheet frozen puff pastry, thawed

1/3 cup whole milk ricotta cheese or soft goat cheese

1 large egg

1/2 teaspoon water

All-purpose flour for rolling

Equipment

Rimmed baking sheet lined with parchment paper

Directions

1. Preheat oven to 425 degrees.

2. In bowl of a food processor, pulse the olives, garlic, lemon juice, lemon zest, and olive oil into a coarse paste. Set aside.

3. On a lightly floured surface, roll the puff pastry into a 9X12-inch rectangle.

4. Transfer pastry to a rimmed baking sheet lined with parchment paper.

5. Prick the pastry all over with a fork leaving a 1-inch border on all four sides.

6. Spread the olive tapenade evenly on the pastry leaving the 1-inch border clear. Top with dollops of the ricotta cheese. Gently fold over the 1-inch border.

7. Beat the egg with a 1/2 teaspoon water.

8. Brush border with egg wash.

9. Bake 20-25 minutes. The pastry will be puffed and deep golden on the edges.

10. Let cool and cut with pizza cutter.

October 19, 2015
At Home with Friends

4 comments

Mocha Pot de Crème with Whipped Cream

I have always loved pot de crème, crème brûlée or any type of baked custard dessert. There is something about the rich, luscious, creamy texture, combined with the intense flavor that brings a smile to my face with the first spoonful.

I tried to sort out the difference between crème brûlée and pot de crème. They are both cooked custards. While the rations of ingredients may vary, the main difference is that crème brûlée is finished with a layer of sugar that’s torched or broiled to form a hard crust. Pretty simple after all.

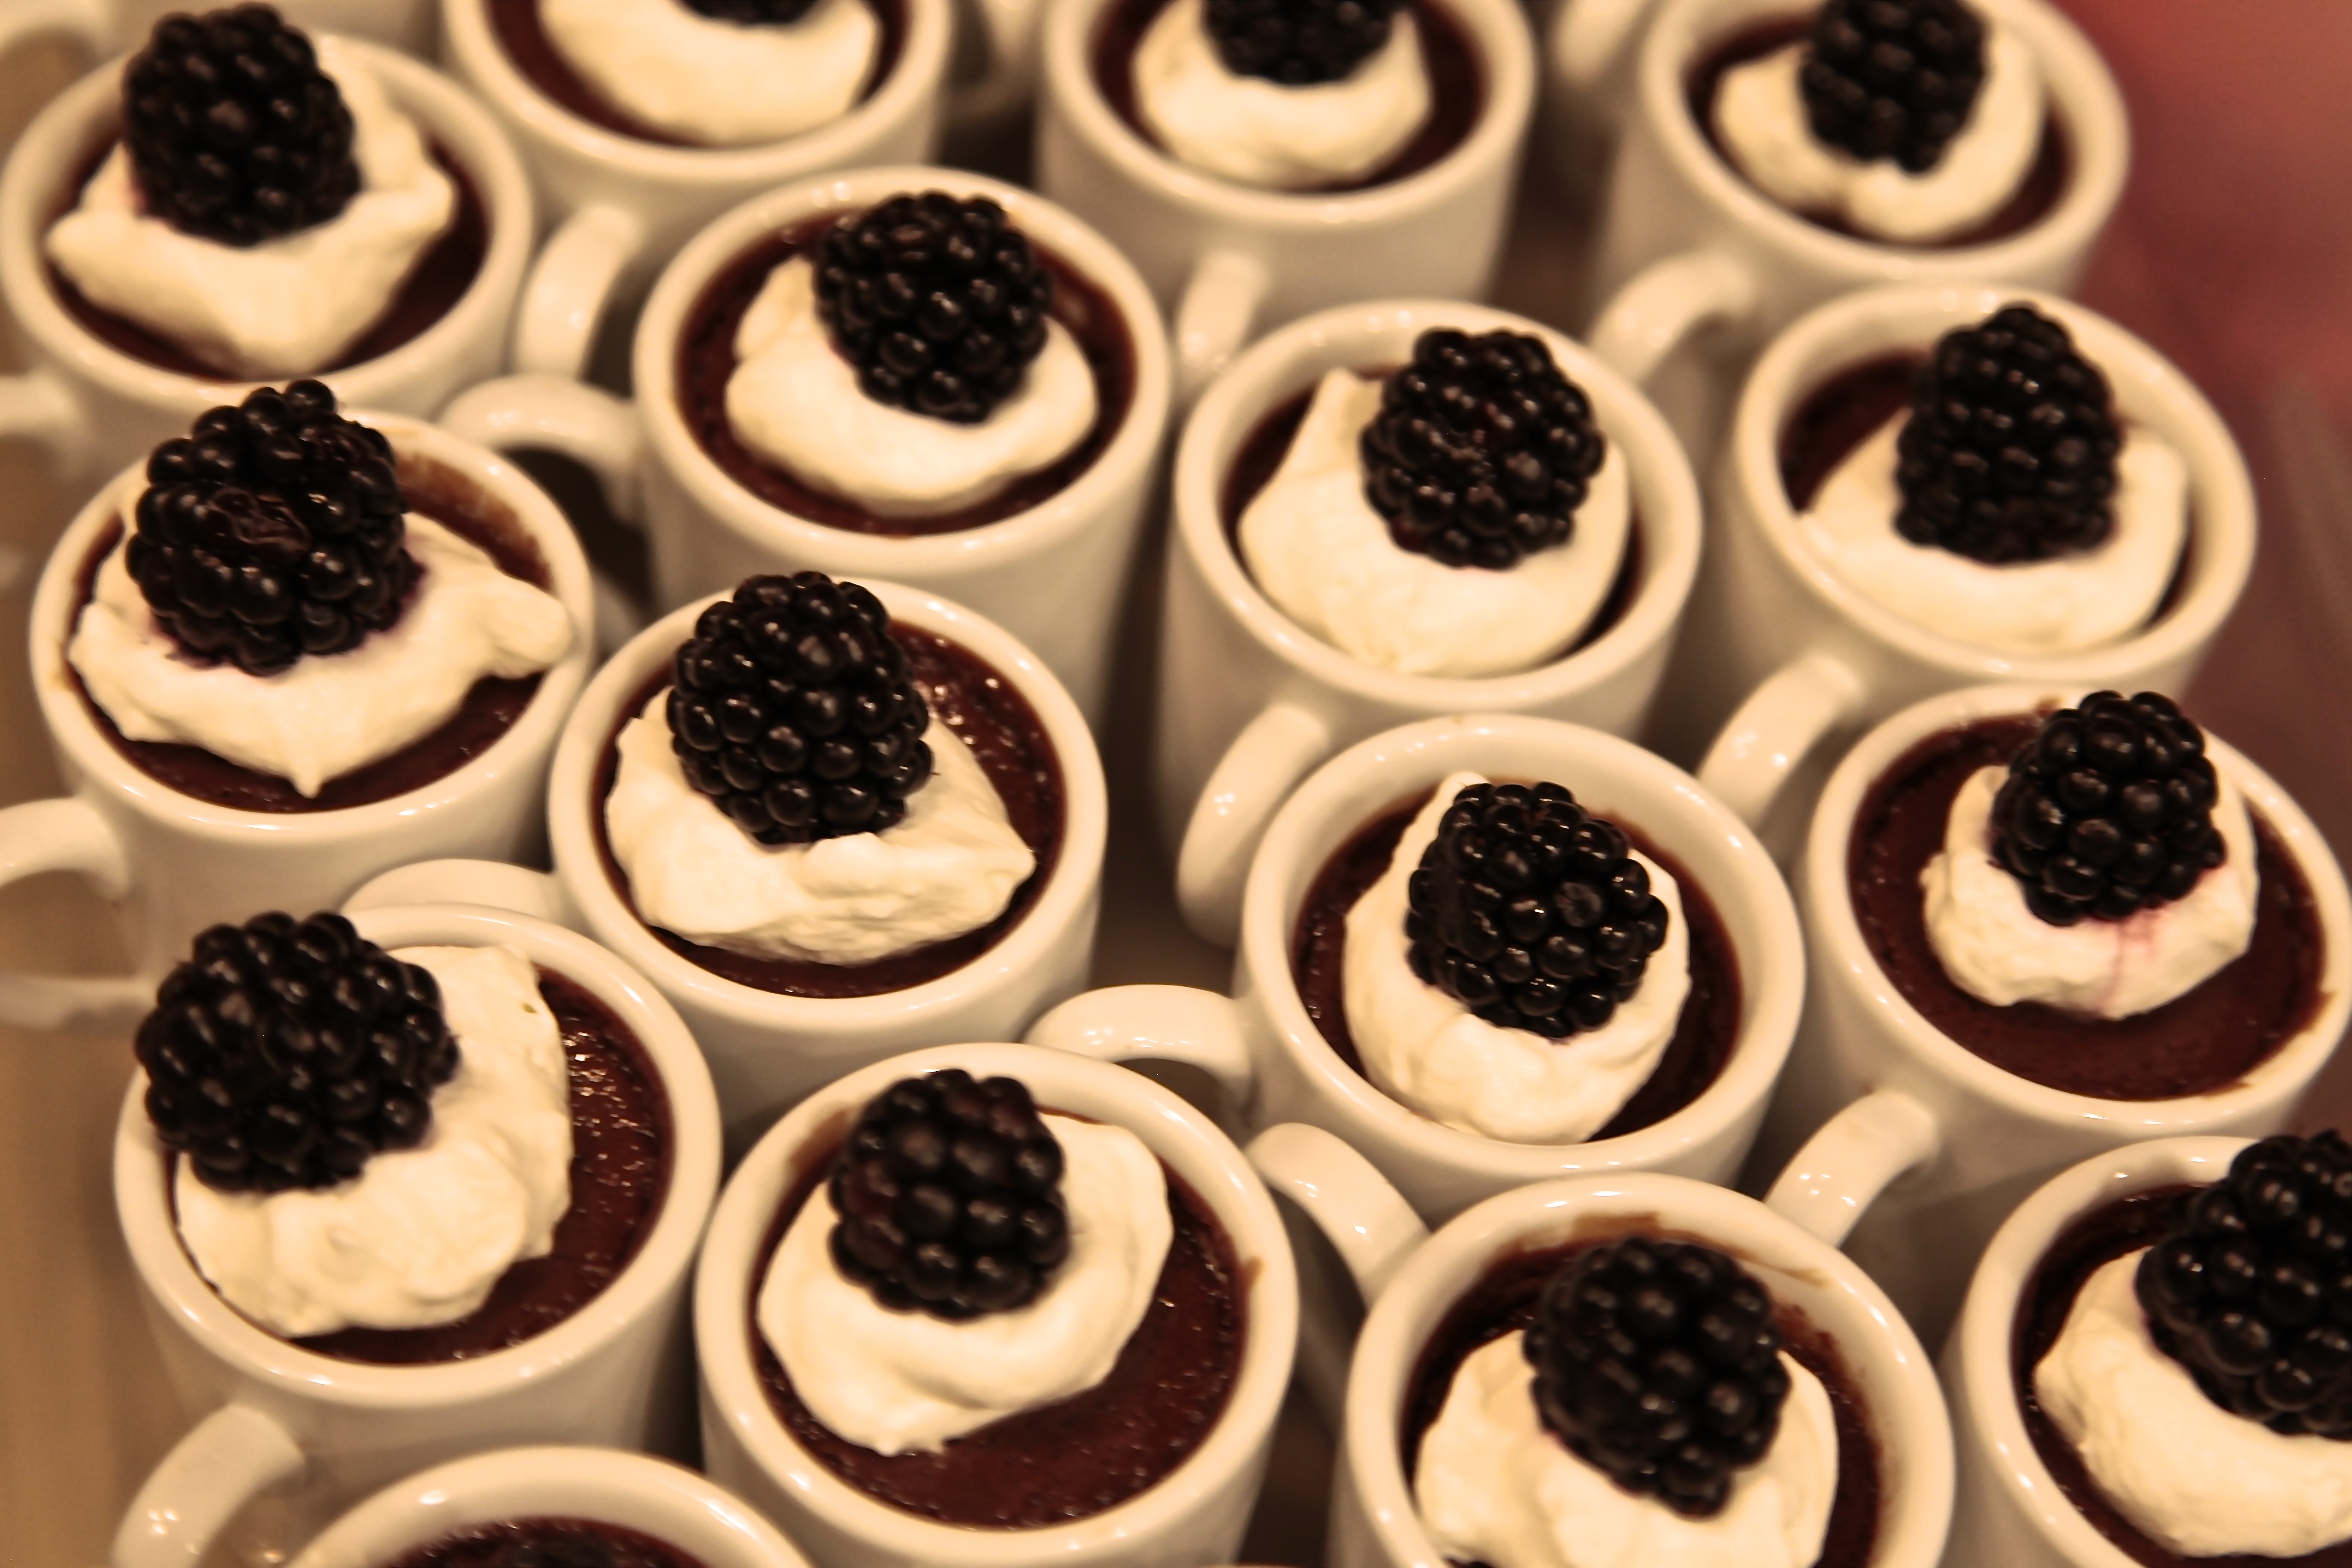
For this party, I wanted to make a crème brûlée or pot de crème in my espresso cups (available at my Amazon Affiliate Store). They only hold 1.5 ozs so they are perfect for a rich, intense, to-die-for dessert.

This one has dark chocolate as well as instant espresso for the intense flavor.

Check out the video to see guests’ reactions when they took the first taste.

The great thing about this dessert, besides the taste, is that it comes together quickly and must be made at least one day ahead so it can properly chill. Don’t tell your guests it’s even easier than baking a cake.

If you’re doing a smaller dinner party, make this the star dessert and use slightly larger containers, such as 3-4 oz. ramekins. The recipe remains the same, just a larger serving in fewer containers.

MOCHA POT DE CREME

EVENT: 2nd Annual Apps & Alcohol

YIELDS: 8 4-oz Ramekins of Pot de Crème or 16-20 if Using Espresso Cups or Smaller Containers

Ingredients

For pot de crème:

6 oz. dark chocolate, finely chopped (I use Trader Joe’s Dark Chocolate. Any good quality bitter-sweet chocolate will work.)

1 1/3 cup heavy cream (additional for garnish)

2/3 cup whole milk

1 1/2 teaspoon instant espresso powder

6 large egg yolks

2 tablespoons granulated sugar

1/4 teaspoon salt

For garnish (optional):

Fresh berries

Whipped cream

Equipment

8 4-oz. ramekins, or

16-20 espresso cups (available at my Amazon Affiliate Store)

Baking pan large enough to hold all ramekins or espresso cups

Fine mesh sieve

Directions

1. Place oven rack in center of the oven and preheat to 300 degrees.

2. Put on a kettle of water to boil.

3. Place chopped chocolate in a heat proof bowl.

4. Combine cream, milk, espresso powder, and 1/8 teaspoon salt in a small saucepan and bring to gentle boil. Stir until espresso powder is completely dissolved.

5. Remove from heat and immediately pour over the chocolate. Stir until the chocolate is melted and the mixture is smooth. Set aside to cool or pour into another bowl to cool.

6. In a separate bowl, gently whisk together egg yolks, sugar and 1/8 teaspoon of salt until thoroughly mixed. Do this gently as the goal is thorough mixing not aerating the custard. Vigorous whisking can result in a foaming surface on the pot de crème.

7. Add the warm chocolate mixture, to the eggs in a slow stream, whisking constantly. Again use a gentle hand. You don’t want air bubbles.

8. Pour the mixture through a fine mesh sieve into a glass measuring cup or other container with a pouring spout. Set aside.

9. Line bottom of a baking pan large enough to hold all containers with a folded kitchen towel.

10. Place ramekins or espresso cups on towel.

11. Divide pot de crème among containers. Pour hot water into pan so that it comes halfway up the sides of ramekins or espresso cups.

12. Bake 30-35 minutes just until they are firm 1/4 inch of the way from the sides, but the center jiggles when you nudge the container. If you are using smaller containers, check for doneness at 15-20 minutes.

13. Remove from oven and transfer containers to a cooling rack.

14. Cool uncovered 1 hour.

15. Cover each ramekin and chill overnight.

16. Garnish with whipped cream and a few berries.


October 15, 2015
At Home with Friends

2 comments

Individual Onion Pies with Blue Cheese & Walnuts

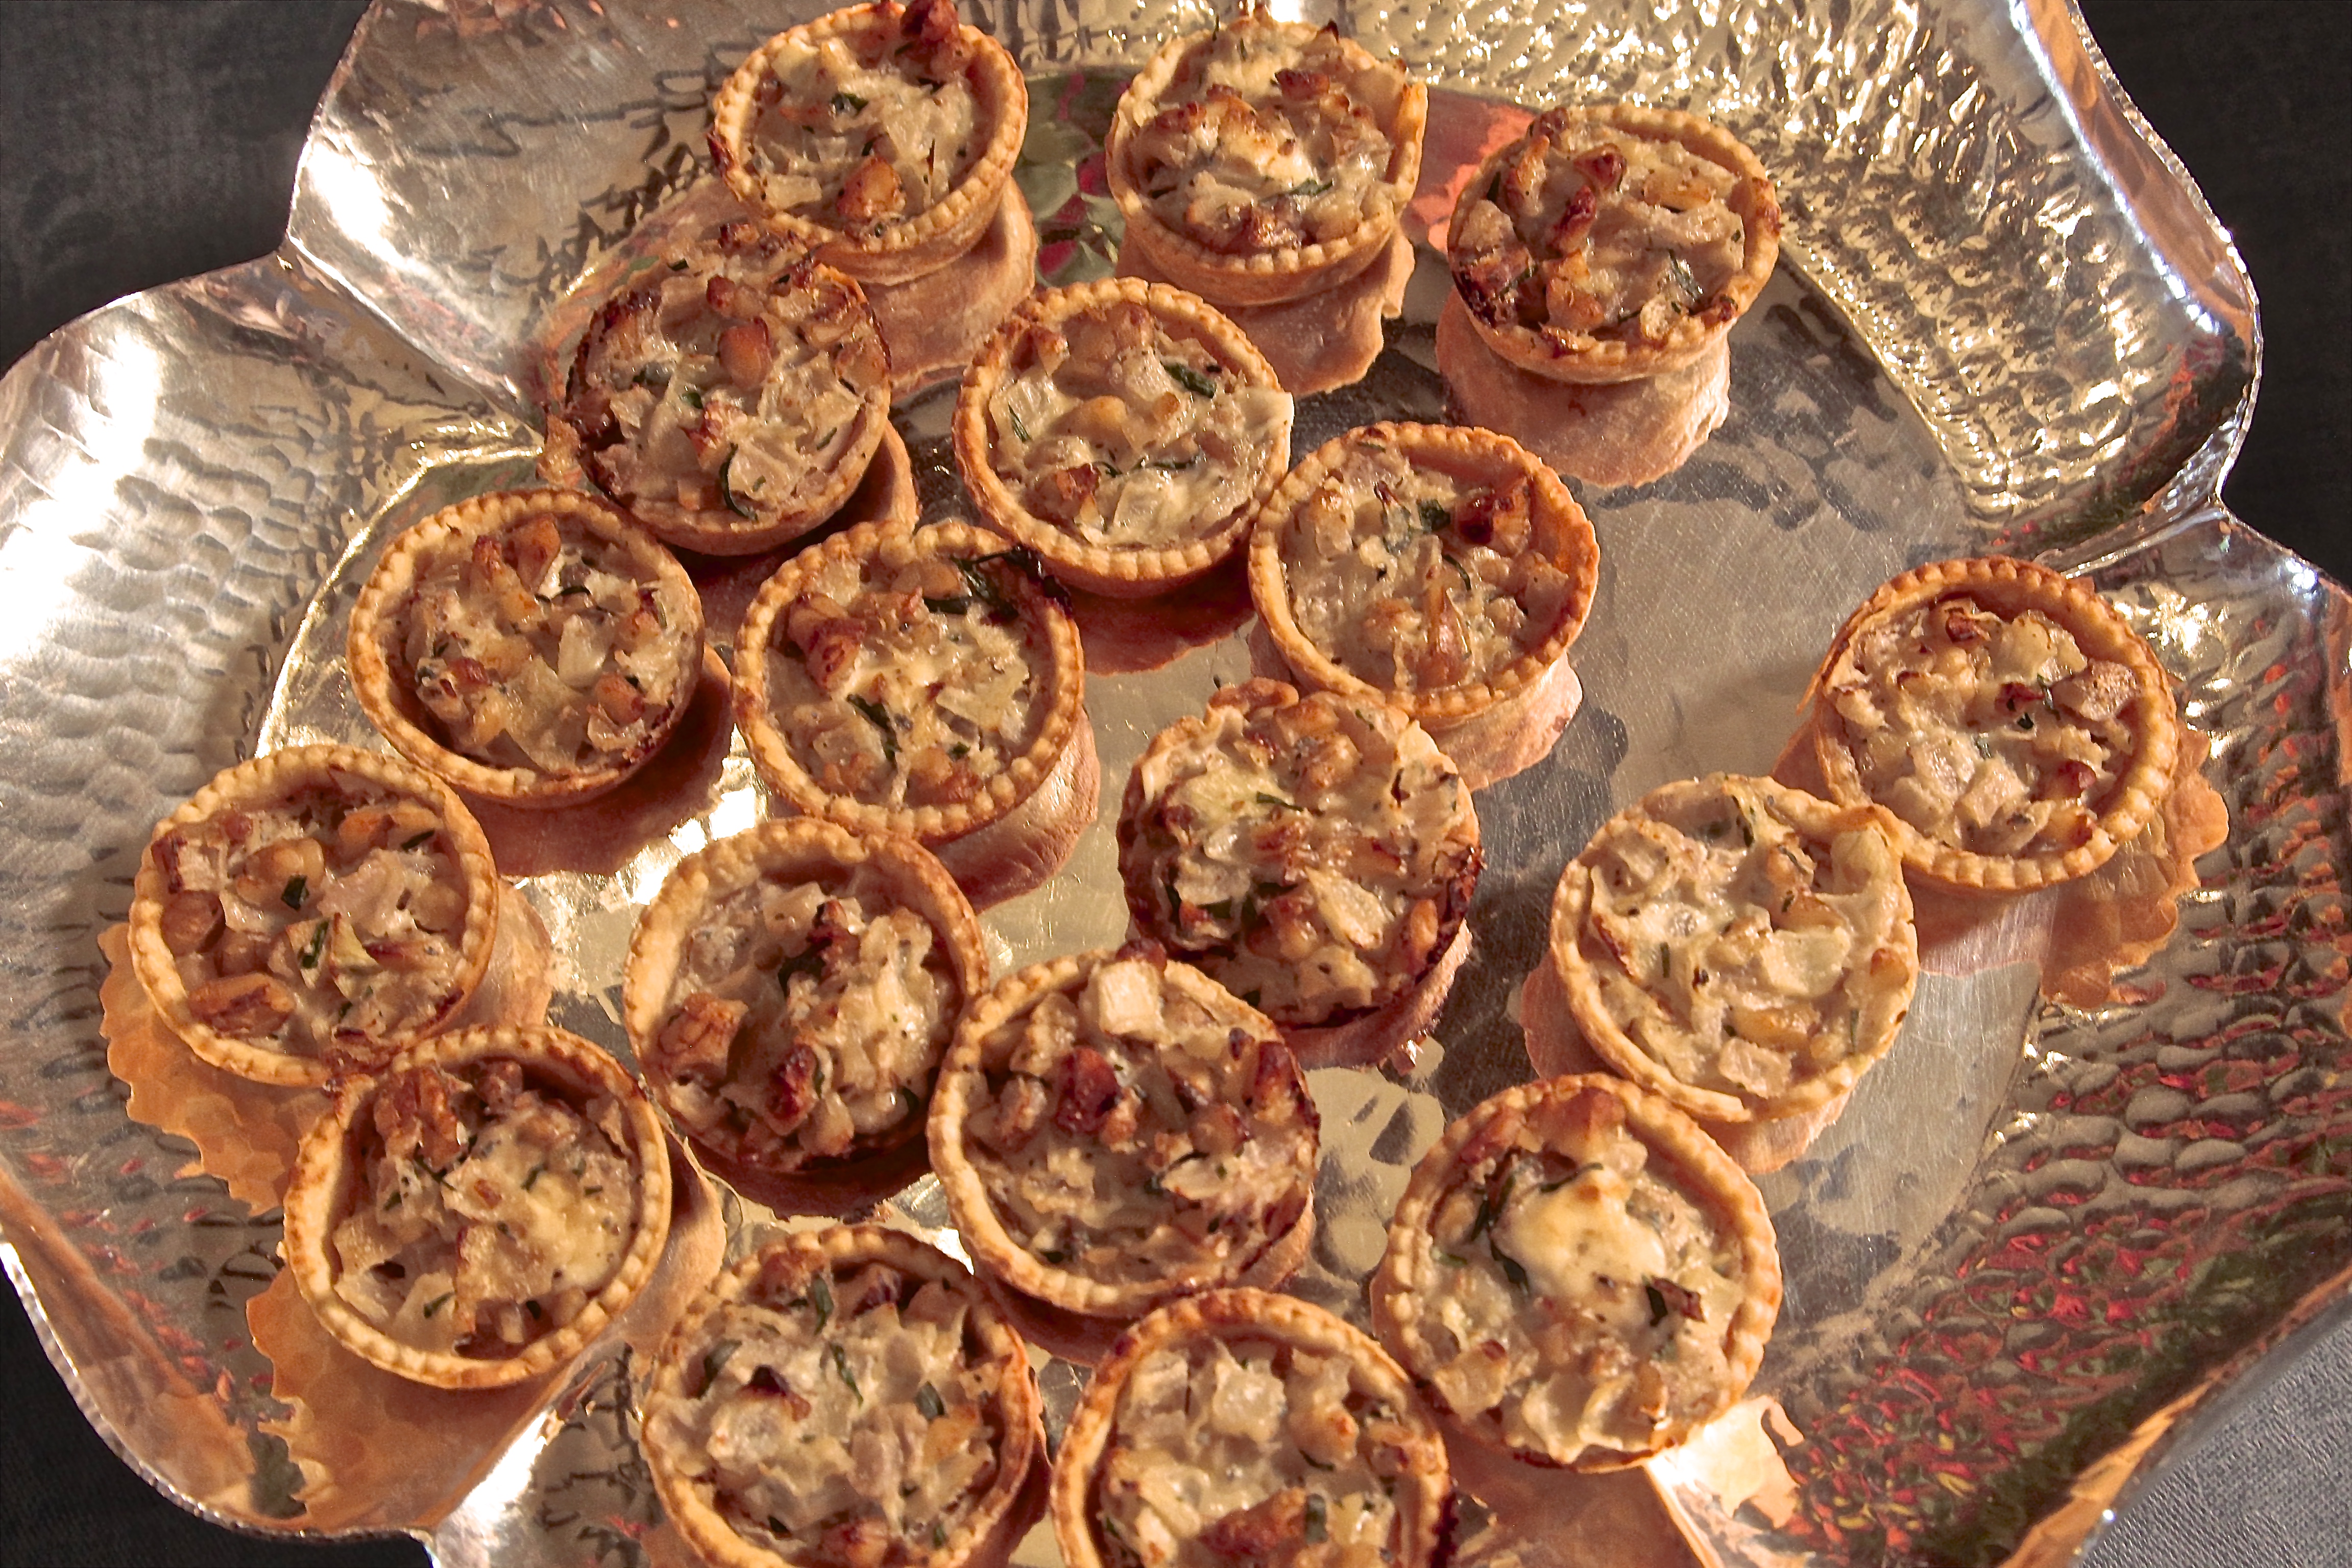
These are terrific one-bite wonders that pack a big flavor. They are intense, rich and delectable. The size is just perfect as part of an all appetizer party or by themselves with a glass of wine for an intimate dinner.

Once again, this recipe makes great use of store bought refrigerated pie crust.

I was inspired by a traditional French onion pie. The addition of blue cheese and fresh tarragon gives them a distinctive French attitude.

While I was developing the recipe, I asked my friend Keith, who is a professional chef, to taste test them and tell me what he thought. He loved them but suggested adding a tiny slice of white cheddar cheese on top. I took his suggestion, added the cheese and went one better adding a dollop of fig jam on the cheese.

As we kept trying things to add on top, we realized that every addition only made them better. We also realized that if we kept taste testing, we would have to make a whole new batch for the party.

For this party, I served them just as is with no additional topping. But feel free to top with a slice of white cheddar cheese, fresh fig, fig jam or even a sliver of prosciutto.

They are quick, easy and scrumptious.

INDIVIDUAL ONION PIES WITH BLUE CHEESE AND WALNUTS

EVENT: 2nd Annual Apps & Alcohol

YIELDS: Each Roll of Dough Yields 24-28 Pieces

Ingredients

3 white onions, finely chopped

1 cup walnuts, finely chopped

1 cup crumbled blue cheese

1 package refrigerated pie crusts (2 rolls)

1/4 cup water

1/2 teaspoon minced fresh tarragon

2 tablespoons olive oil

Pepper to taste

Equipment

Mini muffin pans, sprayed with non-stick spray

2 3/8-inch cookie cutter

Directions

1. Preheat oven to 425 degrees.

2. Spray mini muffin pans with non-stick spray.

3. In a saute pan over medium heat, warm olive oil and saute onions until softened. Add the blue cheese and cook stirring until melted. Season with pepper (cheese is usually very salty), and add tarragon. Stir in the walnuts and combine thoroughly. Remove from heat, put filling in bowl to cool.

4. While filling is cooling, roll out each sheet of pie crust to approximately 10 X 12. Using 2 3/8-inch cookie cutter, cut rounds and place them in non-stick sprayed mini muffin pans. Take dough scraps and re-roll to make additional pies.

5. Using a teaspoon, fill each dough lined muffin cup.

6. Bake at 425 degrees, approximately 10 minutes. Crust will be golden brown and filling will be bubbly.

7. Serve warm or at room temperature.

October 12, 2015
At Home with Friends

3 comments

Triple Almond Cookies

Years ago, when I made my first almond cake using almond paste, entire world of desserts opened up for me. I never get tired of the flavor of almonds. It can be subtle, as in some cakes, or intense as in these Triple Almond Cookies.

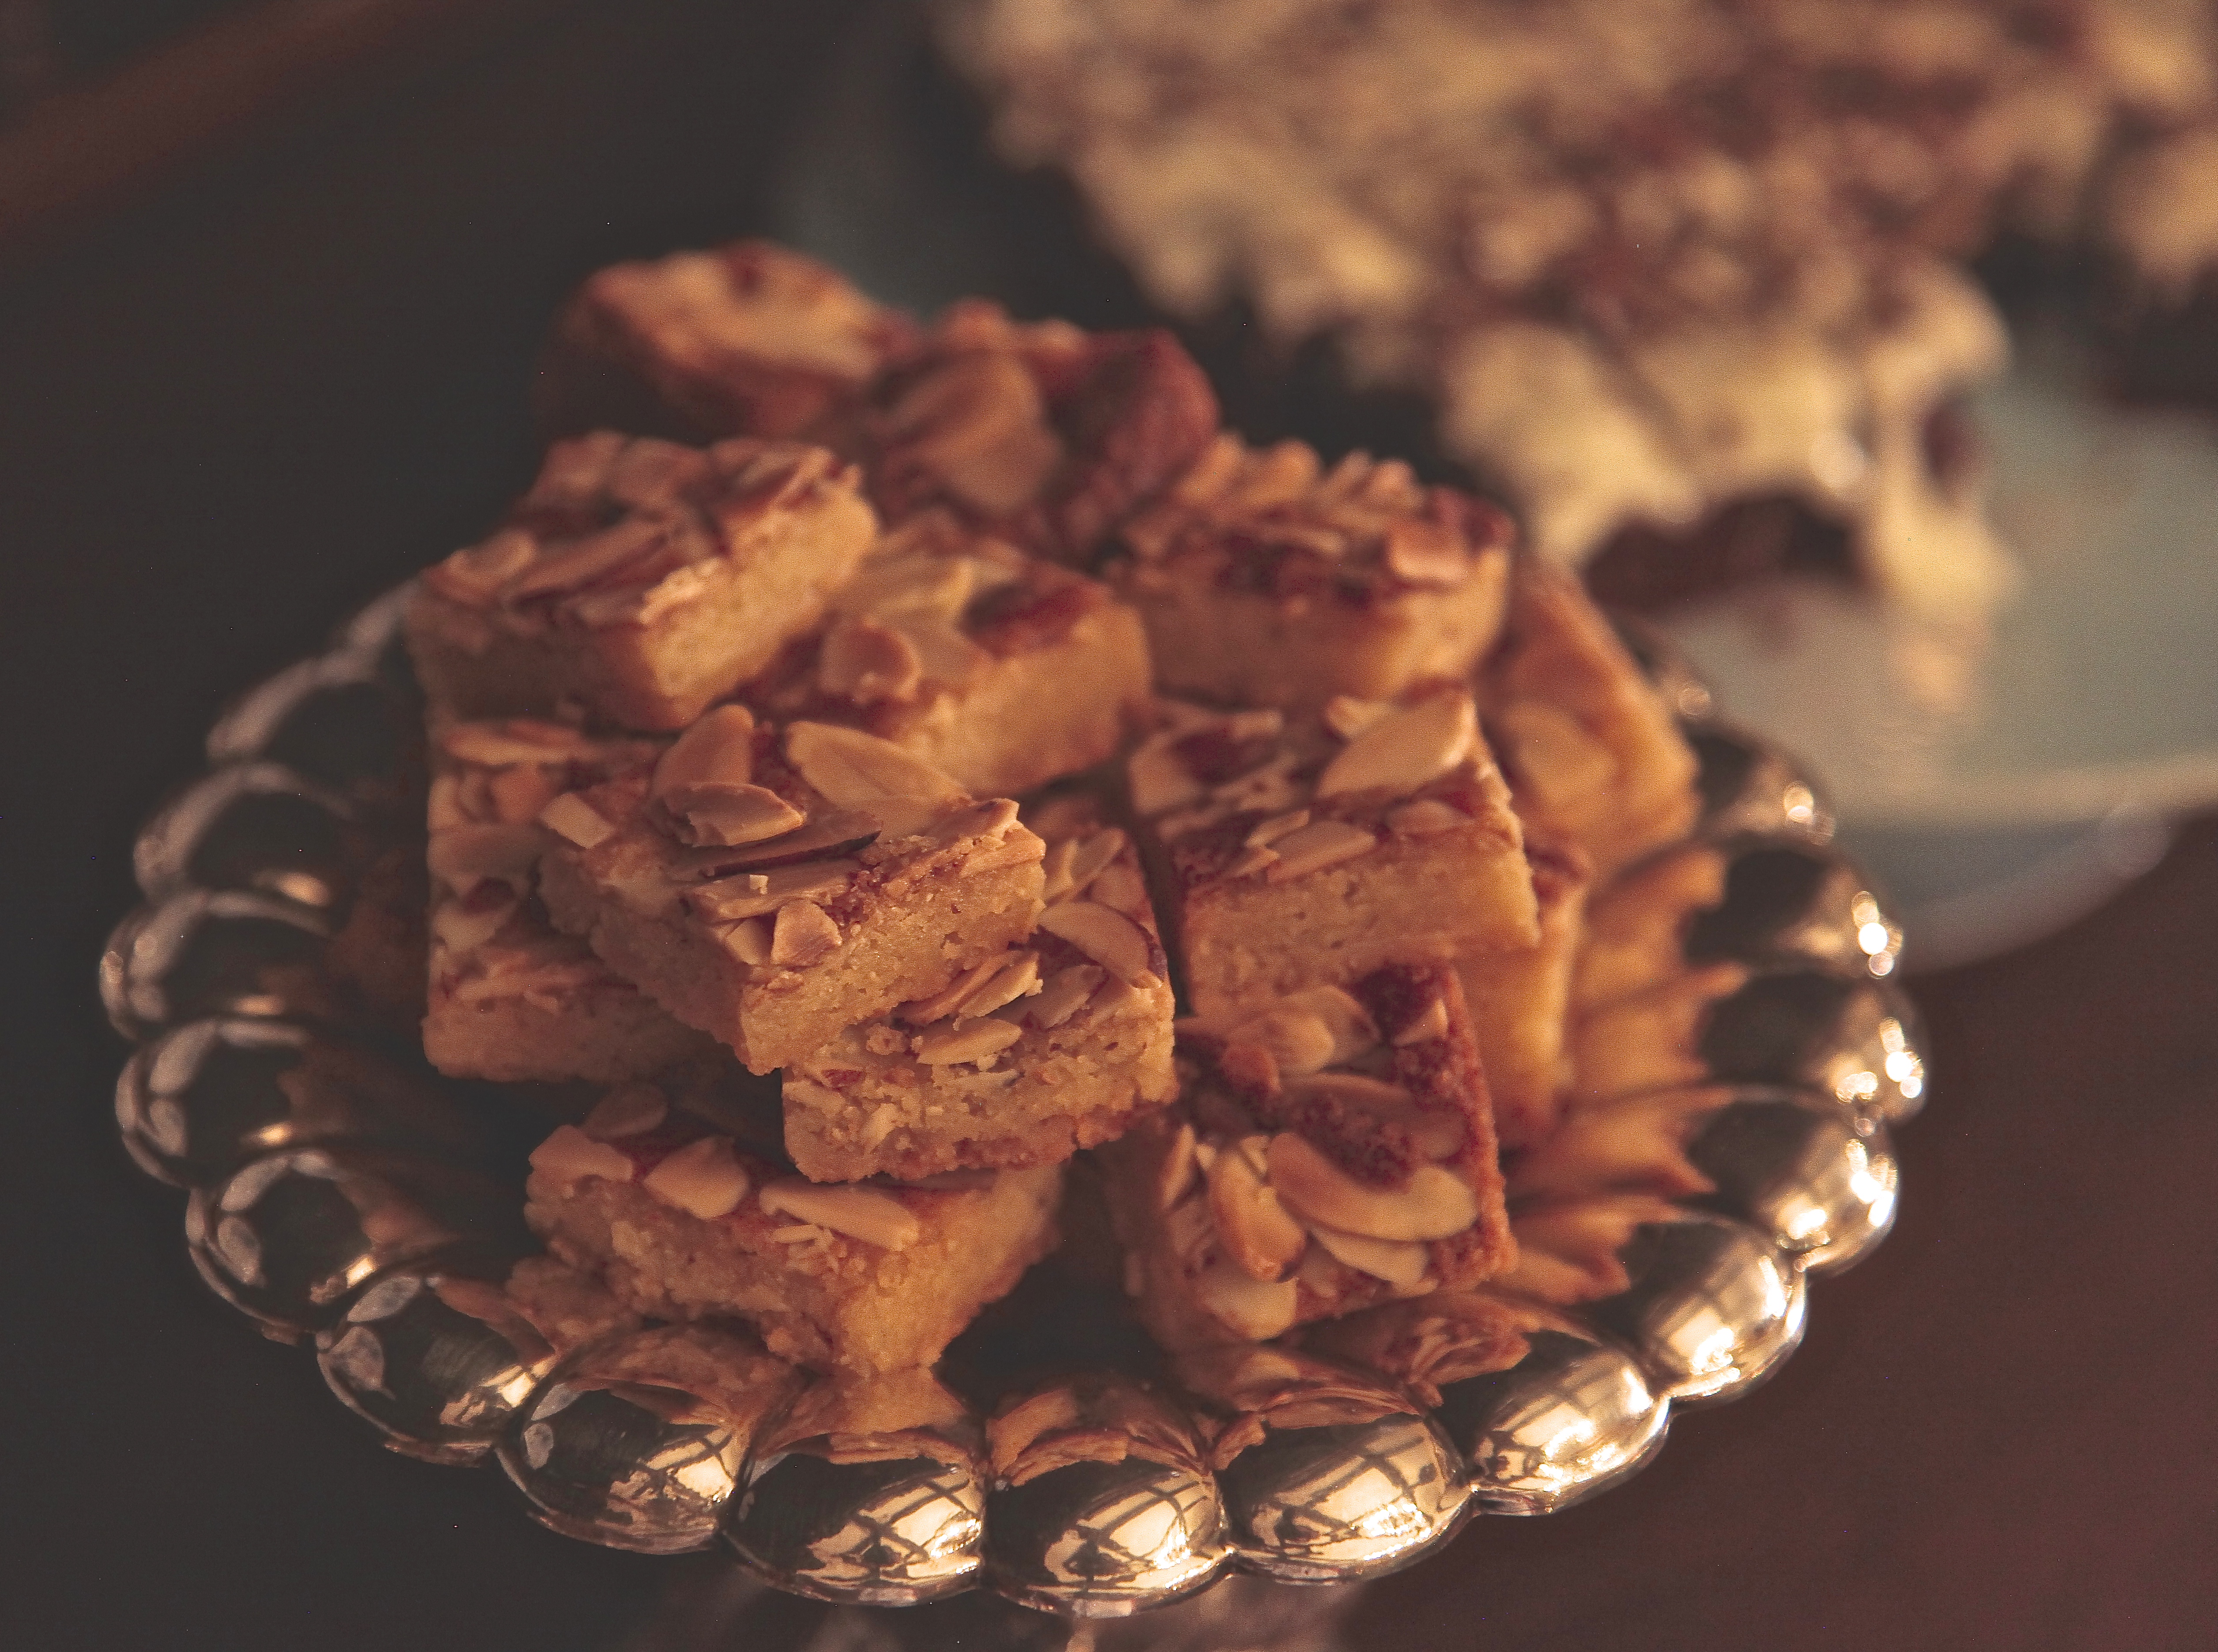
If someone doesn’t like almonds, they won’t like these, but for the rest of us, these are delectable. The sliced almonds on top announce the flavor loud and clear.

At the time of this party, my dear friend Dano was in London visiting family. I knew he loved almonds, so I kept a dozen pieces in my freezer as a welcome home surprise.

He didn’t get home soon enough and somehow the cookies disappeared. Oops. Well, he can enjoy the pictures or I will make him his own batch. Of course, this is after I make Mei her Game Night prize cookies.


TRIPLE ALMOND COOKIES

EVENT: 2nd Annual Apps & Alcohol

YIELD: Approximately 3 Dozen

Ingredients

5 ozs almond paste (not marzipan)

½ teaspoon salt

¾ cup sugar

2 sticks unsalted butter, room temperature and soft

½ teaspoon cardamom

½ teaspoon lemon zest

1 large egg, separated

1 teaspoon almond extract

1 ¼ cup all purpose flour

½ cup sliced almonds

Equipment

9-inch square baking pan lined with parchment paper, leaving 2-inch overhang on sides

Directions

1. Preheat oven to 350 degrees.

2. In food processor, pulse almond paste until broken up into small pieces, then add sugar and continue to pulse until finely ground.

3. In the bowl of a stand mixer, beat butter, remaining ½ cup sugar until pale and fluffy, approximately 3 minutes.

4. Add almond mixture, lemon zest, egg yolk and almond extract, and beat until well combined.

5. Combine flour and cardamom.

6. Reduce speed to low and then add flour mixture until combined.

7. Spread batter in pan, spreading evenly using an offset spatula.

8. Brush top of batter with egg white and top with sliced almonds.

9. Bake until top is golden, 35-40 minutes.

10. Cool completely in pan on wire rack.

11. Using a ruler, cut slab into small squares.

12. I cut off the edges and save them for staff or to crumble over custard, rice pudding or ice cream, or for me when I need an almond fix.

13. These keep in an airtight container for 3-4 days or wrap entire slab in plastic and seal tightly, and store in freezer for up to 2 months.