first

July 30, 2015
At Home with Friends

3 comments

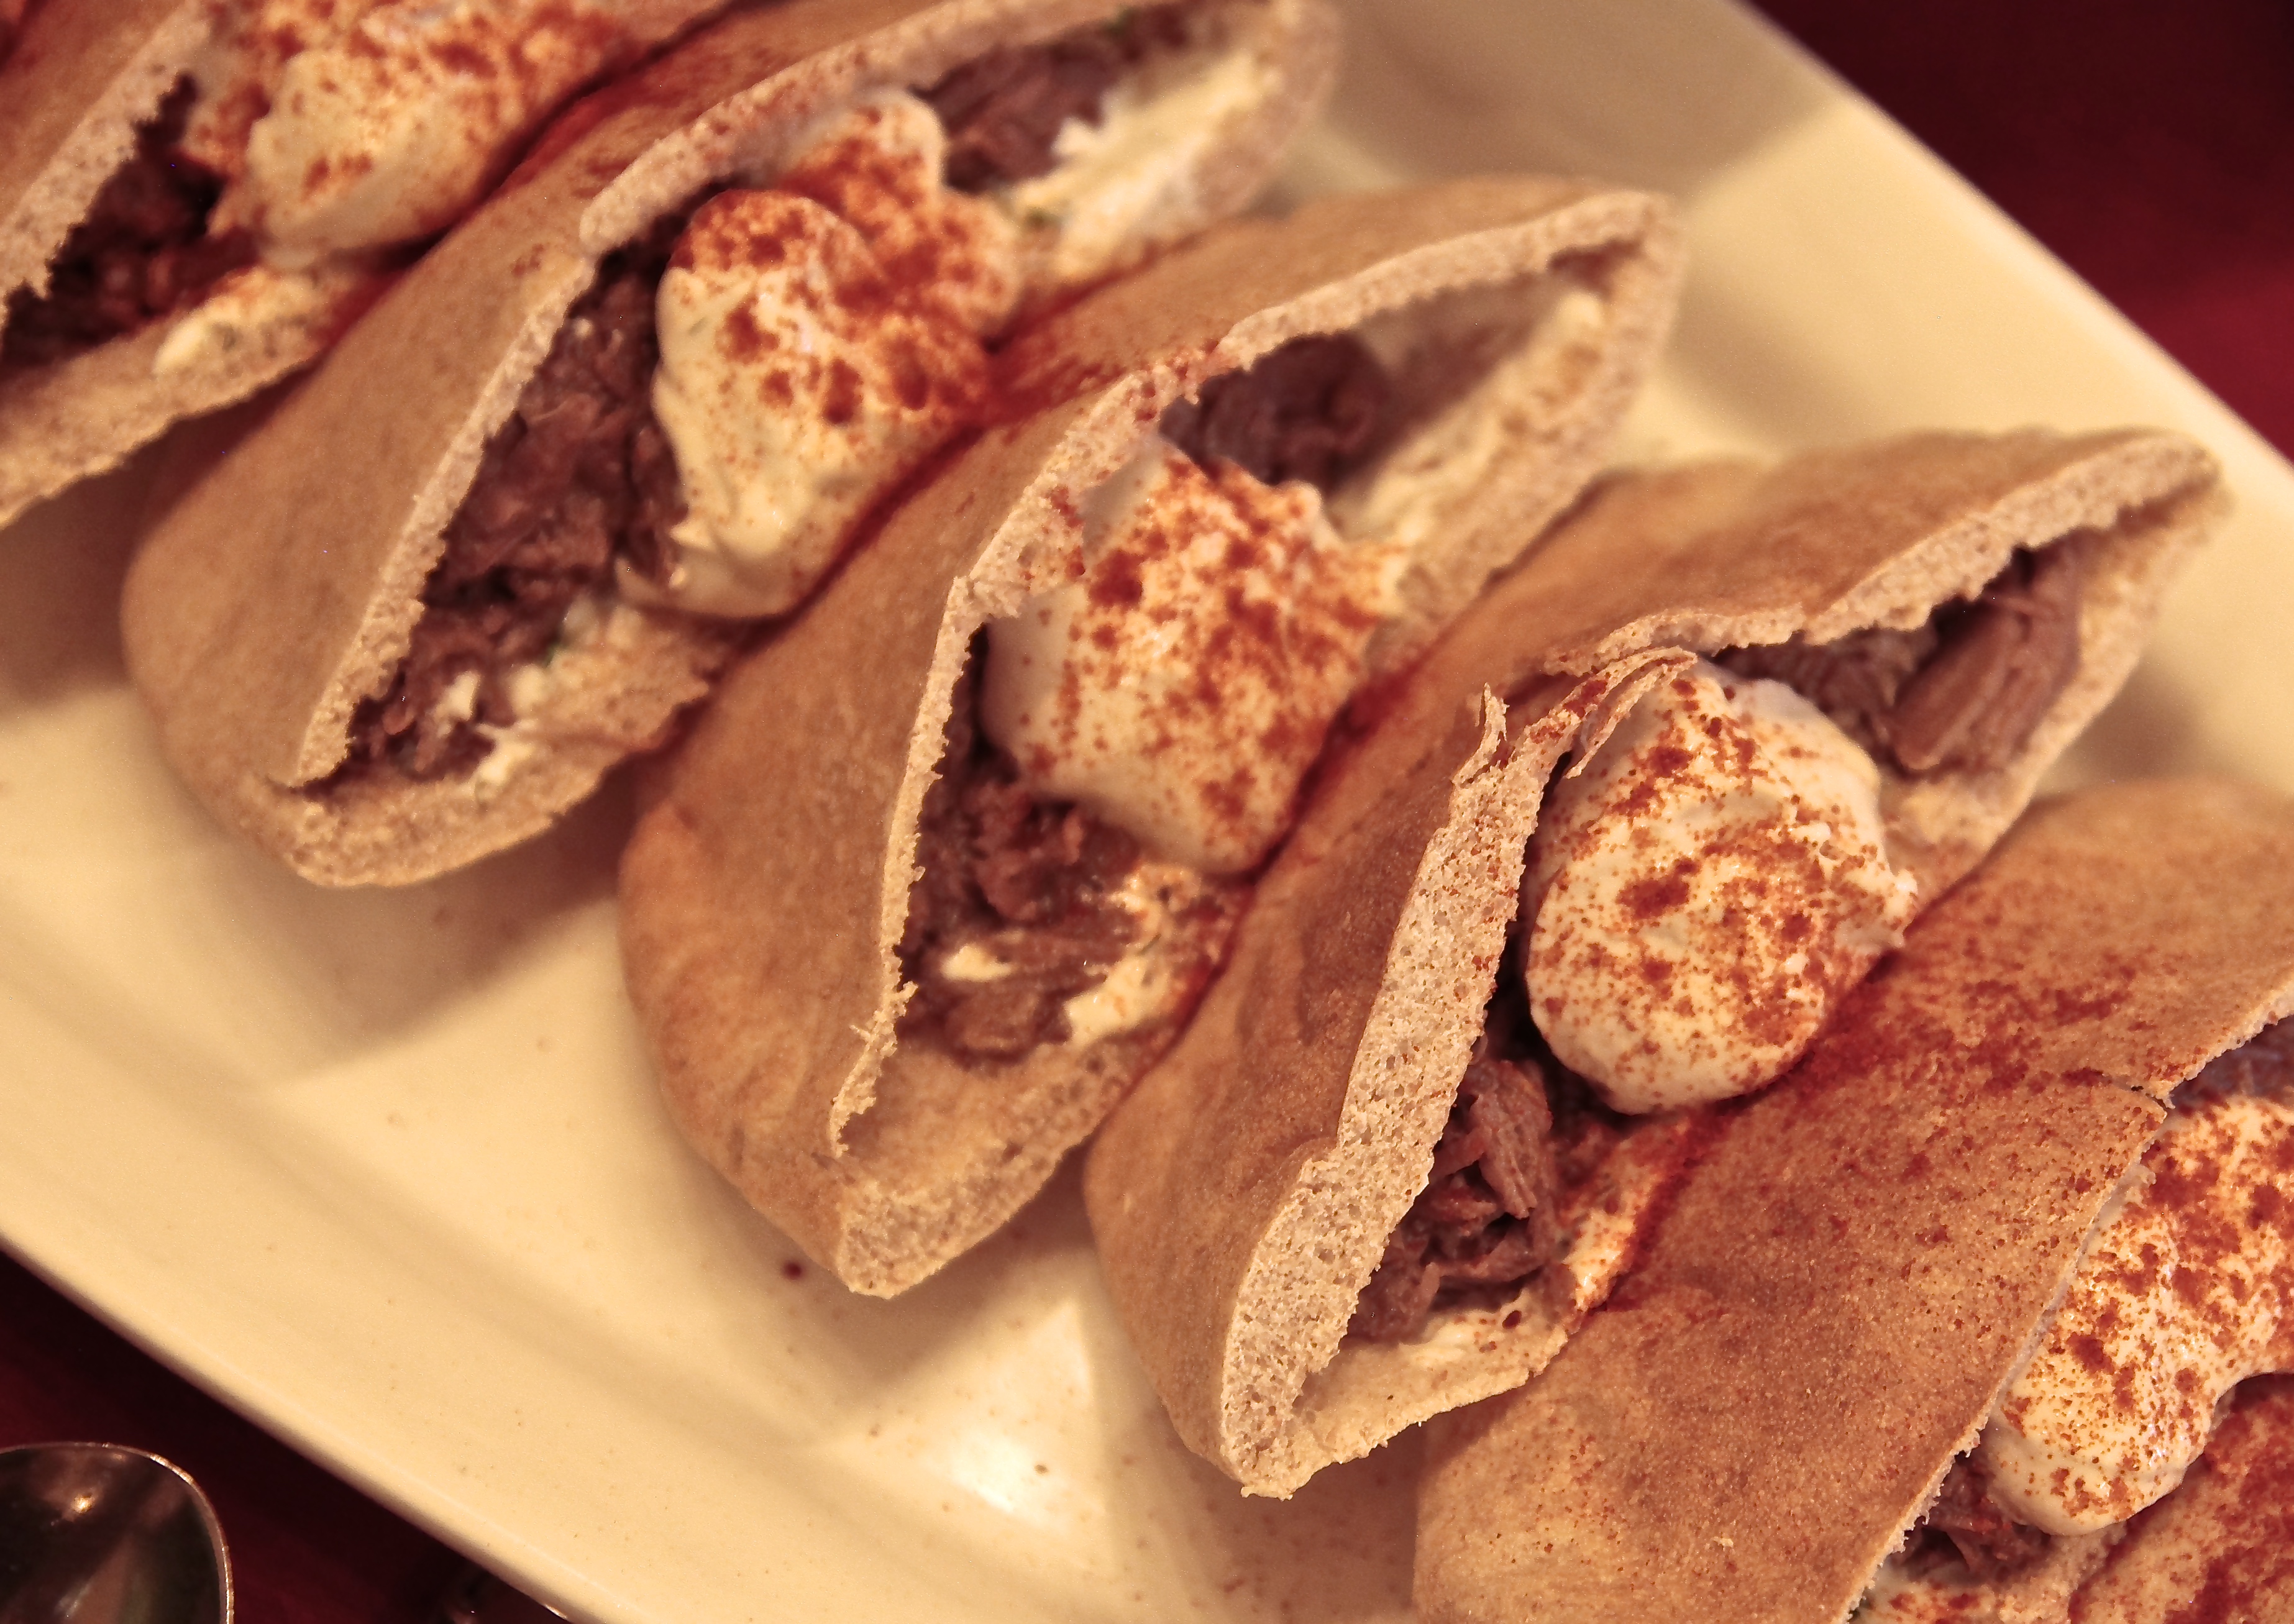
Pulled Lamb Sandwiches on Warm Pita Bread with Tzatziki, Tahini, Israeli Salad & Sweet Paprika

I had been thinking about making Pulled Lamb Sandwiches for a while. And then a recipe appeared on NYT Cooking, to which I subscribed. I figured it was perfect timing.

Then I read the recipe and realized that it required a smoker. I don’t have a smoker; and figured if I bought one, it would go the same way as the deep fat fryer: donated to a charity after one use. So, no smoker.

At least I had a clue as to what cut of lamb to use. Unfortunately, neither of my neighborhood grocery stores carried a lamb shoulder. So while inspired, I decided to make up my own recipe.

Here it is. It might look complicated because there are so many spices. I assure you it’s quite simple and totally fabulous. The lamb is cooked at a low temperature for 3-4 hours. It’s made the day before and pulled off the bone and shredded the day of the party.

I served it in whole wheat pita bread filled with Israeli Salad, Tzatziki and topped with Tahini. You could also pile in high on a potato roll or hamburger bun.

When my friends volunteered to taste test, they downed the first one I made for them and then suggested in the interest of fairness, they try another one or two, or three.

PULLED LAMB SANDWICHES ON WARM PITA BREAD WITH TZATZIKI, TAHINI, ISRAELI SALAD & SWEET PAPRIKA

EVENT: Game Night

YIELD: 20 Generous Sandwiches


Ingredients

1 bone in leg of lamb (5 ½ – 6 ½ lbs)

2 teaspoons fresh ground black pepper

½ teaspoon ground cloves

½ teaspoon ground cardamom

½ teaspoon fenugreek seeds

1 teaspoon ground cumin

½ teaspoon Chinese 5 spice

½ teaspoon ground cinnamon

½ whole nutmeg, grated

¼ teaspoon ground ginger

1 tablespoon sweet paprika

3 teaspoons kosher salt

3 cloves garlic, crushed

¼ cup freshly squeezed lemon juice

½ cup oil (grape seed, olive or canola)

1 cup boiling water

10 large pita breads

Equipment

Dutch oven

Directions

1. Using a small knife, remove some of the excess fat and score the leg of lamb in a few places.

2. Make the slits ½ inch deep through the fat and meat to allow the marinade to seep in.

3. Put all of the spices, lemon juice and oil in a bowl, and stir to combine and make a wet paste.

4. Rub the paste all over the lamb using your hands to massage the spices into the meat.

5. Place lamb in a Dutch oven and cover. Set aside for a few hours.

6. Preheat oven to 325 degrees.

7. Put lamb uncovered in oven with fatty side up and roast for 30 minutes. Add the boiling water to the pan and continue to cook covered, basting every hour for approximately 4 ½ hours. Add more water if needed so that there is always at least ½ inch in the bottom.

8. Once done and lamb falls off bone with fork. Remove from oven and cool completely.

9. Refrigerate overnight. Remove excess congealed fat from pan.

10. Carefully pull lamb away from the bone using fingers or a fork.

11. Add lamb back into Dutch oven and heat in 350 degree oven to make sandwiches.

12. To assemble sandwiches, cut pita bread in ½ half. Warm in oven.

13. Fill each pita with a layer of Tzatziki, Israeli Salad, pulled lamb. Top with Tahini and sweet paprika.

 

July 27, 2015
At Home with Friends

4 comments

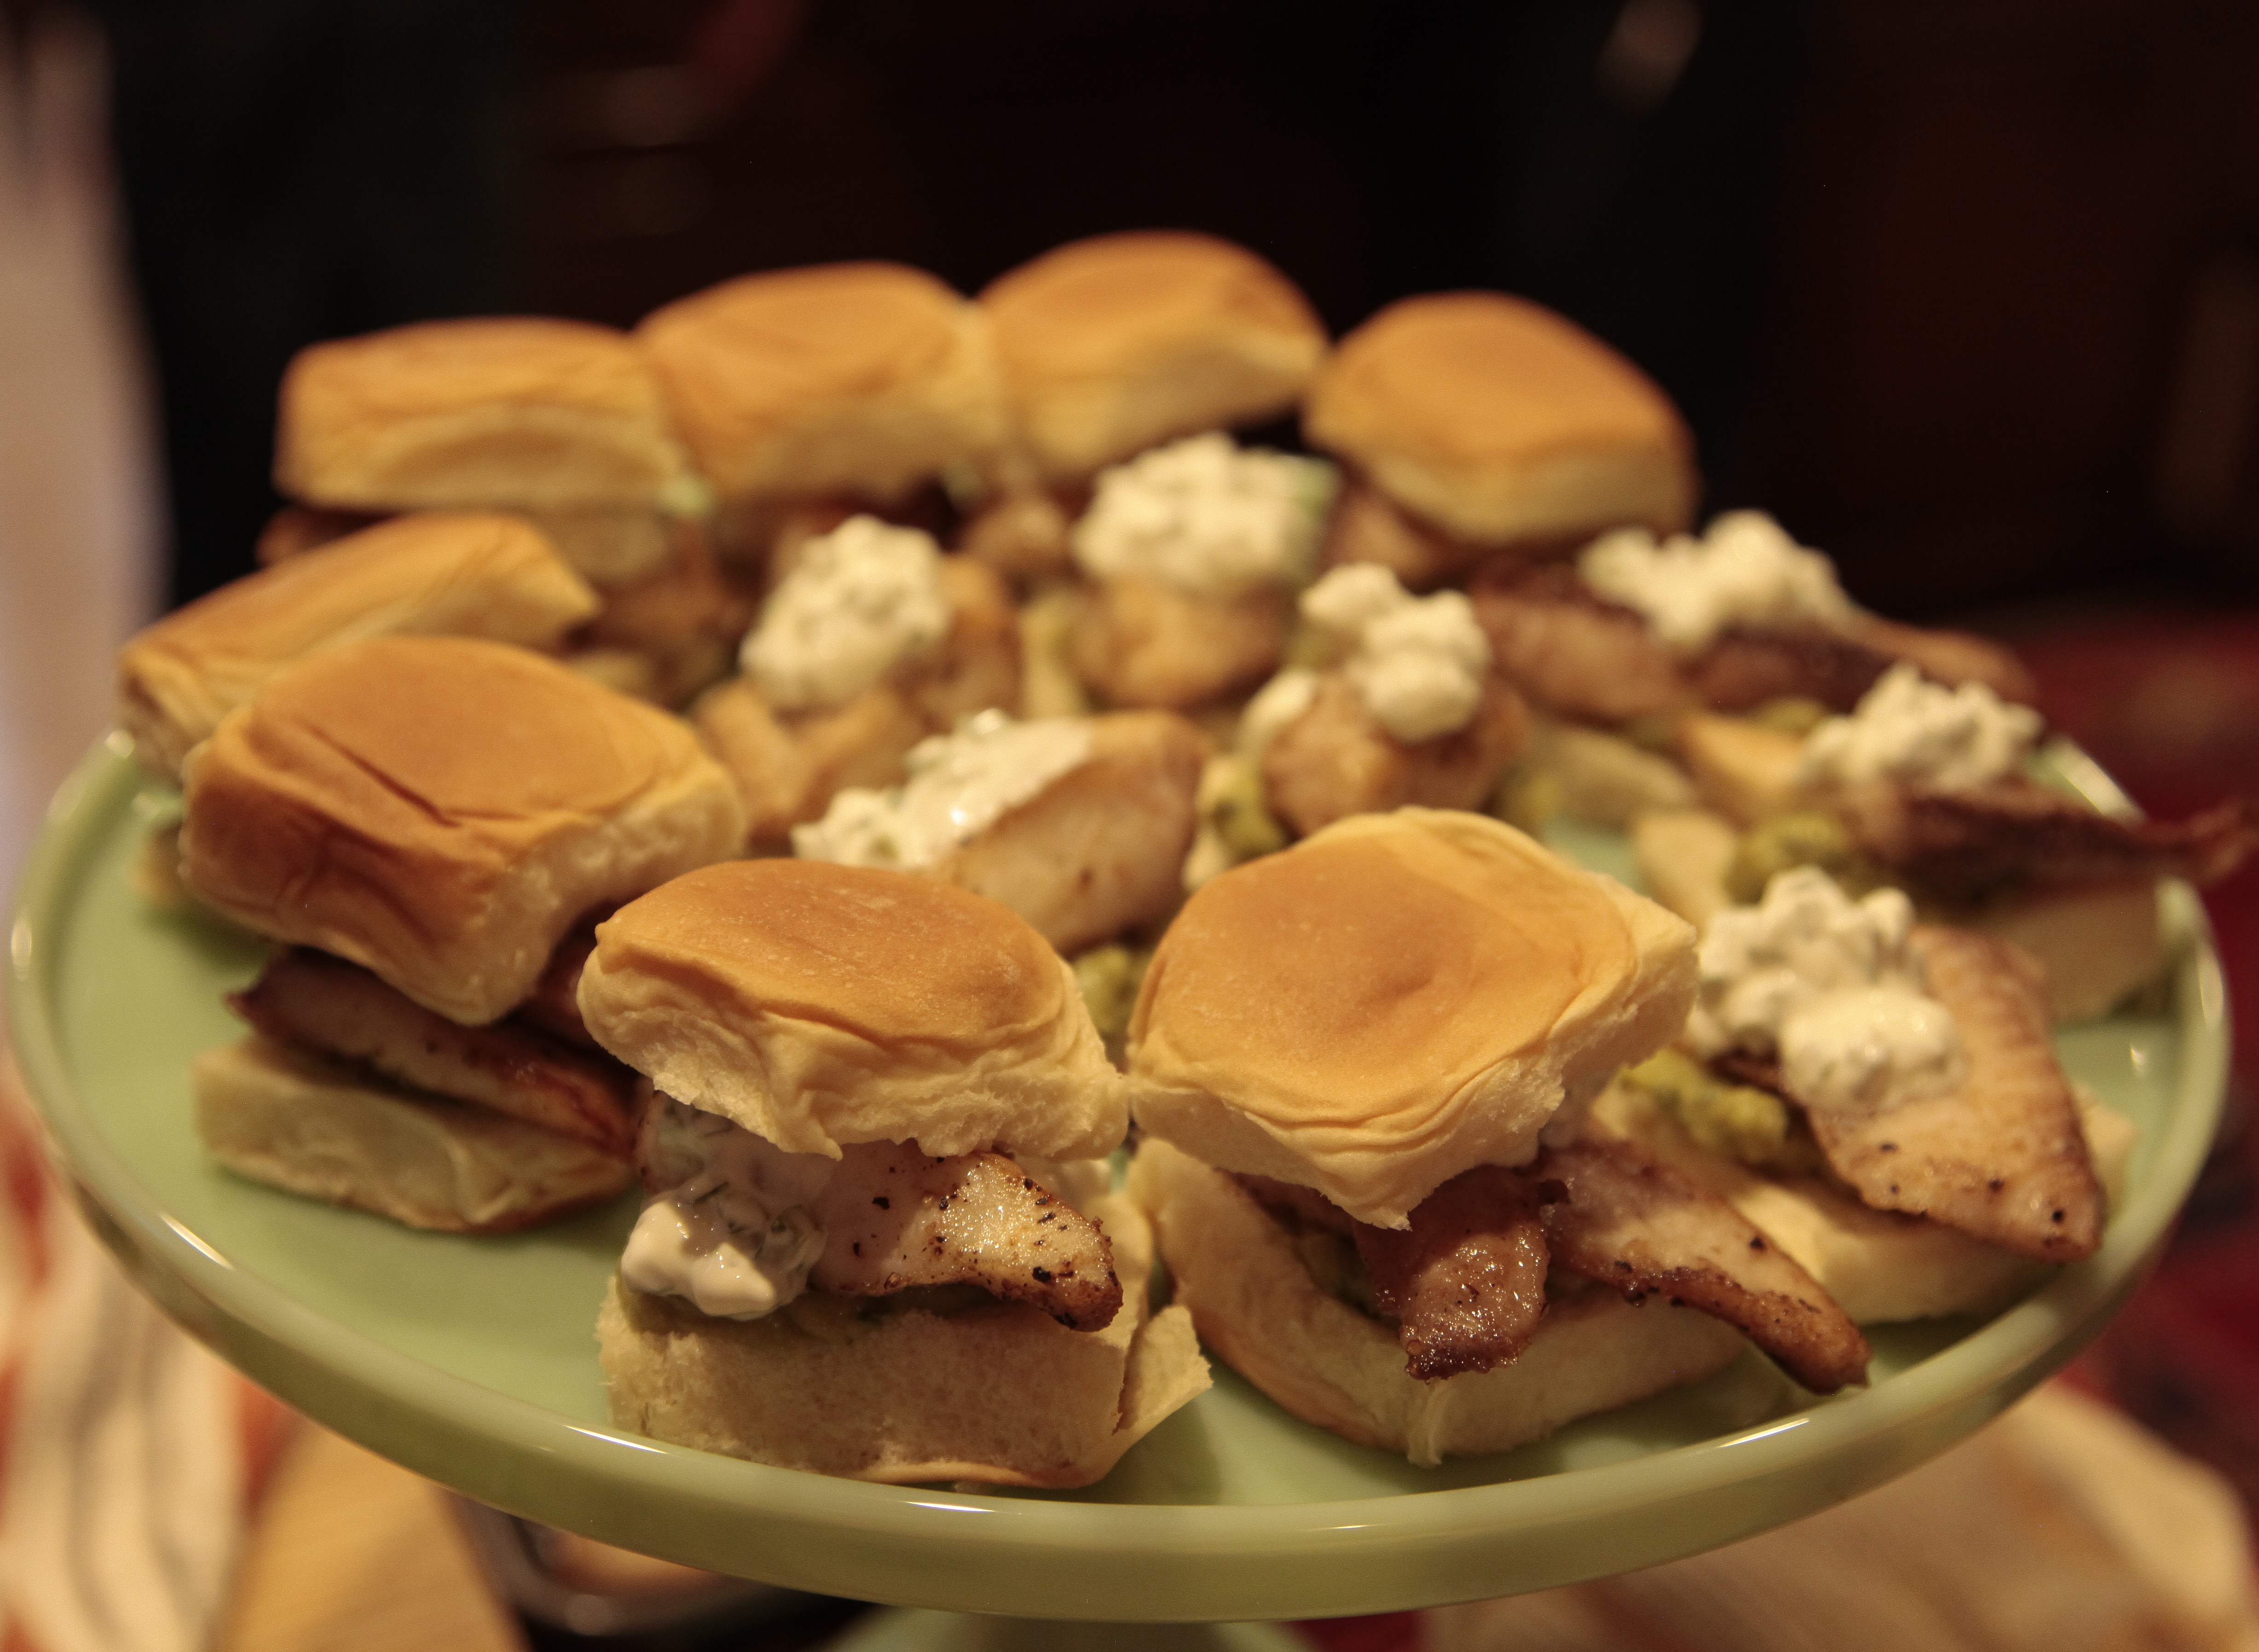
Mexican Fish Sliders with Jalapeño Sour Cream & Guacamole

This was the first time I made these. It was an experiment that was wildly successful. I had 12 guests, including 2 vegetarians. I made 40 sliders and they were all gone in a flash.

There was something about these 2-bite mini sandwiches on sweet Hawaiian rolls with spicy guacamole and jalapeño laced sour cream that people couldn’t get enough of. I only got one, but I agree.

When you’re making any kind of sandwich, every ingredient counts. Choose each element carefully. What’s the best vehicle (i.e. bread) for the sandwich? What’s going to keep the bread moist: mustard, mayo, special homemade relish or something else? And of course, what’s the best combination of filling and flavors.

For these sliders, mini Hawaiian sweet rolls were the perfect base. They are soft and slightly sweet, reminiscent of a hot dog or hamburger bun. They are also kind of thick, so I decided to remove 1/3 of the center of the roll. There is still enough on the roll to hold everything together, there is just less bread. The result was that people could eat more. Good news!

If this were a fillet of fish sandwich at a fast food joint, the bread would be slathered with mayonnaise or secret sauce. This would add moisture and hide the taste of the fish. Instead of mayo, I chose to make a spicy guacamole and a spread of sour cream mixed with finely minced fresh jalapeño peppers. Way better than mayo!

To assemble, the bottom of the roll was covered with a generous layer of guacamole. The pan seared fish went on the guacamole and it was topped with a dollop of jalapeño sour cream.

The fish itself was simply seasoned with salt and pepper and ground coriander, and quickly pan cooked. The fish wasn’t even breaded. It didn’t need to be.

Rather than give you an exact recipe, I am providing the general instructions on how to calculate the quantities you need depending on the number of sandwiches you want to make. This makes it easy to adapt this recipe, even for dinner for two, which I plan to do.

MEXICAN FISH SLIDERS WITH JALAPENO SOUR CREAM AND GUACAMOLE

EVENT: Game Night

SERVES: Figure at Least 3 Per Person

Ingredients

Hawaiian sweet mini rolls

Tilapia fish, 2-3 oz of fish per slider

1 teaspoon of guacamole per slider

1/2 teaspoon jalapeño laced sour cream per slider

For the rolls:

1/3 of the center removed

For tilapia:

Salt and pepper

Ground coriander

For jalapeño sour cream:

Fresh jalapeño peppers, seeds removed, finely minced

Guacamole:

See my previously published recipe


Directions

1. Multiply the number of sliders by 2.5 ozs to get total ounces of fish. Divide by 16 to get pounds of fish necessary.

2. Remove 1/3 of bread from the rolls.

3. Season tilapia with salt and pepper and coriander. Pan saute in neutral oil (grape seed or canola).

4. To assemble, place layers of guacamole on bottom of roll, top with fish, add dollop of sour cream and top of roll.


July 23, 2015
At Home with Friends

3 comments

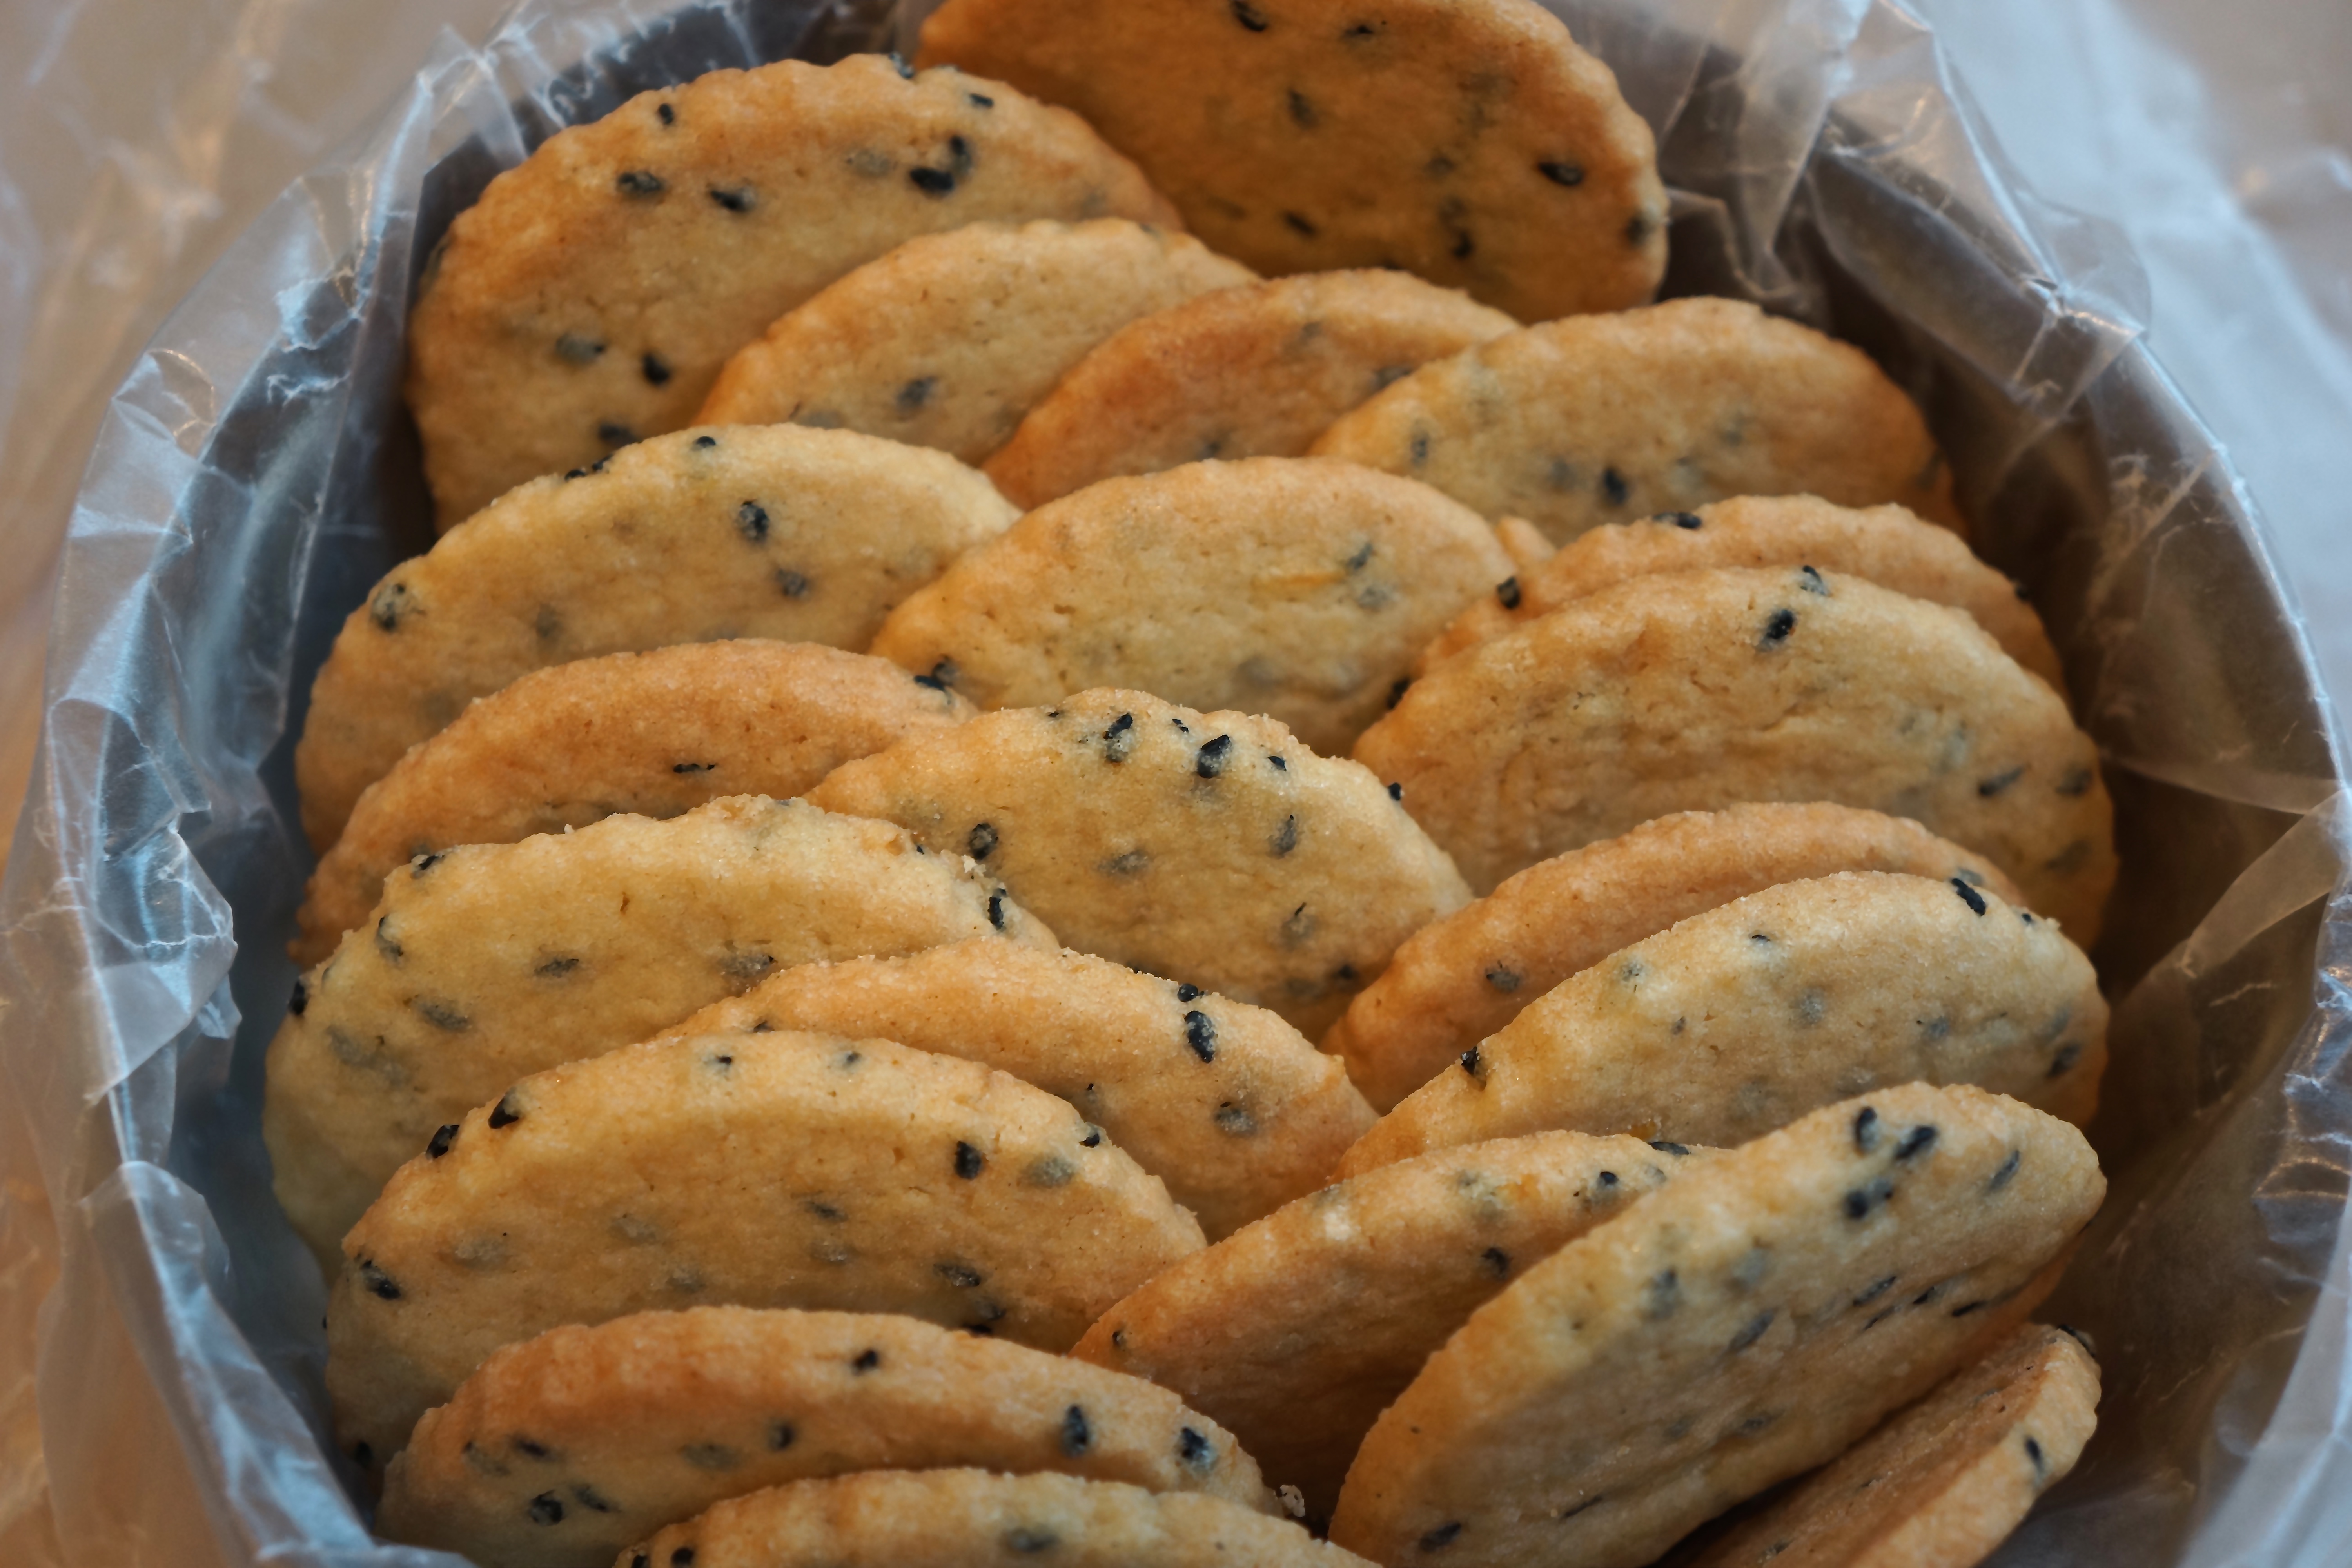
Lemon & Sesame Seed Cookies

You know by now I am a cookie lover. These started out as a lemon poppy seed cookie: crunchy, lemony and addictive. I originally made them to be used as a sandwich cookie with a cream cheese lemon filling. They never made it to that stage as I watched people sitting in my kitchen, unable to stop eating these, just as they were. When I went to make them for this party, I found that my poppy seeds had gone bad but I had a stash of black sesame seeds that were fresh and aromatic.

Both poppy seeds and sesame seeds get rancid quickly, so it’s important to buy them from a vendor who sells really fresh ingredients and store them in your refrigerator or freezer. Taste them before you start this recipe: If they have an oily rancid taste, toss them.

These two seeds have very different flavor profiles. I think the black sesame seeds create a more sophisticated, slightly exotic cookie; but poppy seeds also result in a great cookie.

These are deceptive. They look kind of plain, even unexciting, but the combination of lemon zest, lemon extract, and seeds make these a keeper.

Also, the recipe makes a large amount and, carefully wrapped, they freeze well.

LEMON SESAME SEED COOKIES
EVENT: Game Night
YEILD: 50-60 Cookies

Ingredients
2 1/4 cups all purpose flour
1/2 teaspoon salt
1/2 teaspoon baking powder
1 cup (2 sticks) unsalted butter, room temperature
1 1/4 cups granulated sugar
1 large eggs
2 tablespoons black sesame seeds
2 teaspoons lemon zest
1 teaspoon vanilla extract
1/2 teaspoon lemon extract

Equipment
Parchment lined baking sheets

Directions
1. Combine flour, salt and baking powder in a mixing bowl.

2. Using a stand or hand held mixer, cream butter and sugar until well combined.

3. Add in egg, sesame seeds, lemon zest and both extracts. Mix until well combined.

4. Add dry ingredients in 3 stages, mixing well after each addition.

5. Remove the dough from the bowl, divide in two and flatten each half into a disk. Wrap each half in plastic wrap and chill several hours or several days.

6. Preheat oven to 325 degrees.

7. Roll out disks one at a time on a floured surface to 1/8 inch thickness. If dough won’t roll, allow it to warm slightly a few minutes.

8. Using a 2 1/2 inch cookie cutter, cut out cookies and place on parchment lined baking sheets, 1 inch apart. Gather scraps and re-roll.

9. Chill cookies on baking sheets 15 minutes.

10. Bake until edges begin to color, approximately 18 minutes. Rotate baking sheets front to back and top to bottom, halfway through baking.

11. Cool the cookies on the baking sheets 5 minutes and then transfer to racks and cool completely.

12. Store in an airtight container up to 2 weeks or, carefully wrapped, frozen up to 1 month.

July 20, 2015
At Home with Friends

4 comments

Ginger Mascarpone Cheesecake

There are a lot of no-bake cheesecake recipes out there, but I haven’t found any this good, and in the interest of research, I’ve tried lots and lots.

This one has an unusual blend of cream cheese, low fat yoghurt, mascarpone and heavy cream. Yes, there is sugar in the cookie crust as well as the cheesecake, but the flavor surprise is the minced crystallized ginger and lemon zest.

I’ve made this using both Graham Cracker crumbs as the base, as well as Ginger Snap Cookie crumbs. They’re both great! Add the cardamom to whichever cookie crumbs you use.

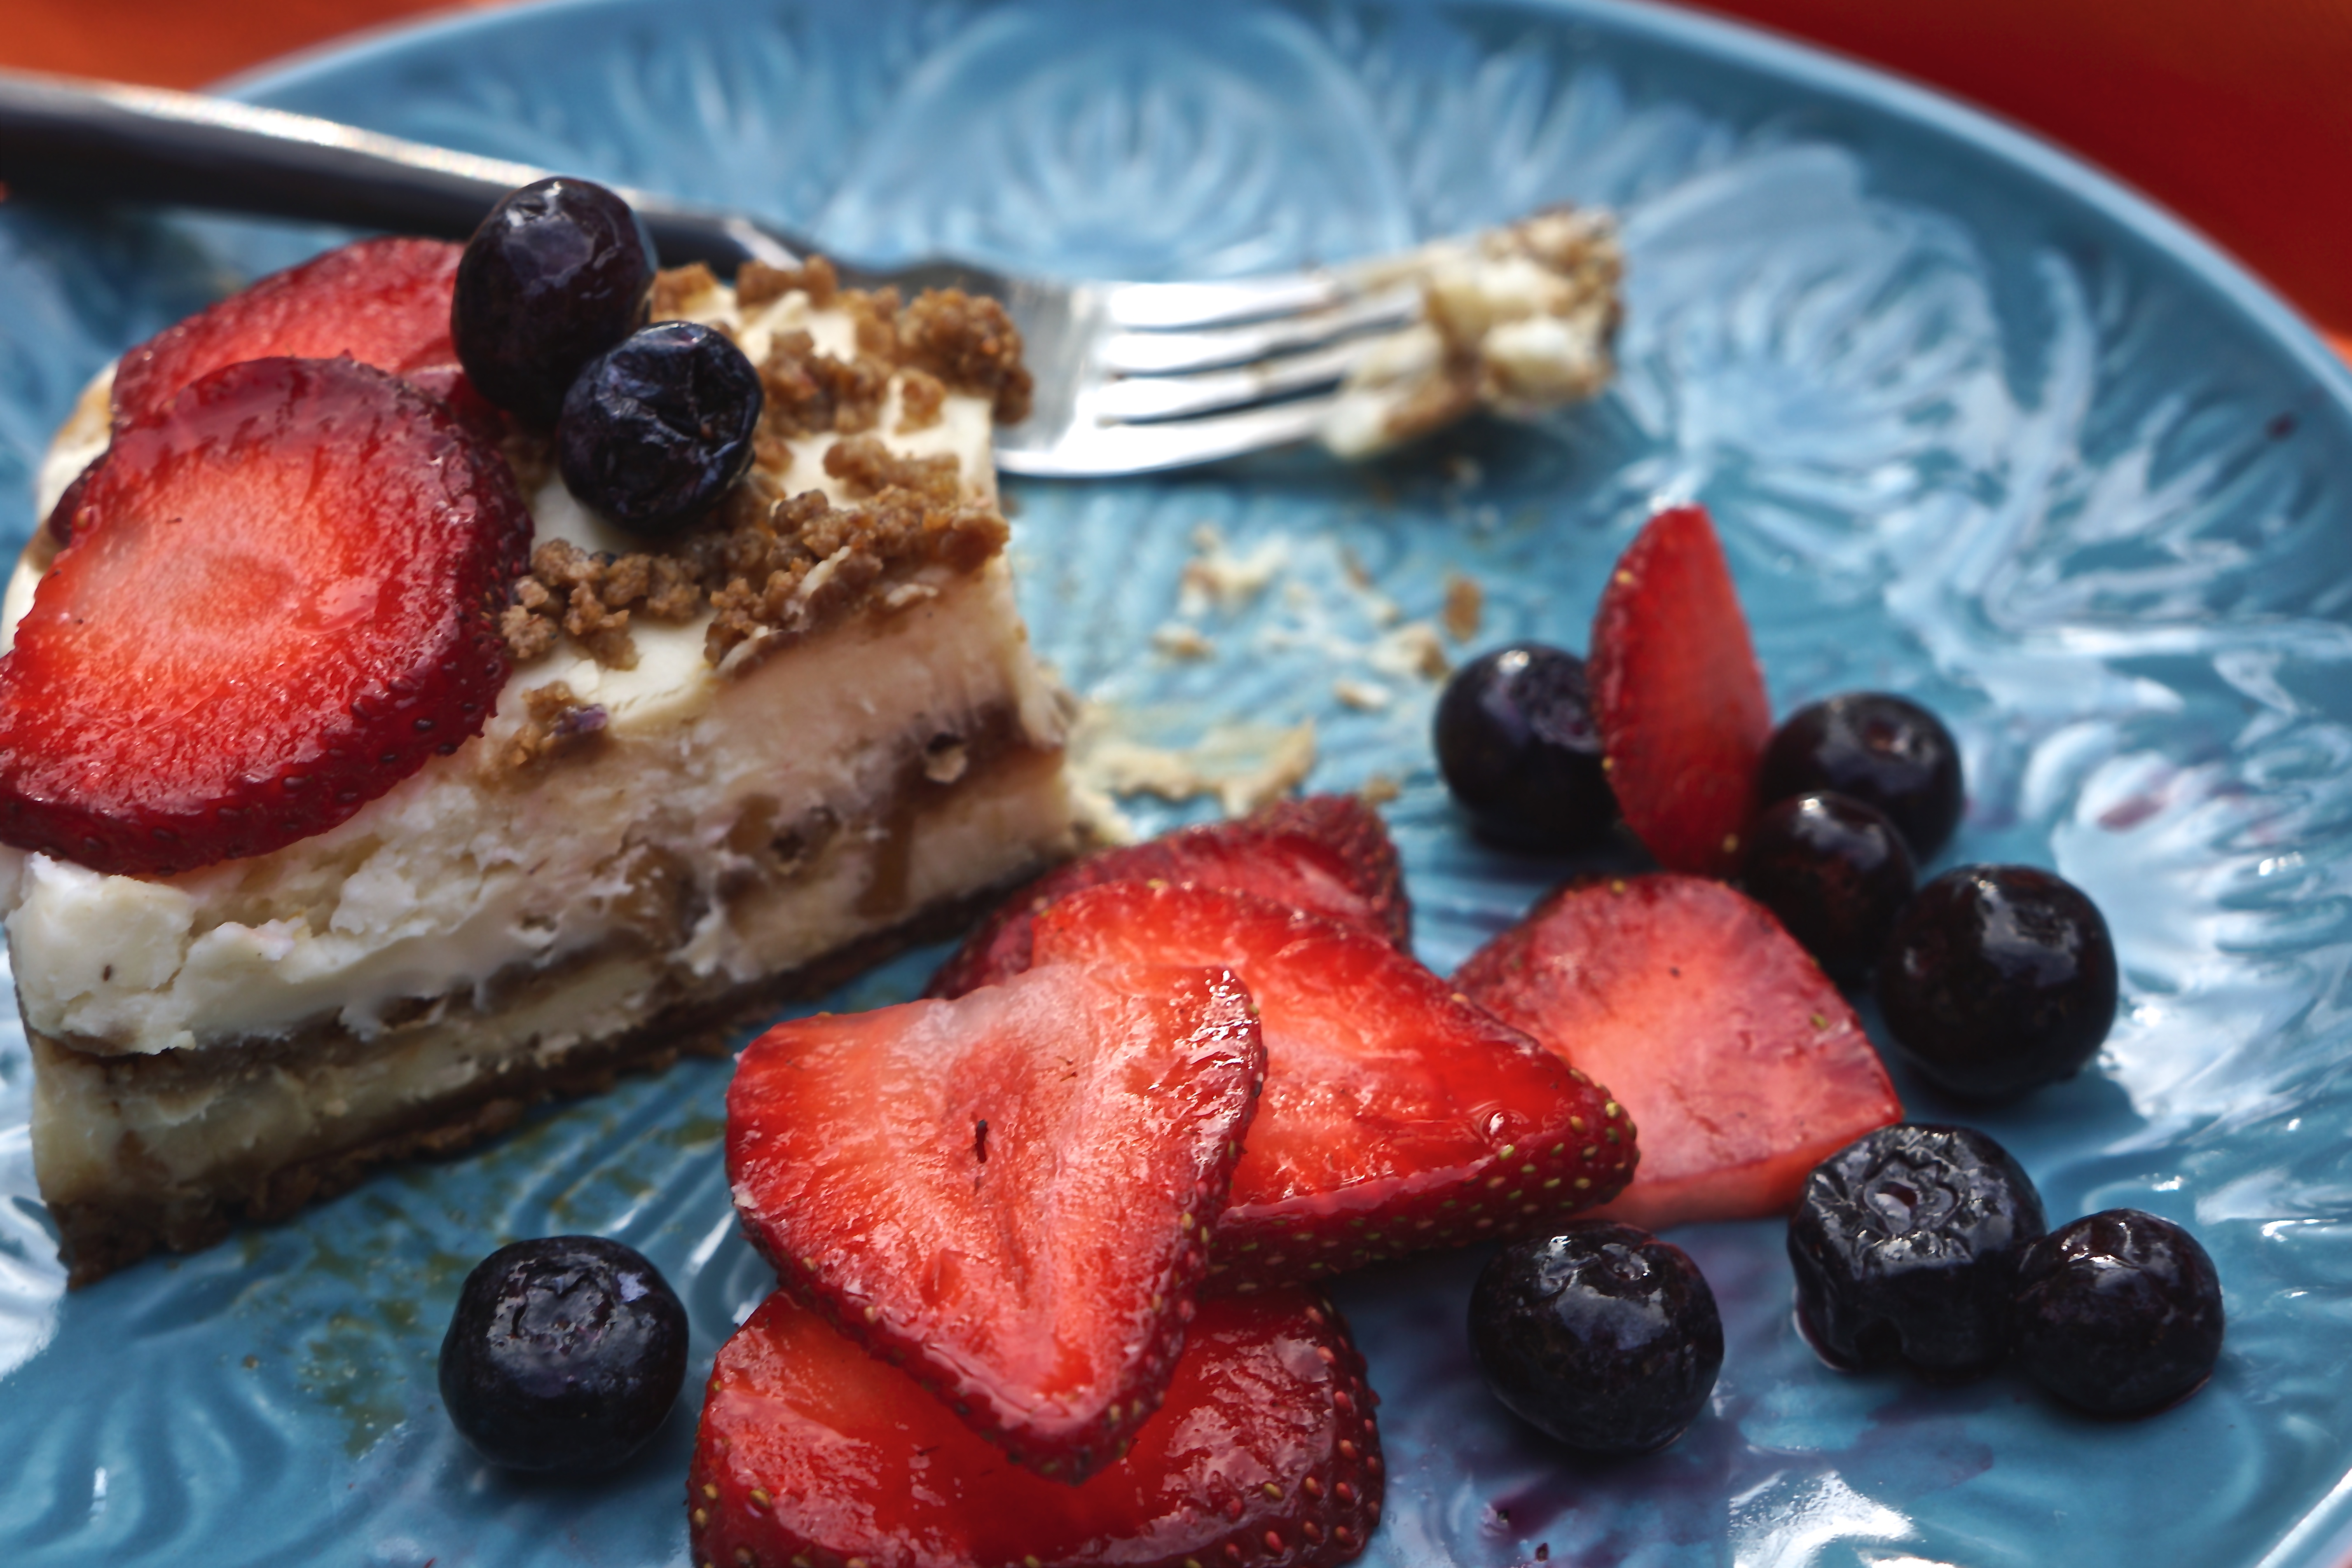
I served it at Game Night with loads of fresh berries on the side. When I make it in the fall, I’ll serve it with homemade stone fruit jam.

As I am writing this, I can already taste this creamy, dreamy, melt-in-your-mouth perfection! This is one time, the leftovers will be staying at my house.

GINGER-MASCARPONE CHEESECAKE
EVENT: Game Night
SERVES: 10-12 People

Ingredients
12 oz. Graham Cracker crumbs OR 40 Ginger Snaps crumbs (about 2 1/2 cups) *
1/2 teaspoon ground cardamom
8 tablespoons unsalted butter, melted
8 oz. cream cheese, room temperature
1/2 cup plain low-fat yogurt, room temperature
2/3 cup sugar
1/2 teaspoon vanilla extract
1/2 cup minced candied (crystallized) ginger
1 lb. mascarpone cheese, room temperature
1/3 cup heavy cream
1/2 – 3/4 teaspoon lemon zest, to taste

Equipment
9-inch springform pan

Directions

1. Butter a 9-inch springform pan and dust it with a little sugar and knock out any excess.

2. Combine the Ginger Snaps crumbs, butter and cardamom, rubbing them together with your fingertips to combine thoroughly. Sprinkle one half the crumbs over the bottom of the pan and pat down evenly.

3. With an electric mixer, whip together the cream cheese, yogurt, sugar, vanilla, crystallized ginger and lemon zest until smooth, scraping down the sides. Add the mascarpone and cream and whip until the mixture is thoroughly combined and just holds peaks. Don’t overwhip or the mixture may separate!

4. Carefully spoon ½ half the mascarpone mixture over the crust, spreading it evenly to the edges of the pan. Gently tap the pan on the counter to eliminate any air bubbles.

5. Sprinkle half of the remaining crumbs over the mascarpone cream.

6. Top the remaining mascarpone and finish with remaining crumb mixture.

7. Cover with plastic wrap and refrigerate overnight.

8. Can be made 5 days ahead and stored well wrapped in the refrigerator.

* A NOTE: I purchase the Graham crackers at Costco.

July 16, 2015
At Home with Friends

2 comments

Giant Cornmeal Anise Cookie

No matter what our parents told us, we all know it’s fun to play with food. Maybe not a food fight (at least in my house) but fun to play.

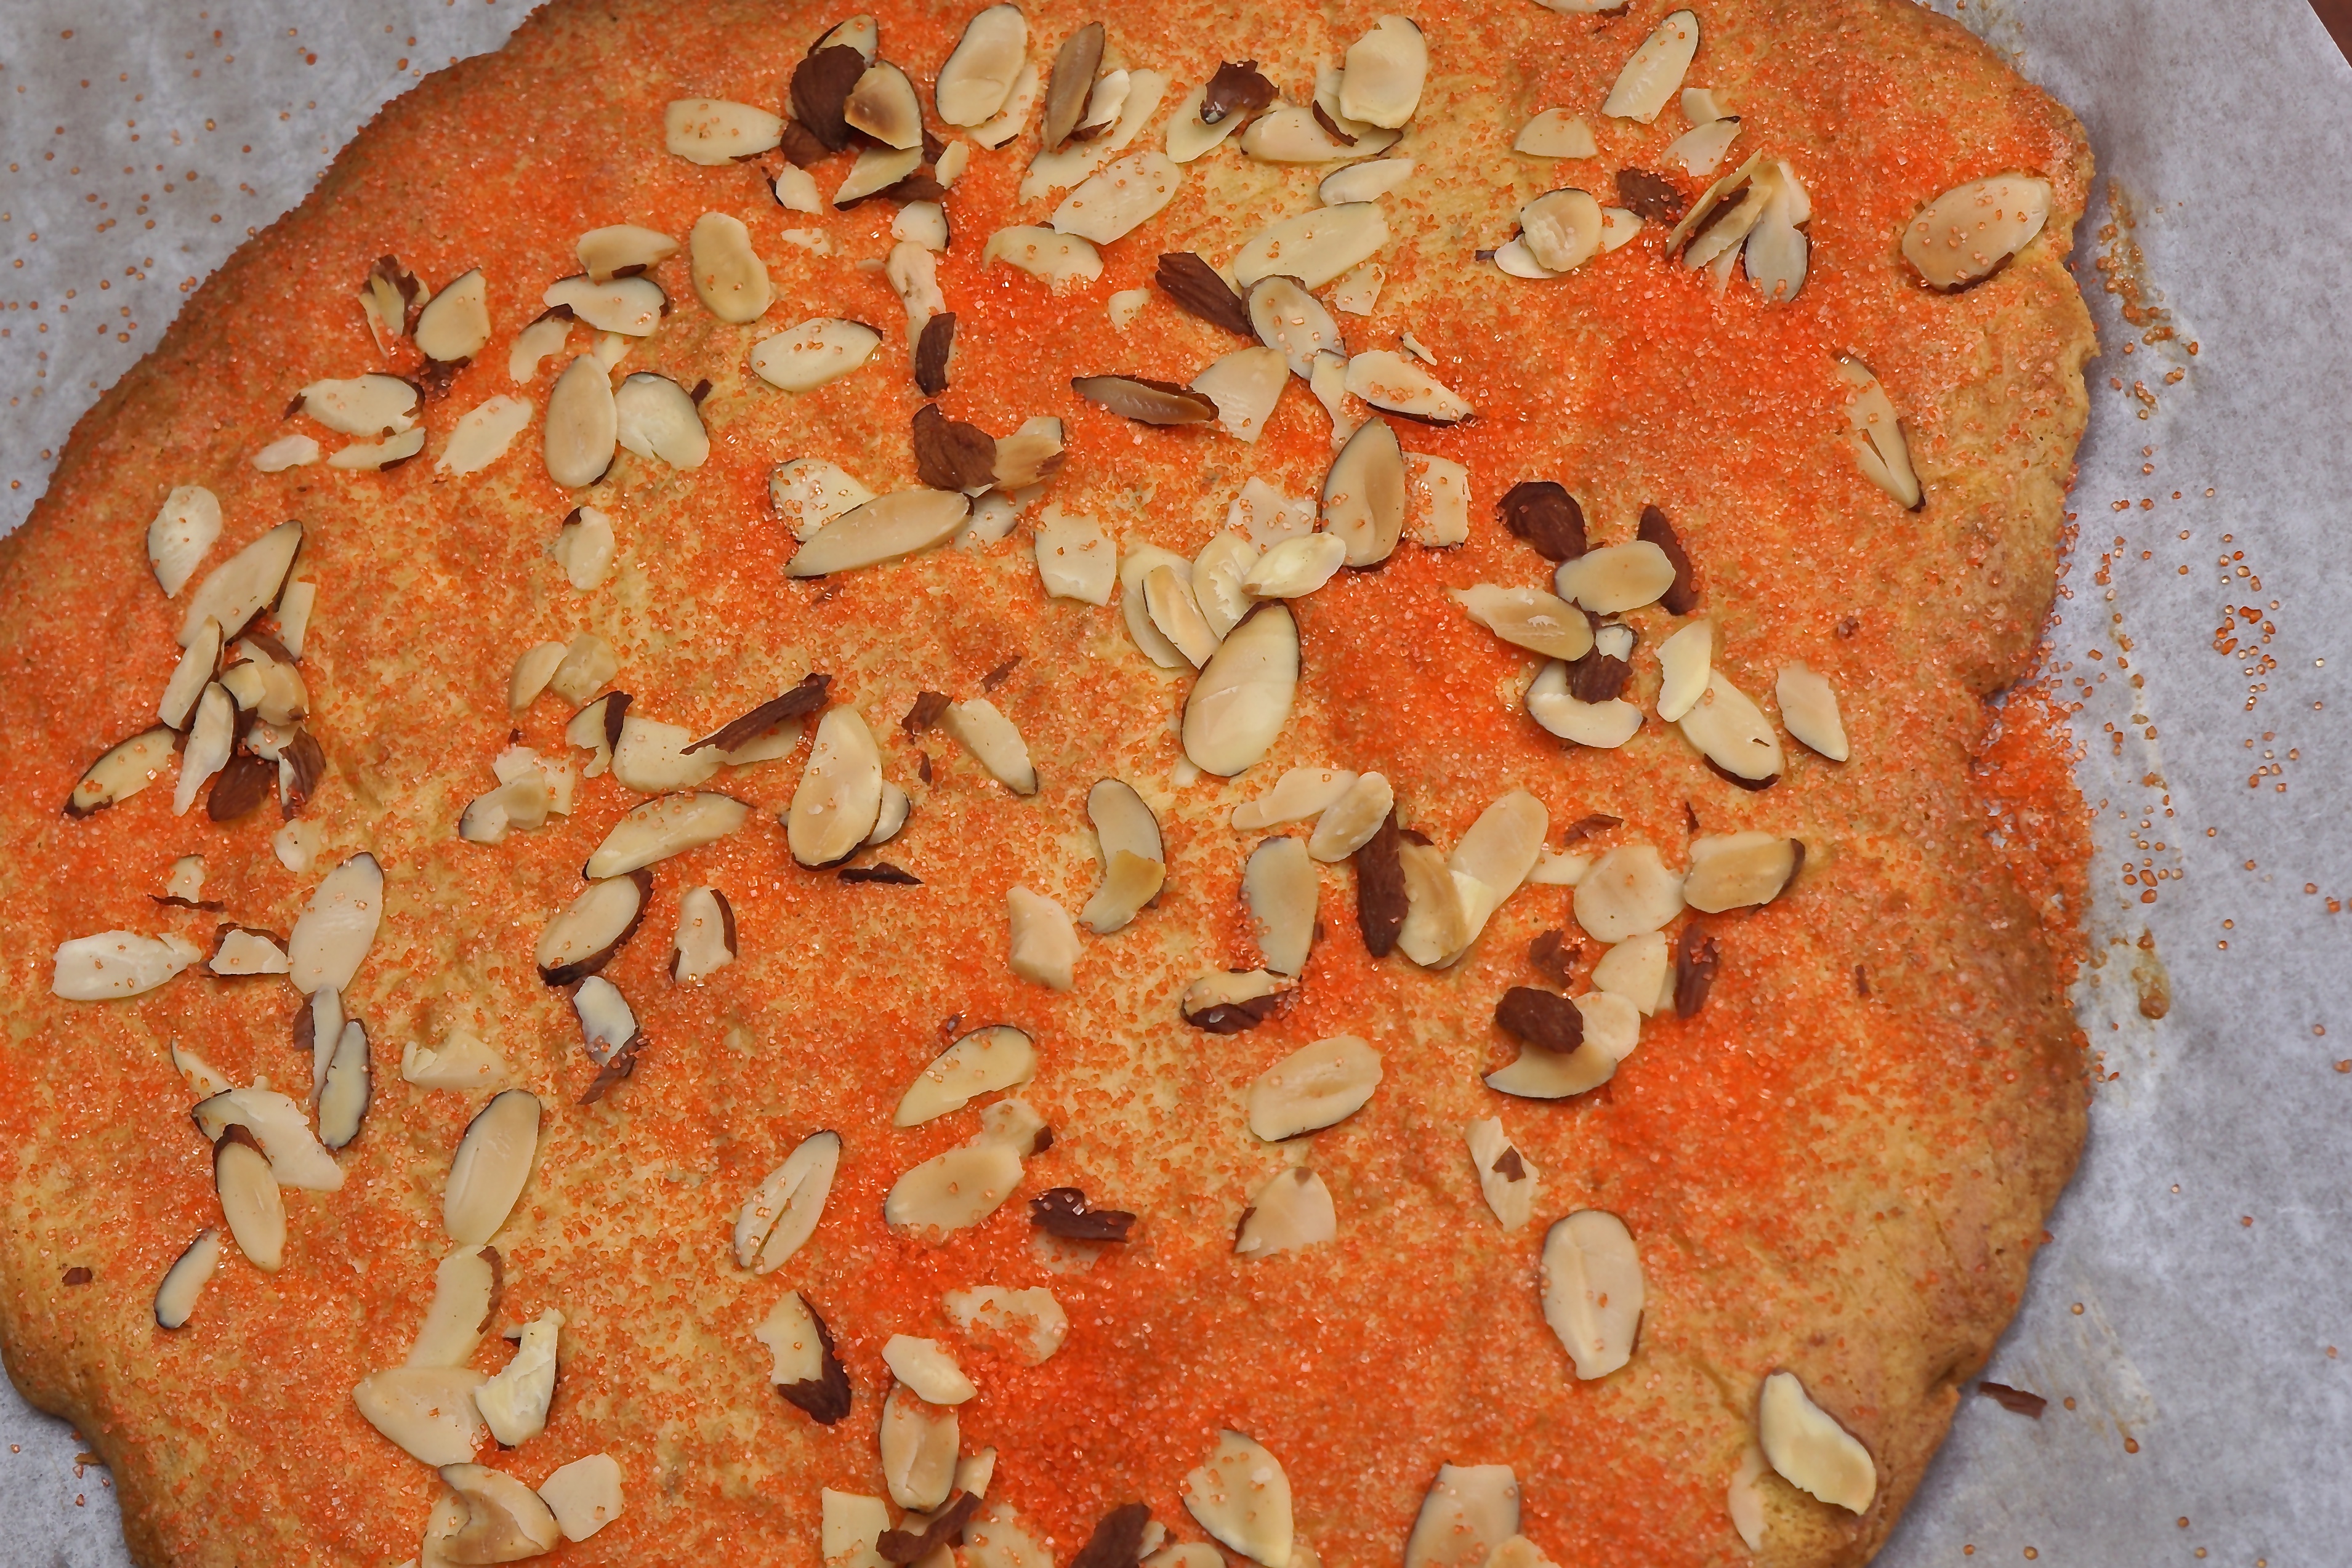
What better time than Game Night to have food to play with? So I made a giant cookie that my friends got to pass around and break apart. Watch the joy on your guests’ faces as they do this.

This is one of those recipes you’ll use over and over again. It’s got loads of flavor from the combination of lemon zest, almond extract and anise seeds, and it’s super simple to make.

It’s topped with sliced almonds and sugar. I used orange sanding sugar because it seemed perfect for Game Night but you can use regular sugar.

You can also make this a day or two ahead and store it room temperature. I even forgot to cover mine and it was still yummy.

The only problem with making this ahead is resisting the temptation to break off just a tiny nibble… No one will notice, right?

GIANT CORNMEAL ANISE COOKIE
EVENT: Game Night
YEILD: One Giant Cookie
SERVES: 6-8 Depending on Other Dessert

Ingredients
¾ cup all purpose flour
¾ cup corn flour or fine ground yellow cornmeal
1 teaspoon anise seeds
¼ teaspoon baking powder
¼ teaspoon Kosher salt
3 tablespoons unsalted butter
½ cup granulated sugar
1 large egg
1 egg white
3 teaspoons grated lemon zest
2 tablespoons sliced almonds
1 tablespoons sanding sugar or regular sugar for topping

Equipment
Parchment lined baking sheet

Directions

  1. Preheat oven to 350 degrees.

  2. Whisk together flour, corn flour, anise seeds, baking powder and salt.

  3. In stand mixer, beat butter and ½ cup sugar until pale and fluffy.

  4. Add in whole egg and lemon zest and almond extract.

  5. Reduce speed to low and add in flour mixture.

  6. Press dough into 1/4-inch thickness on parchment lined baking sheet.

  7. Beat egg white. Brush dough with egg white. Top with almonds and sanding sugar.

  8. Bake until golden, 20-25 minutes. Cool on a wire rack.

  9. Serve whole and ask guests to break off pieces.

July 13, 2015
At Home with Friends

2 comments

Turkish Salad

I wanted something crunchy and refreshing as a side salad to compliment the Fish Sliders and Pulled Lamb Sandwiches.

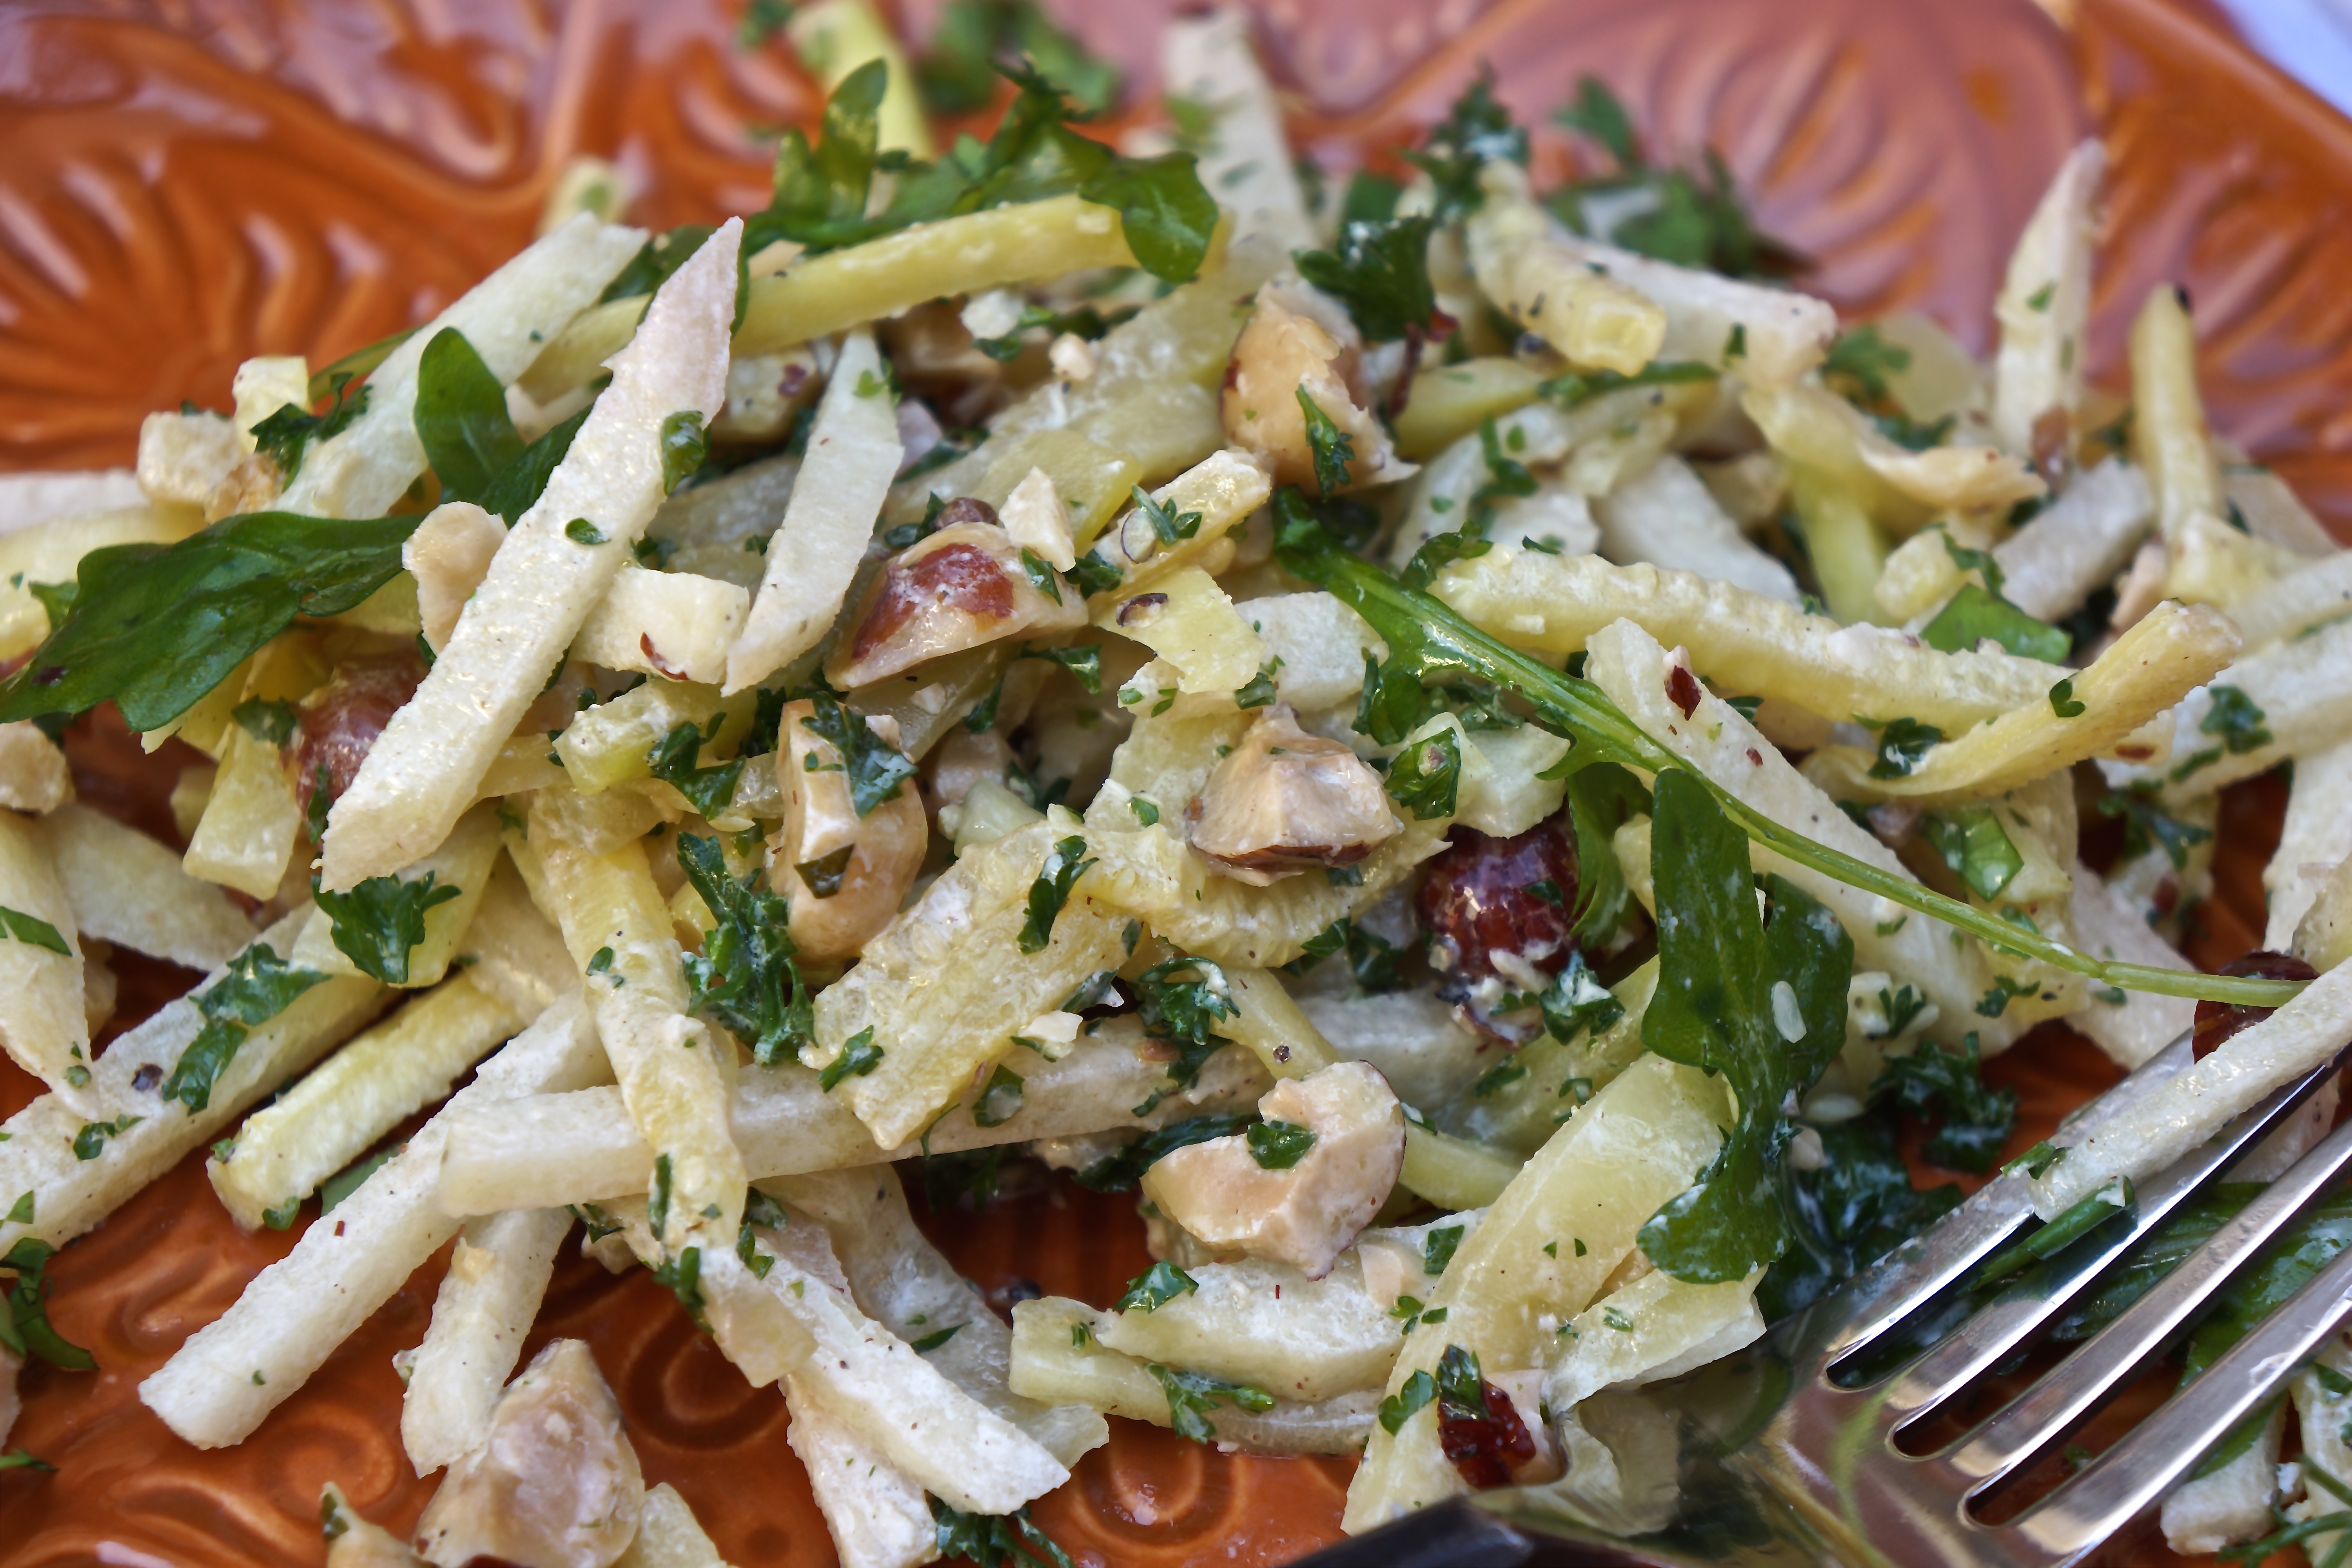
I found a recipe from an out-of-print Turkish cookbook and was intrigued. The combination of apples and zucchini with a yoghurt hazelnut dressing was something I had never eaten.

The original recipe called for raw garlic but my tasters felt the garlic was too strong and I felt it was totally unnecessary.

Something I didn’t realize but which makes it perfect party fare is that it can actually be made a day ahead and it retains its fresh crunchy character and the flavors are even better. Try this salad if you need to bring a salad to a barbecue. It’s a perfect summer salad. In fact, I’m thinking of serving it when I make ribs.


TURKISH SALAD

EVENT: Game Night

SERVES: 10-12 People


Ingredients

For the salad:

6 zucchini

3 red apples

Juice 2 lemons

For the dressing:

6 oz. roasted hazelnuts, coarsely chopped

6 tablespoons olive oil

6 tablespoons thick Greek yoghurt *

Salt and pepper to taste

To serve:

3 bunches fresh parsley, chopped


Directions

1. Peel the apples, slice into matchsticks and put in bowl with lemon juice to stop apples from turning brown.

2. Peel zucchini and slice into matchsticks and add to bowl with apples and lemon juice.

3. Combine olive oil, yoghurt and hazelnuts. Mix well and toss with apple / zucchini mixture.

4. Season with salt and pepper to taste.

5. If serving immediately, mix with chopped parsley and serve. If making a day or two ahead, mix with chopped parsley just before serving.

* A NOTE: I buy my supplies of Greek yoghurt at Costco.

July 9, 2015
At Home with Friends

2 comments

Spicy Walnut, Beet & Carrot Salad

This menu has so many assertive flavors that I wanted a salad that was equally assertive and also fresh and delicious.

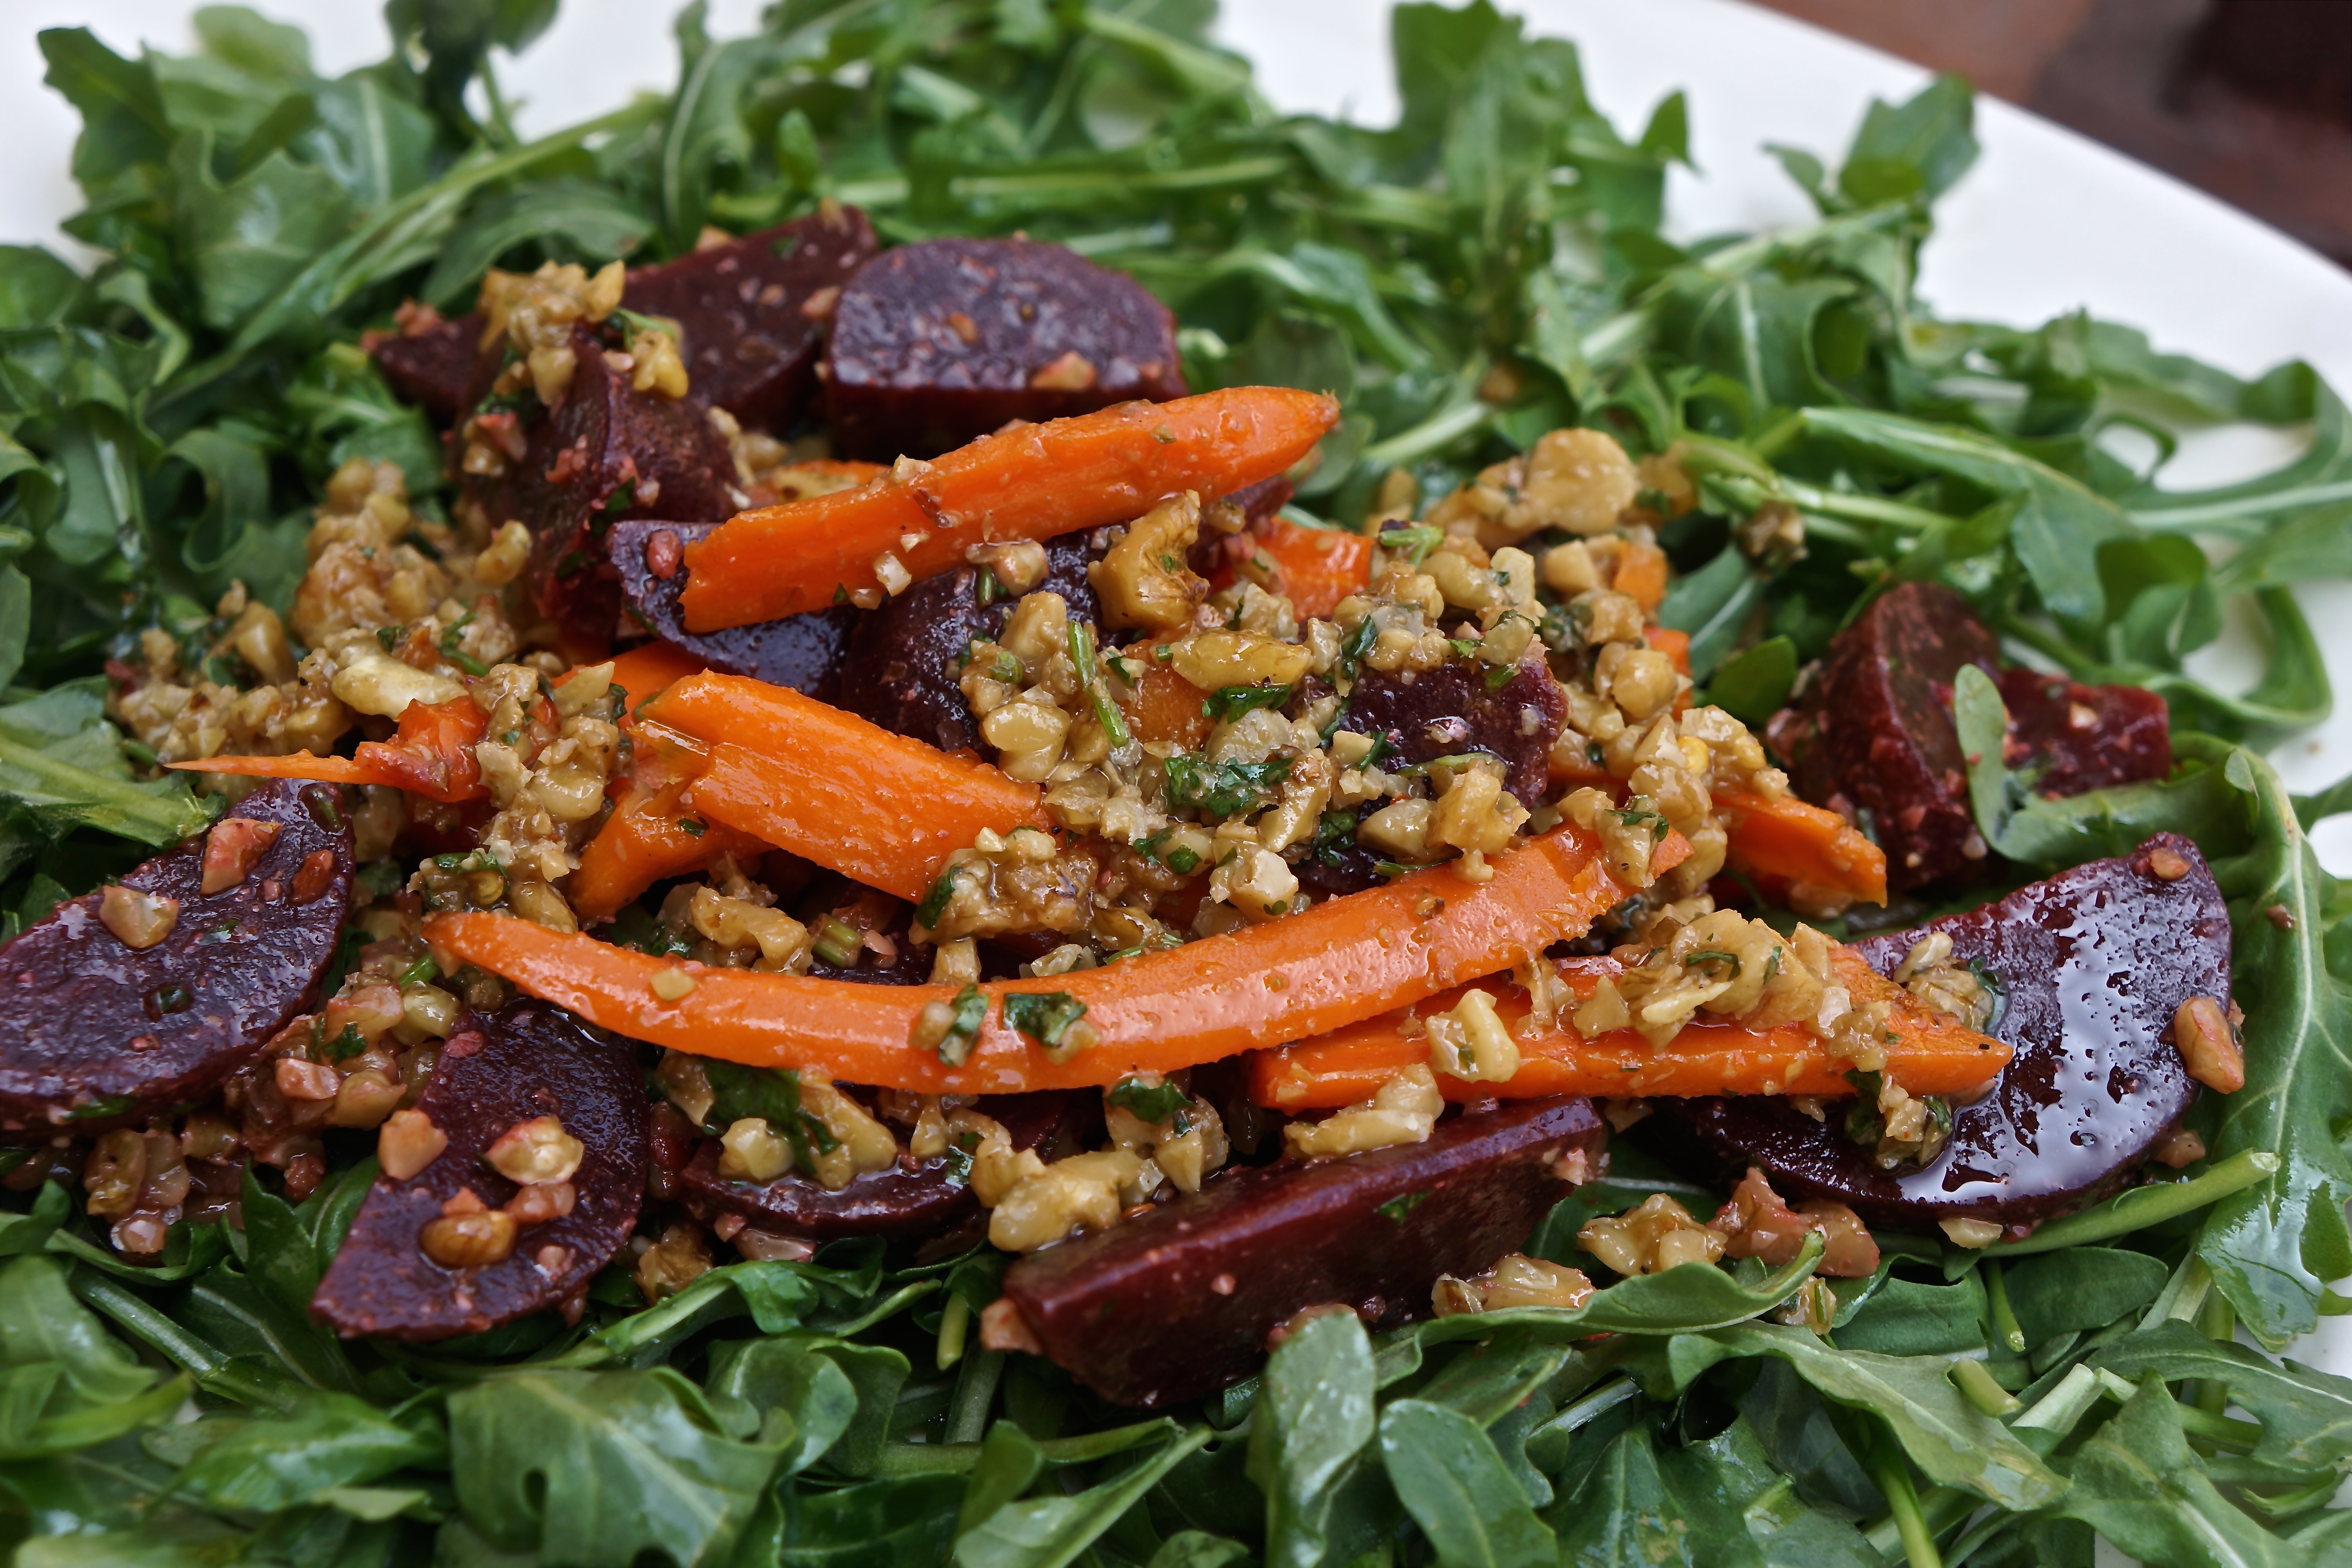
This salad is really all about the dressing. My tasters were asking if they could just eat it right out of the bowl on crackers.

The flavors are a bit exotic and seductive. Maybe you don’t think of a salad dressing in this way, but it’s got some mystery as you try to identify the ingredients. It flatters the carrots and beets and surprisingly calls you back for just another taste.

The secret ingredient of pomegranate molasses adds a tanginess and an extra bit of acidity that together with the chopped toasted walnuts makes this almost decadent.

And it’s a salad! You’re eating your vegetables, you’re getting your greens, you’re even being a vegetarian… At least until you bite into the pulled lamb on pita, which is also part of this menu.

SPICY WALNUT, BEET, CARROT SALAD
EVENT: Game Night
SERVES: 8-10 People

Ingredients
For the salad:
4-6 beets, not peeled
Bunch small carrots, scrubbed
1 7-oz bag pre-washed baby organic arugula
For the dressing:
1 cup walnuts, toasted and finely chopped *
4 cloves garlic, crushed
1/4 teaspoon red chili flakes
1/8 cup fresh lemon juice
2 teaspoons pomegranate molasses
3 tablespoons extra virgin olive oil
Salt and pepper to taste
1/4 cup chopped fresh cilantro

Directions

  1. Preheat oven to 425 degrees.

  2. Place beets on a large sheet of foil and carrots on a separate sheet of foil. Drizzle each sheet with olive oil and season with salt and pepper.

  3. Seal each packet. Place both packets in oven on middle rack.

  4. Remove carrots after 30 minutes, beats after 40-45. Beets should be tender but not falling apart.

  5. Let beets cool slightly. Run under cold water and rub the skin from the beets. When cool, cut into small wedges.

  6. Slice carrots lengthwise.

  7. While vegetables are cooling, prepare the dressing.

Make the dressing:

  1. Combine in a mixing bowl the garlic, chili flakes, lemon juice, pomegranate molasses and olive oil. When thoroughly combined, add the chopped walnuts and combine well.

  2. The dressing can be made ahead to this point and stand for several hours or even made the day before.

  3. Add chopped cilantro just before serving.

To serve:

  1. Toss ½ half the dressing with carrots and the other ½ half with the beets.

  2. Mound the arugula on a serving plate and place the carrots and beets on top, alternating between the carrots and beets.

  3. Drizzle a bit more olive oil on the arugula.


* A NOTE: I purchase the walnuts at Costco.

July 6, 2015
At Home with Friends

3 comments

Chocolate Prune Cake with Salted Butter Caramel Sauce

My Chocolate Prune Cardamom Cookies and the combination was so scrumptious I went in search of other chocolate prune recipes. I found David Lebovitz’s Chocolate Prune Cake that he took to a dinner party in Paris. I figured if it was good enough for a dinner party in Paris, it was fine for Game Night in Beverly Hills.

I loved the recipe which contains no flour, just oodles of chocolate and prunes. It’s definitely for chocolate lovers: Not too sweet but just so chocolatey.

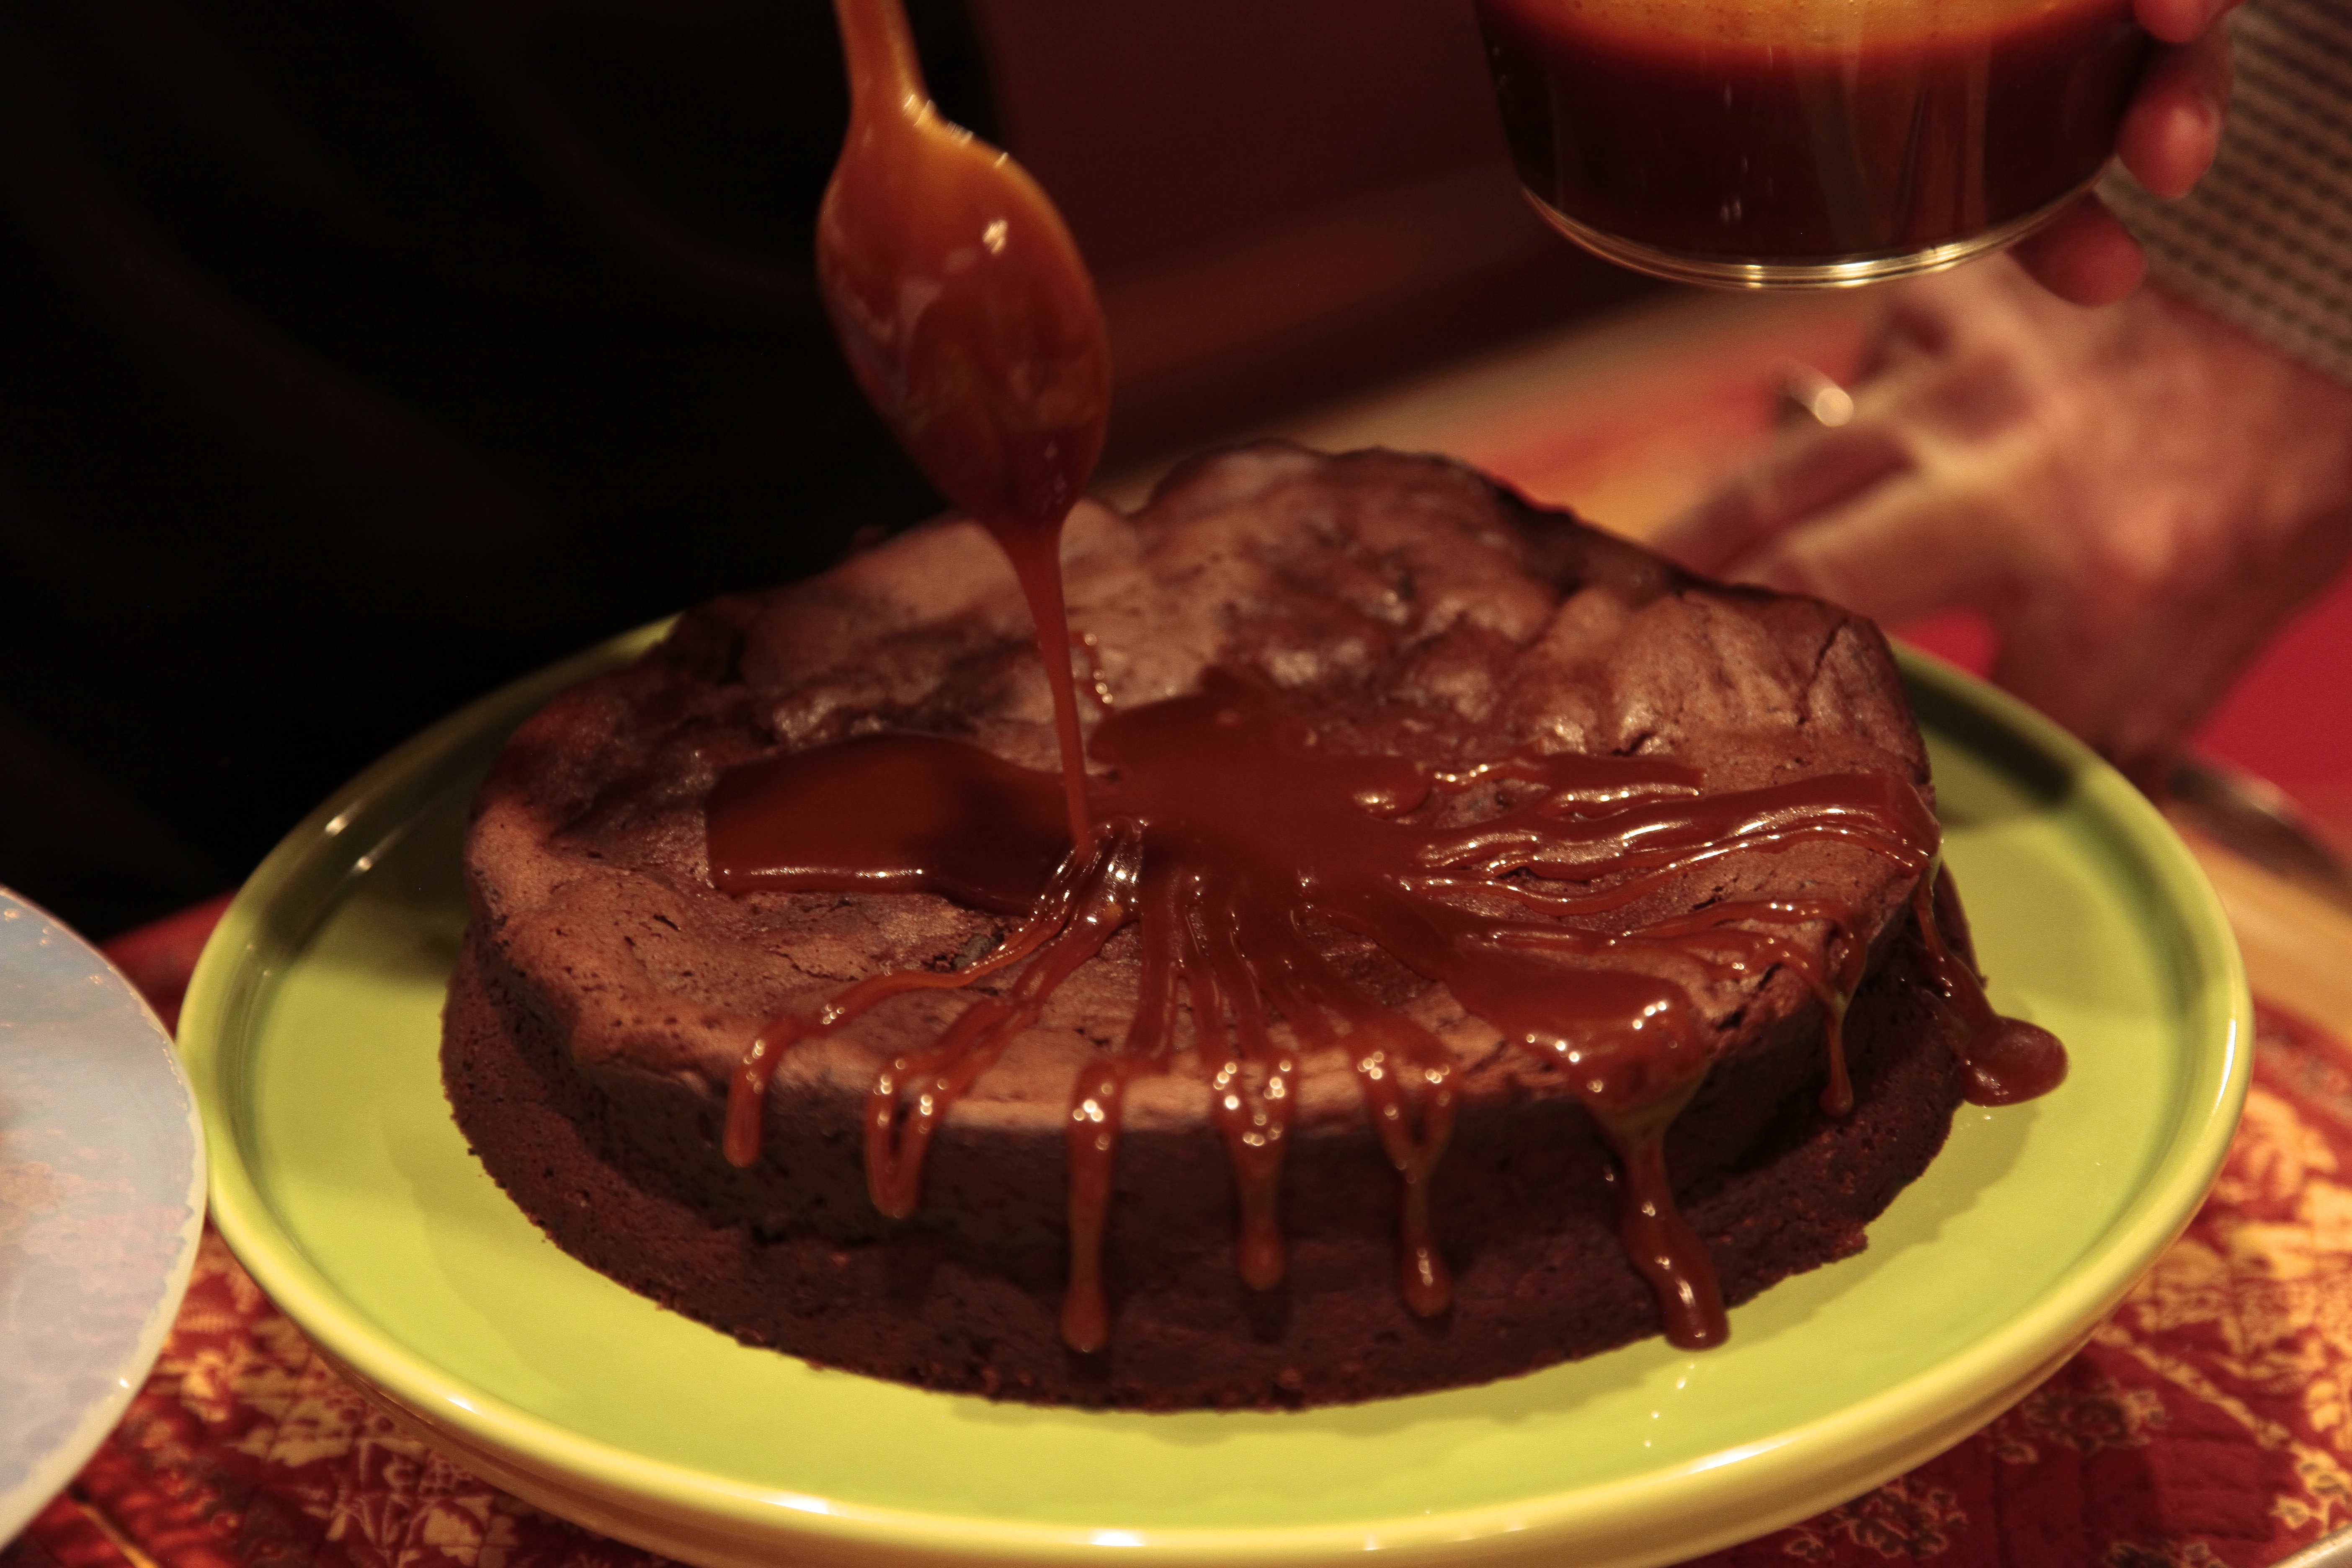
David Lebovitz suggests serving it with Salted Butter Caramel Sauce, which I included. I also figured some fresh berries and a dollop of whipped cream couldn’t hurt.

Try not to overcook the cake or burn the sauce. I did both. My friends were polite and pretended not to notice, as the cake disappeared.

Add this to your dessert repertoire. The only change I made was to use Armagnac instead of rum. This is for serious chocolate lovers, which includes me. And it’s okay for breakfast because it includes prunes, right?


CHOCOLATE PRUNE CAKE
EVENT: Game Night
SERVES: 10-12 People (One 9-Inch Cake)

Ingredients
6 oz pitted prunes, diced in small pieces *
1/3 cup Armagnac
1 tablespoon granulated sugar
12 oz bittersweet or semisweet chocolate, chopped
12 tablespoons (6 oz) unsalted butter, cubed
6 large eggs, separated
1/4 teaspoon salt
3 tablespoons sugar
Extra butter for pan and cocoa powder

Equipment
One 9-inch springform pan

Directions

1. In a small saucepan, simmer the prunes with the Armagnac and the sugar for a few minutes, until most of the moisture is absorbed. Set aside.

2. Preheat oven to 325 degrees.

3. Butter a 9-inch springform pan and dust the inside with flour or cocoa powder.

4. In a large bowl, set over a pan of simmering water, melt the chocolate and butter.

5. Remove from heat and stir in the prunes and any liquid in the pan. Stir in the egg yolks.

6. In a stand mixer, whip the egg whites with the salt until they begin to hold soft peaks.

7. Continue whipping, adding the 3 tablespoons of sugar, one at a time, until other egg whites hold the shape.

8. Fold 1/3 of the egg whites into the chocolate mixture thoroughly, then gently fold in the remaining egg whites. Don’t overfold!

9. Pour into pan. Using offset spatula, gently even cake.

10. Bake 40-45 minutes until the edges feel set and the center is still soft. Cool completely.

11. Run knife around the cake to loosen it from the pan and remove the sides, dip knife in hot water to get clean slice.

12. Serve with Salted Caramel Sauce, fresh Whipped Cream and fresh berries.

Can be stored room temperature up to 3 days or frozen for two months.

* A NOTE: I purchase the prunes at Costco.


SALTED BUTTER CARAMEL SAUCE (by David Lebovitz)
EVENT: Game Night

Ingredients
1 cup (200 g) granulated sugar
½ cup (125 ml) water
6 tablespoons (3 ounces / 85 g) salted butter, cubed, at room temperature
½ cup (125 ml) heavy cream
Sea salt or kosher salt (optional)

Directions

1. Spread the sugar in a large skillet or wide saucepan and pour the water over it. Heat the sugar over medium heat, swirling the pan very gently, just enough to moisten the sugar evenly with the water.

2. Once the sugar is moistened and starting to cook, swirl the pan only if there are dry spots of sugar that aren’t melting. Continue to cook the sugar until it begins to darken. Watching carefully, gently swirl the pan, only if necessary, so it cooks evenly. (If the sugar starts to crystallize, continue cooking, stirring only if you see very dark or burnt spots appearing, and the crystals should eventually smooth out.)

3. When the caramel is deep amber color and begins to smoke, remove the pan from the heat and drop in the cubes of butter. Stir the butter in with a whisk until it’s completely melted, then gradually whisk in the cream, stirring until the sauce is smooth. If there are stubborn bits of caramel stuck to the bottom, loosen them with a wooden spoon and stir them in. If they refuse to melt, rewarm the sauce over low heat, which should to the trick. Once the sauce is cool enough to taste, you may want to add a bit of salt.

4. The sauce will keep for up to 2 weeks in the refrigerator and can be reheated before serving. If cooled and rewarmed, it may need to be thinned with a bit of cream of milk.

July 2, 2015
At Home with Friends

3 comments

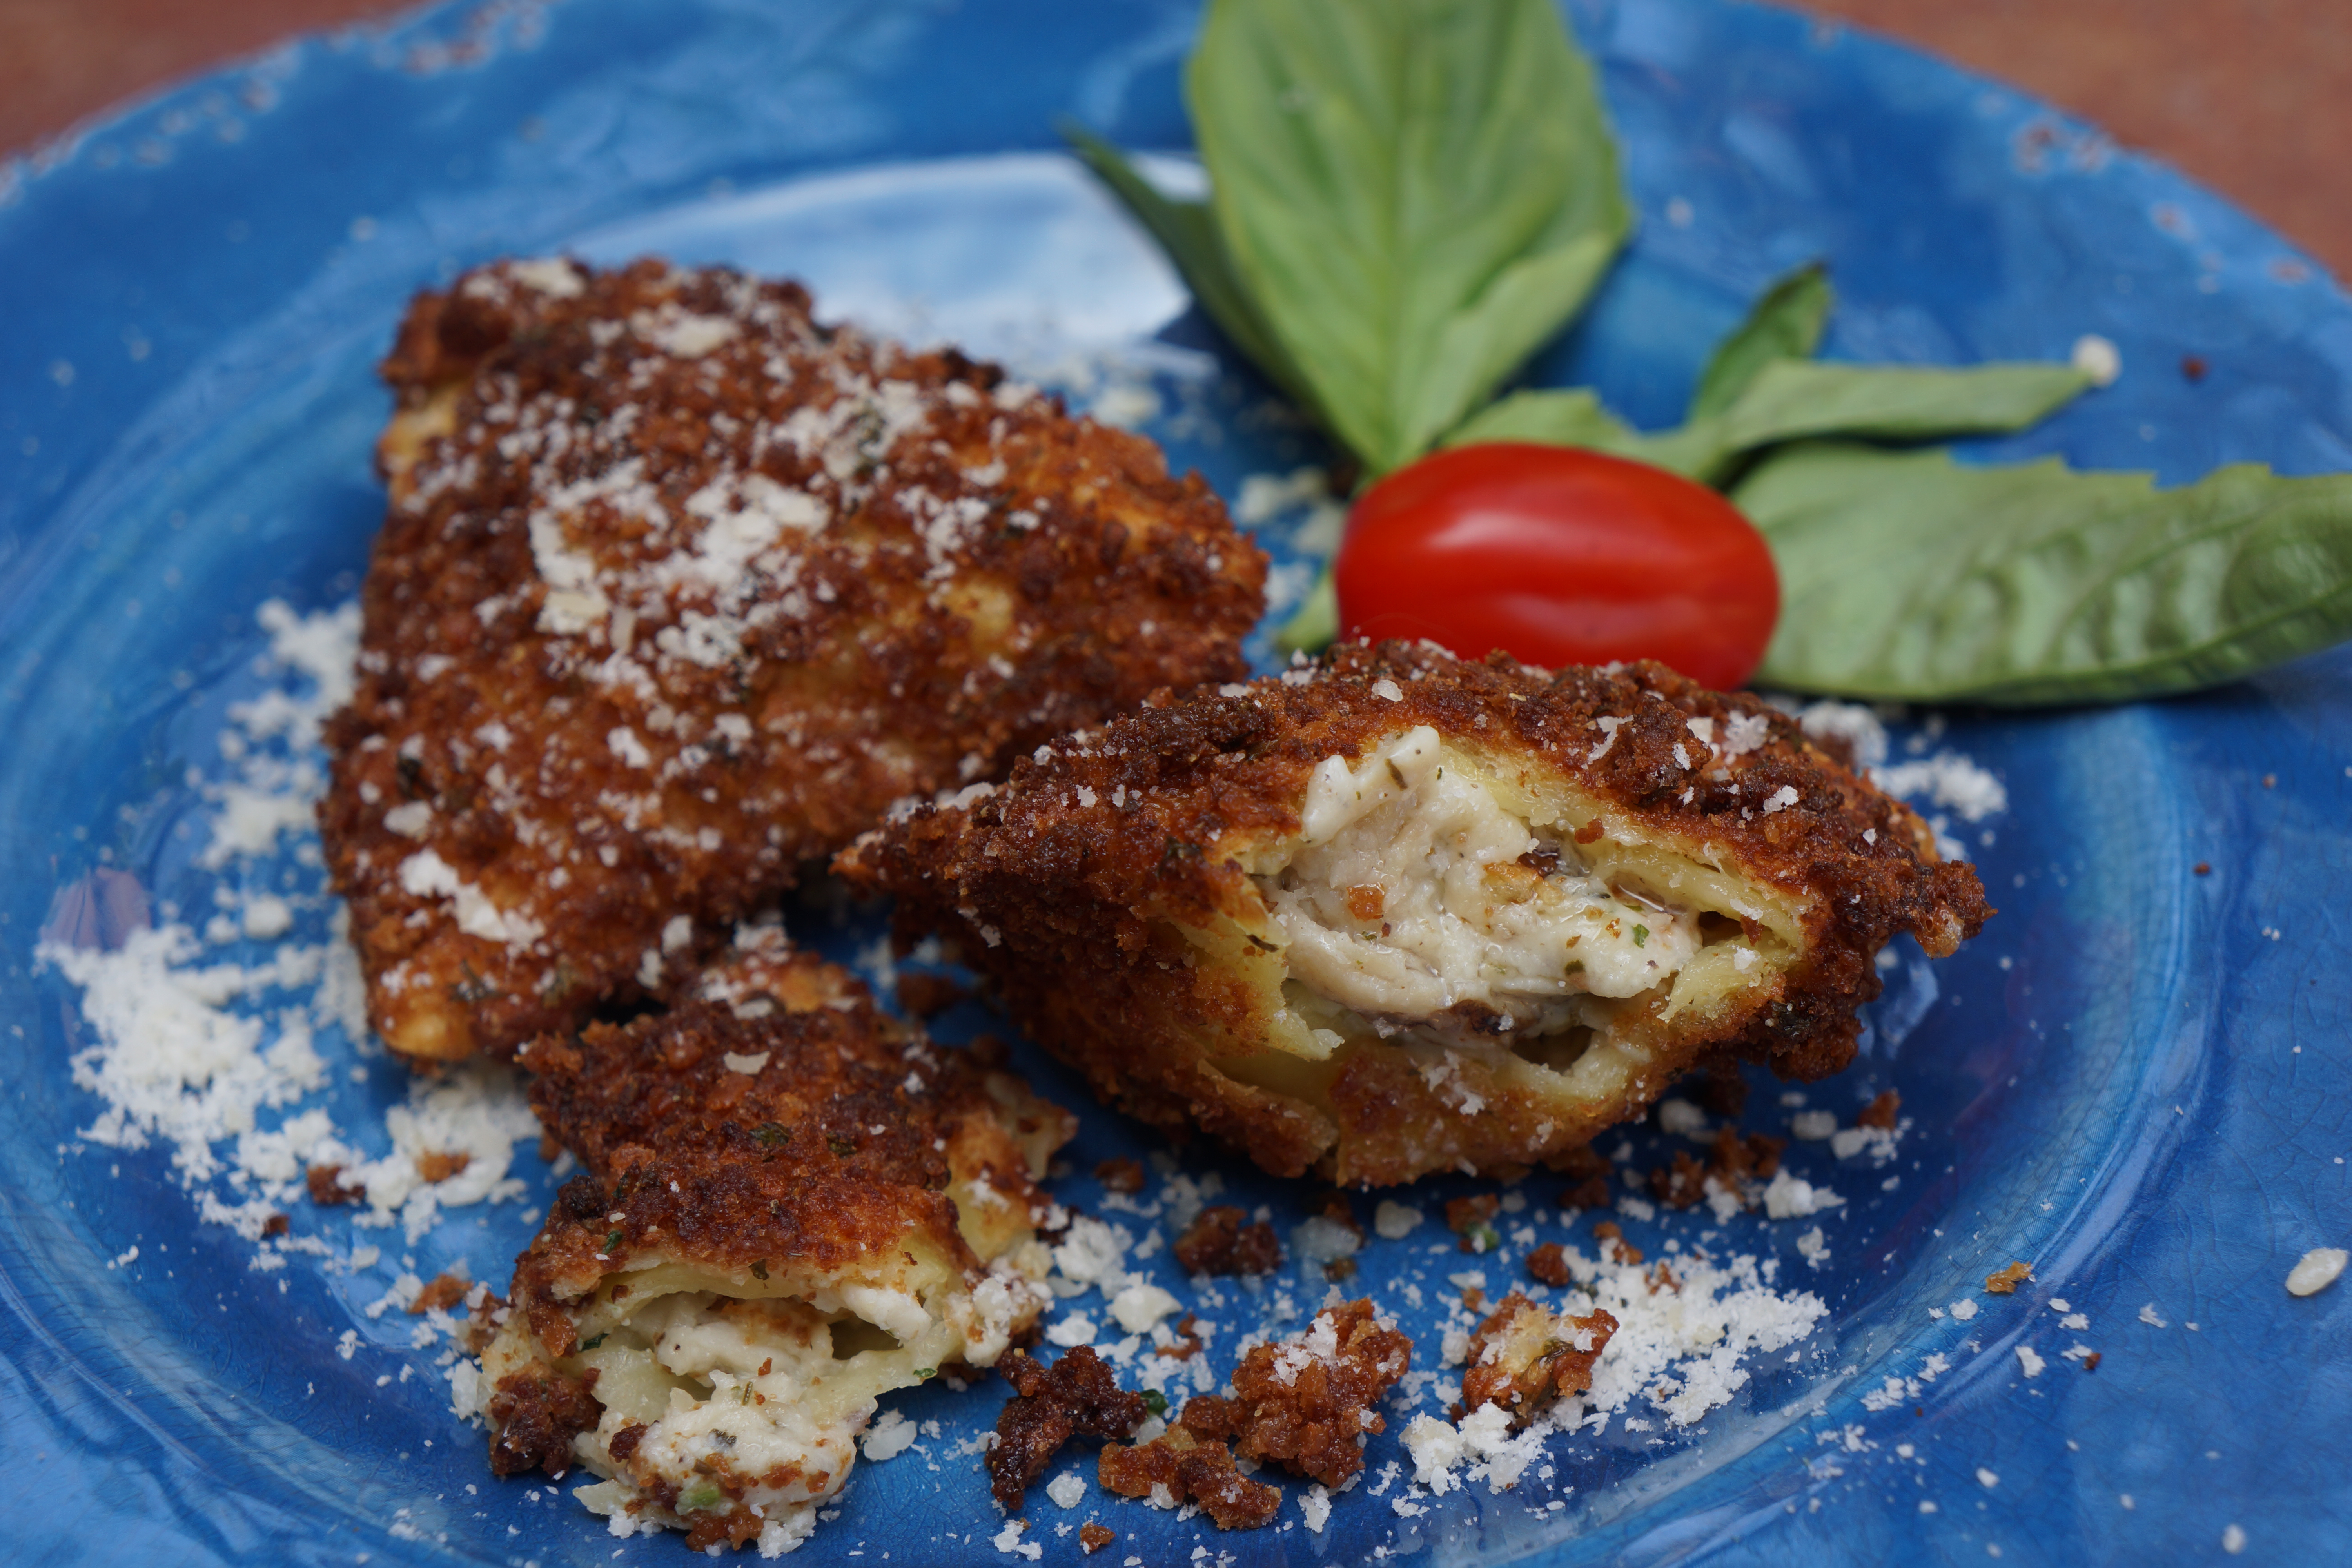
Fried Ravioli with Tomato Dipping Sauce

Are you afraid of deep frying food? I was. When I was a kid, my Mother didn’t fry much. Eggs were poached, potatoes were baked; and on the one or two occasions she made fried chicken, I was banned from the kitchen.

I had this irrational fear of frying. The kitchen could be set on fire. I could suffer 3rd degree burns or worse…

Then I went to a cooking class in San Francisco and I was put in charge of frying the crab cakes. I stepped up and overcame my fear. In that class, I deep fried crab cakes in a large 4-quart pot with a few inches of oil.

I grew so confident, I even bought a deep fryer. The one I bought was made by Wolfgang Puck and it promised to be easy, safe and foolproof.

I took it for a spin at Chanukah Party, to make jam filled, deep fried wontons. This was a serious piece of kitchen equipment and I was a bit nervous, so I enlisted my friend Dano to help. I didn’t know his fear of frying was even greater than mine. We did a test run and he insisted that we have a fire extinguisher on hand.

There was no fire, but there was a huge amount of oil to dispose of. After that Chanukah and the rave reviews for the wontons, I disposed of the deep fryer by donating it to a local church for their kitchen.

So much for a designated deep fat fryer!

I was toying with ideas for bar food, for Game Night, and when I remembered my class in San Francisco and my mastery of deep frying in a regular 4-quart pot with a thermometer. And so this recipe was born.

The secret to making non-greasy fried foods is to use the right type of oil and to be sure the oil is hot enough. If you do this, the food is cooked quickly and very little oil is absorbed.

The easiest way to assure this is to use a deep fat thermometer. Also, you need to use the right type of oil. Select an oil that has a high smoking point. A high smoke point is important because heating oil to the point that it smokes is what makes frying unhealthy. When the oil begins to smoke, it produces toxic fumes and harmful free radicals. We don’t want free radicals, no political pun intended.

I use grape seed oil which has a smoke point of 420 degrees and a neutral flavor. Don’t use extra virgin olive oil which has a smoke point of 320 degrees. You can also use canola oil (smoke point 400 degrees) or peanut oil (smoke point 440 degrees).

The other trick to making this into a dish that no one can resist is to be sure to use Panko breadcrumbs. Panko breadcrumbs are a Japanese style breadcrumbs made from crustless bread. The crustless bread is roughly ground into large flakes, which stay crisper longer because they don’t absorb as much oil. This is the other secret to non-greasy fried food. If you use regular breadcrumbs, you won’t get crispy ravioli.

I serve these with a homemade tomato sauce but you can use a store bought marinara sauce or even a chunky blue cheese or ranch salad dressing. I tasted this recipe using giant ravioli from Costco and gourmet ravioli from a fancier store. The Costco ravioli are hands down the best!

Even the next day or as a midnight snack, these are delicious. Someone I know, but I’m not naming names, even scarfed these cold.

Overcome your fear of deep frying with this recipe!

FRIED RAVIOLI

EVENT: Game Night

SERVES: At Least 2 Ravioli per Person if Part of Larger Menu. 3-4 Per Person as First Course.


Ingredients

For the ravioli:

1 lb package large ravioli, refrigerated *

2 large eggs, lightly beaten

3 tablespoons whole milk

1 ½ cup Panko breadcrumbs

3 tablespoons finely grated Parmesan cheese *

2 tablespoons fresh chopped parsley

½ teaspoon Kosher salt

Grape seed oil

To serve:

3 tablespoons grated Parmesan cheese (optional)

2 cups homemade tomato sauce


Equipment

4-quart pan

Clip or deep fry thermometer

Baking sheet (lined with parchment paper is optional)

Baking rack


Directions

1. Combine beaten eggs and milk in a bowl.

2. Place the flour on a sheet of wax paper or in a glass pie plate.

3. Combine Panko breadcrumbs, Parmesan cheese, salt and parsley in a bowl and placed in a sheet of wax paper or pie plate.

4. One at a time, dip the ravioli into the flour, shaking off extra, then into egg mixture, then into Panko breadcrumbs mixture.

5. Place each ravioli on a baking sheet until each is coated with flour, egg, Panko mixture. I coat all the ravioli before I begin frying.

6. Clip thermometer to side of heavy 4-quart sauce pan.

7. Add 3 inches of oil. Heat over medium heat.

8. When the temperature reaches 370 degrees, working in batches, drop 3-4 pieces at a time into oil.

9. Cook, turning at least once until they are golden brown, 2-3 minutes per batch.

10. Using a slotted spoon, transfer the ravioli to a plate lined with paper towels if serving immediately. Top with extra Parmesan cheese.

11. You can actually make these several hours ahead. If you do, place them onto a wire rack set into baking sheet and keep warm in a 200-degree oven.

12. Serve topped with extra parsley and homemade tomato sauce on the side.

* A NOTE: I purchase the grated Parmesan cheese, as well as Chicken / Roasted Garlic Large Ravioli in the refrigerated section at Costco.


July 2, 2015
At Home with Friends

1 comment

Homemade Tomato Sauce

Ingredients

3 cloves of garlic, crushed

6 tablespoons olive oil

One 2-lbs can Italian tomatoes, coarsely chopped or crushed *

1 tablespoon fresh basil

Salt and pepper to taste

Directions

  1. In a medium sauce pan, over low heat, cook the garlic until translucent. Don’t overcook or burn the garlic.

  2. Add the canned tomatoes with their liquid and simmer over low heat, covered, until most of the liquid has evaporated (30-45 minutes). The sauce should be very thick and chunky.

  3. Remove from heat. Stir in fresh basil.

  4. Add salt and pepper to taste.

  5. Keep sauce in refrigerator for 3 days or store in air tight container in freezer for up to 1 month.


* A NOTE: I purchase the canned Italian tomatoes at Costco.