first

July 11, 2014
At Home with Friends

2 comments

Watermelon Tomato Salad

The idea for Watermelon Tomato Salad came from my adopted daughter Vera. She had eaten a watermelon salad at one of her favorite restaurants in Los Angeles. She raved about it and brought me one to sample. It was delicious but I had an idea of how to make it even tastier.  Vera volunteered to be quality control and the official taste tester.

I created my version of a Watermelon Tomato Salad making enough for 3 generous portions, thinking someone would stop by and it wouldn’t be wasted. Vera took a forkful and after the first bite, looked around and asked if anyone else had “dibs” on the salad. I said, “No,” and she proceeded to clean the bowl.

Here’s the salad. Enjoy!


WATERMELON TOMATO SALAD

EVENT: Summer Solstice

SERVES: 10 – 12 people


Ingredients

For the salad:

8 cups diced watermelon

8 cups roughly chopped baby heirloom mixed-color tomatoes

1/2 shallot, minced

2 cups crumbled feta cheese *

1 cup Greek Kalamata pitted olives, sliced in half *

2 7-oz bags of arugula


For the dressing:

2 tablespoons sherry vinegar

5 tablespoons olive oil

1/2 teaspoon balsamic vinegar

1/2 teaspoon kosher salt

Fresh ground pepper


Directions

1. Combine all the ingredients for the dressing.

2. Combine watermelon, tomatoes, shallots and crumbled feta in a bowl. Toss.

3. Lightly dress arugula with dressing (a teaspoon per handful of arugula) and toss. Place arugula on plate.

4. Top with watermelon, tomato and feta mixture.

5. Top with sliced olives. Drizzle a bit of dressing over each plate.


* A NOTE: I buy feta cheese and Kalmata olives at Costco.

July 9, 2014
At Home with Friends

4 comments

Ice Cream Sandwiches

Remember the way ice cream sandwiches used to be? Two cake-like chocolate cookies sandwiching creamy dreamy vanilla yumminess. All that and wrapped in paper so they were easy to eat. What a perfect dessert!

Sadly they are not like that anymore and I miss that. So I decided to create my own.  Since I could create it any way I wanted, I thought about making them 3-bite size and using some of my favorite soft cookies and favorite ice cream flavors.

These cookies are cherry, pecan and sour cream cookies, and the ice cream is Ben & Jerry’s Cherry Garcia. Feel free to tweak the recipe and customize it. You can even make your own ice cream or use plain vanilla with mix-ins. To do this, allow vanilla ice cream to get room temperature, add mix-ins, and refreeze.

The recipe looks long because there are 3 steps, but don’t worry: They are easy and the results are definitely worth it. To make it even easier, I use ice cream scoops in both the cookies and the ice cream. I use a slightly larger size for the ice cream itself. This insures a uniform result and makes the whole process very simple. Watch your guests’ faces light up as they take their first bite.


ICE CREAM SANDWICHES

EVENT: Summer Solstice

SERVES: Yields approximately 24 sandwiches


Ingredients

For the cookies:

2 1/2 cups tart dried cherries, chopped *

1 1/2 cup pecans, toasted and chopped *

2 cups flour

1 teaspoon baking soda

1/4 teaspoon salt

1 stick (4 oz) unsalted butter

1 teaspoon vanilla extract

1 cup granulated sugar

2 large eggs

1/2 cup sour cream

For the sandwiches:

2 pints of ice cream


Equipment

Baking sheets

Parchment paper

Two ice cream scoops, one slightly larger than the other


Directions

STEP ONE: MAKE THE CHERRY PECAN SOUR CREAM COOKIES

  1. Preheat oven to 350 degrees.

  2. Line baking sheets with parchment paper

  3. Mix together flour, baking soda and salt. Set aside.

  4. In bowl of electric mixer, beat butter and sugar until soft and thoroughly mixed. Add vanilla.

  5. Beat in eggs and sour cream.

  6. On low speed gradually add dry ingredients. Beat only until mixed.

  7. Remove bowl from mixer. By hand, mix in dried cherries and pecans.

  8. To form each cookie, use a small ice cream scoop or table spoon.

  9. Place them on cookie sheets approximately 1 1/2-2” apart.

  10. Bake 9-13 minutes until light golden color. They should spring back when gently pressed with a finger.

  11. Remove from oven. Using spatula, transfer to cooking rack. Cool completely. Store covered at room temperature or freeze in airtight container.


STEP TWO: PREP THE ICE CREAM LAYERS

  1.  Using an ice cream scoop larger than the one you used for cookies, scoop out ice cream and put individual scoops on parchment line baking pan and place in freezer.


STEP THREE: ASSEMBLE THE SANDWICHES

  1.  Take out frozen cookies and pans with ice cream scoops.

  2. Using small piece of parchment, flatten each ice scream scoop slightly.

  3. Place one scoop on bottom of cookie, top with second cookie and press together slightly.

  4. Wrap each in plastic wrap as you proceed and immediately place back in freezer.

  5. If ice cream starts to melt, put pan back in freezer and allow to harden.

  6. Before serving, take ice cream sandwiches out of freezer and remove plastic wrap before putting on serving plate.

Yum! Yum! Yum!

* A NOTE: I purchase the dried cherries and pecans at Costco.

July 7, 2014
At Home with Friends

4 comments

Summer Berry Torte

If you need to bring something to a summer barbecue or pool party, make this! This is an easy dessert you can put together in 20 minutes the morning of the party.

The challenge in this recipe is not overworking the batter and getting sweet delicious berries. Now, I can buy berries all year long but this time of year is when they have great flavor. In fact, I have to buy extras because I find myself munching handfuls on the drive home from the market.

Taste the berries. If you can’t get tasty, sweet, flavorful berries you can use another fruit such as peaches or nectarines *. The cake itself is very simple but is only as good as the fruit you use. Serve dusted with powdered sugar and a dollop of fresh whipped cream or vanilla ice cream.

A NOTE: * If you use peaches, peel them before you put them on the cake.


SUMMER BERRY TORTE

EVENT: Summer Solstice

SERVES: 8 – 10 people (makes one 8 or 9” single layer cake)

Ingredients

For the torte:

1/2 cup (1 stick) unsalted butter room temperature

3/4 cup granulated sugar

1 teaspoon vanilla extract

2 large eggs room temperature

1 cup all purpose flour, spooned lightly into measuring cup

1 tablespoon baking powder

1/4 teaspoon salt

3 cups mixed raspberries, blueberries and blackberries *

1/4 teaspoon cinnamon

1/2 teaspoon granulated sugar

1/2 teaspoon fresh lemon zest

To serve:

Powdered sugar

Whipped cream

Directions

1. Preheat oven to 350 degrees. Butter an 8 or 9” round cake pan.

2. In separate bowl, combine flour, baking powder and salt. Whisk together a few times to thoroughly blend. Set aside.

3. Using a handheld or stand mixer at medium speed, beat the butter until light and creamy.

4. Add sugar and vanilla and lemon zest until fluffy.

5. Add eggs one at a time.

6. Add dry ingredients to mixing bowl and mix just until combined. Finish by hand. DO NOT OVER MIX!

7. Scrape the butter into the pan. Smooth the top.

8. Scatter the berries over the top. Sprinkle with cinnamon. Sprinkle with sugar.

9. Bake until the cake is golden and browned, approximately 45 minutes. Sides will start to pull away from side of pan.

10. Cool in the pan on a wire rack.

11. Dust lightly with powdered sugar. Serve with whip cream or vanilla ice cream.

* A NOTE: Costco is an excellent source for fresh berries!

SUMMER SOLSTICE

GAME PLAN

4 Weeks Before

3 Weeks Before

2 Weeks Before

  • Review the menu
  • Make master list of household items, food, beverages, serving supplies, everything you will need

1 Week Before

Tuesday

  • Clean house
  • Make a detailed shopping list (food prep, house prep)

Wednesday

Thursday

  • Set table, arrange flowers
  • Set up bar if indoors. Otherwise, wait until Saturday.
  • Decide on playlist

Friday *

Saturday

A NOTE: *Many of these can also be done on Saturday. The more you do on Friday, the less stress you will have on Saturday.

July 4, 2014

July 2, 2014

July 2, 2014
At Home with Friends

3 comments

Summer Solstice Party


When I was growing up, seasons were tied to the school year, not necessarily the weather. It could be hot and sunny on New Year’s or Christmas or cold in spring. (Yes, for Los Angelenos, 50’s is considered cold.) So for me, summer really started when school was out and we had summer vacation. Summer vacation meant more time outside. It stayed light later in the evening, and it just seemed like there were more hours in the day to play.

I am no longer tied to a school year and I note the seasons (such as they are in Los Angeles) by what’s happening in my garden. I know in December / January, the roses will all be cut back and in spring I start to see the first new blossoms. By mid-June, if I am lucky, the hydrangeas appear in all their glory. The puppies and I start to spend more time outside.  I notice all of this and realize we are coming up on the summer solstice.

Summer Solstice is actually the longest day of the year and the shortest night. It marks the first day of summer and the start of the warmest season of the year. The rituals surrounding Summer Solstice date back to ancient time and Stonehenge. Some people get up at dawn to watch the sunrise. I would rather celebrate with an amazing dinner party, at home with friends.

This time of year, I think back to my childhood, about our summer dinners outdoors.  Even though we lived in Beverly Hills, my Father grew his own tomatoes. This was way before it was considered hip to grow your own vegetables. Of course, I hated tomatoes, and thought it was weird and even a little embarrassing that we grew them in our backyard. Funny how things change.

These days, I love tomatoes and even pay extra for the delicious multi colored heirloom variety. My Father is definitely enjoying this moment. Now, summer means wet and juicy watermelon, tomatoes that really taste like tomatoes, berries you can’t stop eating and more ice cream (although in truth, ice cream is good even on the coldest day). Also, if we are lucky we are still enjoying the wild halibut that arrived in the market around May.

This party started outside in my garden for cocktails and appetizers. You’ll notice in the photos that my little Yorkie Princess is featured. She was not happy that her brother Moe got so much attention at the last party. So, this month, she gets lots of screen time.

Also, what you won’t see is that one guest forgot all about the dinner and never showed  up and another arrived very sick and went home without eating or drinking anything. I simply rearranged the table, acted like there was nothing wrong,  and the party continued.

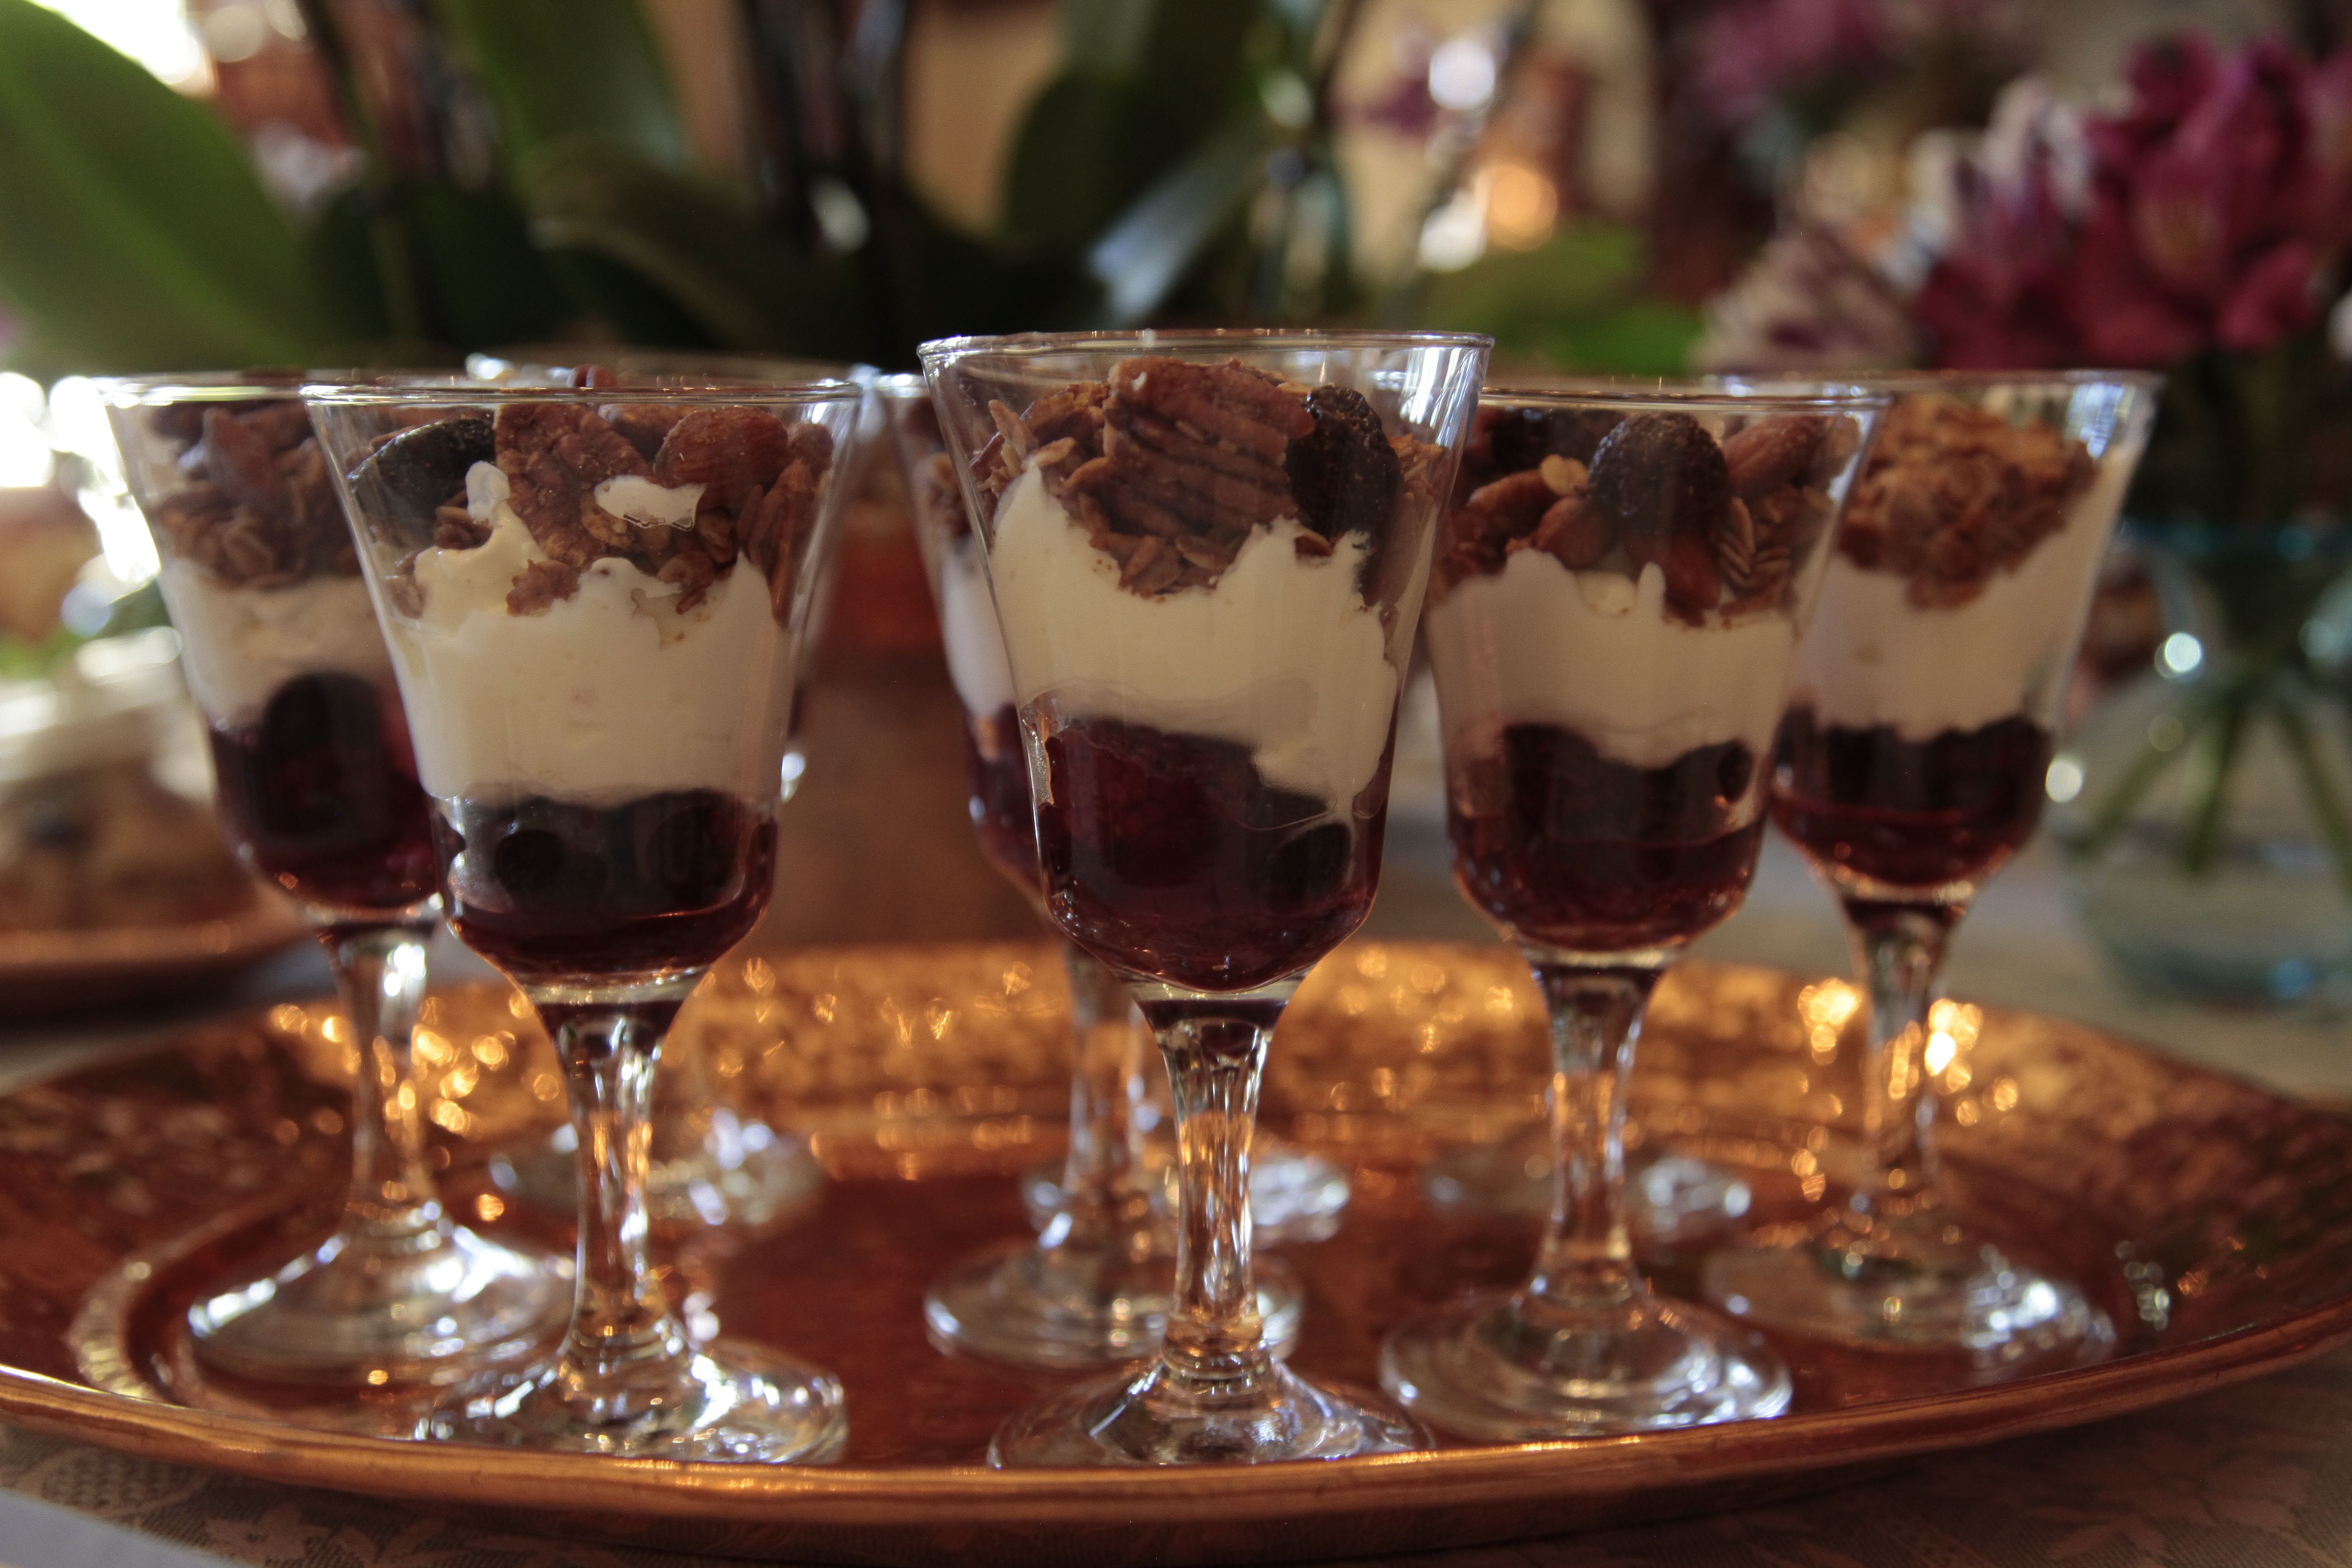
After a leisurely cocktail hour that lasted close to two hours, we moved into the dining room for a more formal sit-down dinner and ended playfully with an abundance of desserts, including of course ice cream.

Please enjoy!


June 29, 2014
At Home with Friends

3 comments

Mexican Fiesta Beverages & Summer Solstice Save the Date


As you can see from the photos, we definitely had tequila that night.

I also created a drink I call Tequila Surprise.

It came about quite spontaneously. My friend Dano arrived early just in case I needed last minute help. I asked him to muddle some sliced cucumbers, add two fingers of tequila, some ginger beer and top it off with sparkling mineral water. It was delicious, light and refreshing.

As each guest arrived, they asked what I was drinking. When they heard, they requested the same.

Voilá, a Tequila Surprise!

When you are thinking about beverages, think about slicing cucumbers, oranges, lemons and seasonal fresh fruit as part of the beverage set-up. Always have sparkling mineral water and non-alcoholic soft drinks. This gives you and your guests options and encourages everyone to get creative.


SAVE THE DATE

Next month, join me for a Summer Solstice Celebration.

The menu features a Goat Cheese Cake, Raspberry Blueberry Torte, Halibut with Artichoke Puree and a Patron Citronge White Wine Sangria guaranteed to put everyone in a party mood!


June 27, 2014
At Home with Friends

no comments

What’s on My Table Mexican Fiesta

I hope the photo of the table for the Mexican Fiesta inspires you to create your own unique table setting.

I love to mix high and low — the same way I like to dress. So, the dinner plates were handmade by a little old man called Paci whom I met at his store in Torgiano, Italy. He spoke no English, I spoke no Italian, but we both understood beautiful dishes. They are mixed with McCoy pottery that I have collected at flea markets over the years.

The flowers are all ranunculus. They remind me of the Mexican paper flowers I treasured as a kid. We only see these flowers for a very short season, so I scoop them up and enjoy them when they appear.


Here’s what’s on my table:

1. Tablecloth (Sferra, purchased on Ebay)

2. Napkins (Sferra, purchased on Ebay)

3. Large dinner plates (handmade by Paci, Torgiano Italy, purchased from Paci)

4. Centerpiece and vases (McCoy pottery, purchased at flea markets over the years)

5. Light blue water glasses (World Market)

6. Pillar candles (Colonial Candle Company, purchased at local hardware store)

7. Clear candleholders (purchased at local hardware store)

8. Shot, vodka glasses (Silviati, purchased at Neiman Marcus many years ago)

9. Dessert plates (Countryware by Coalport, no longer available. Part of my very first set of china).

10. Dark blue serving platter (Raj, a store in Los Angeles, soon to have a website. I will keep you posted.)

11. Flowers (Trader Joe’s Market)


June 25, 2014
At Home with Friends

no comments

Mexican Baked Rice & Black Beans

This rice tastes exactly like the rice I rolled up in buttered corn tortillas on Olvera Street, when I was a child. It’s a fairly starchy, moist rice.

I used extra long grain enriched rice which is readily available at supermarkets. In other rice recipes, I use basmati or arborio rice but not here.

This recipe uses a combination of stock (vegetable or chicken) and canned enchilada sauce as the cooking liquid. It’s baked in the oven so you don’t have to worry about burned rice on the stove. I know this has happened to me and maybe to you. If you have a recipe or method of cooking rice you love, you can definitely use it and incorporate the seasonings and substitute the stock and enchilada sauce as the cooking liquid.


MEXICAN BAKED RICE

EVENT: Mexican Fiesta

SERVES: 10 – 12 people

Ingredients

3 cups extra long grain white rice

4 cups chicken or vegetable stock

1 can 19 oz size enchilada sauce, mild *

2/3 cup chopped onions

1-2 tablespoons grape seed or canola oil

1 teaspoon ground cumin

1 teaspoon salt


Directions

1. Preheat oven to 350 degrees.

2. In a saute pan, saute onions, cumin and salt in oil until onions are soft and translucent.

3. Combine stock and enchilada sauce and pour into 9 X 13 inch baking dish. (Pan must be at least 2-3 inches deep.) Add rice and cooked onions. Stir to mix all ingredients. Cover tightly with foil.

4. Place carefully in the middle rack of the oven and bake 1 hour.

5. Remove from oven. Carefully remove foil, fluff gently with fork. Don’t worry if rice looks very wet. Put it back in the oven for 10 minutes before serving.

* A NOTE: This comes in mild or medium. The medium is actually fairly hot so I use the mild. If you want a more spicy rice, try the medium.


BLACK BEANS

If you’ve never made black beans, you need to try this recipe.

Some people might be upset that I don’t suggest buying dried beans, soaking them and then cooking for hours. That’s a lot more work and I haven’t found the result to taste any better. Why do extra work? I don’t, neither should you.

I make these frequently, sometimes doubling the recipe so I am guaranteed leftovers. I take any leftovers and vegetable or chicken stock and puree in a food processor or a blender. Voila, black bean soup.  I freeze it in small containers. It’s wonderful to have homemade soup in the freezer. Serve it garnished with sour cream, scallions or chopped tomatoes.

BLACK BEANS

EVENT: Mexican Fiesta

SERVES: 10 – 12 people


Ingredients

4 15 oz cans black beans, drained

1 small onion, chopped

2 tablespoons ground cumin

3 dried chile de arbol

1/2 teaspoon salt

1 cup vegetable or chicken stock, or water

1 cup Cotija cheese (optional) *

1 cup green scallions, chopped (optional)

Directions

1. While draining the beans, saute the onions and shallots in olive oil. Add the cumin. Let the onions get soft.

2. Add 3 dried chiles de arbol. When the chiles are soft, remove them from the pot.

3. Seed and chop the chiles. Add back to the pot. Add the black beans.

4. Add 1 cup of vegetable or chicken stock, or water. Simmer for about 20 minutes.

5. To serve, top with crumbled Cotija cheese and scallions (optional).

* A NOTE:  Available at Smart & Final, Latin markets. Can substitute any mild crumbled white

June 23, 2014
At Home with Friends

7 comments

Veggie Tacos & Chipotle Sauce

I love the versatility of these tacos and the fact that I make the filling the morning of the party and keep it in a 200-degree oven or covered on the countertop until the party. Assembling the tacos is a great job to give to one of your guests.

Be careful. I had a guest assemble these and asked him to put a tiny amount of chipotle sauce on each tortilla. I walked away and he did the platter. They looked amazing! I bit into one only to find that he had smeared chipotle sauce, like cream cheese on a bagel, and the heat was unbearable. I got out the sour cream and we fixed the problem. Just shows you how versatile these are!


VEGGIE TACOS 

EVENT: Mexican Fiesta

SERVES: 10 – 12 people

Ingredients

6 – 8 large yellow, orange or red peppers (okay to use all colors)

4 cups chopped mushrooms

4 cups chopped zucchini

2 – 3 tablespoons grape seed or other neutral oil

2 – 3 tablespoons chipotle sauce

Salt and pepper, to taste

2 – 3 dozen 5 – 6” corn tortillas (I like Mission Extra Thin which come in a package of 24)

Shredded cabbage

Sour cream

Guacamole or avocado slices

Chipotle sauce


Directions

Make the vegetables:

1. Preheat oven to 425 degrees.

2. Place the whole peppers on a sheet pan and roast until the peppers are wrinkled and slightly charred.

3. Remove from the oven and when cool enough to handle, remove stems and seeds and chop the peppers. No need to remove skins.

4. Pour the oil into a large saute pan.

5. Saute the mushrooms, zucchini and roasted peppers in the pan. Saute until all the ingredients are soft.

6. Mix thoroughly.

7. Stir in the chipotle sauce.

8. Add salt and pepper to taste.

This can be made in the morning and kept in a pan at room temperature or covered in oven at 200 degrees.


Assemble the tacos:

1. Wrap a stack of approximately 10 tortillas in paper towels and warm them in a microwave, for 10 seconds.

2. Brush a thin smear of sour cream on each tortilla.

3. Top with cooked vegetables.

4. Top with shredded cabbage.

5. Top with guacamole or sliced avocados.

6. Offer chipotle sauce on the side.

CHIPOTLE SAUCE     

EVENT: Mexican Fiesta

SERVES: 10 – 12 people


Ingredients

1 7 oz. can chipotle peppers in adobo sauce

Directions

There are two options for this sauce depending on the desired heat level.

Option 1 (hottest version)

1. Place the contents of the can into a blender and puree. Use as is.

Option 2 (milder but still hot)

1. Separate the contents of the can and puree the peppers in a blender.

2. Mix a small amount of the pureed peppers into the adobo sauce.